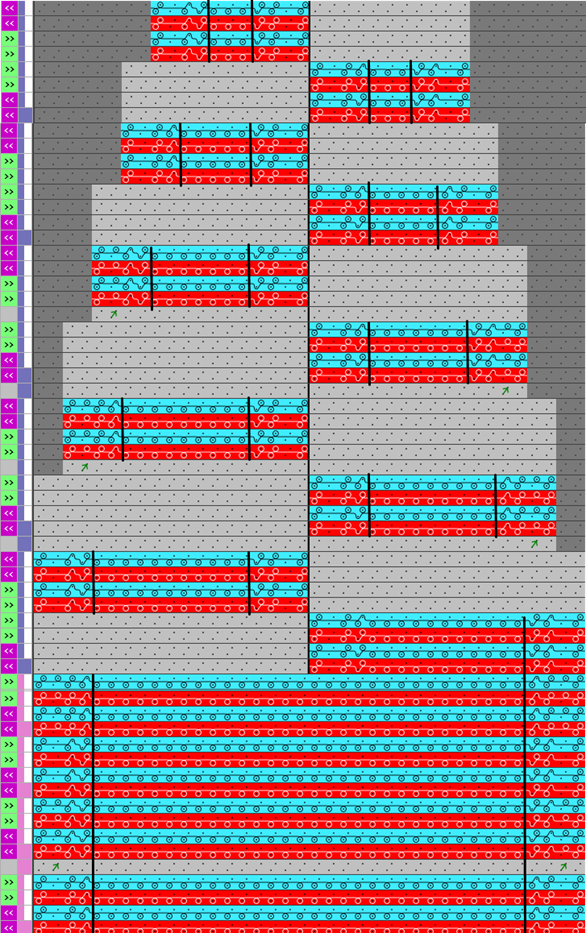
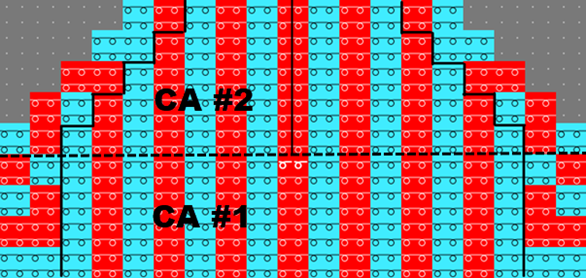
Example 03: Color segment with several search colors
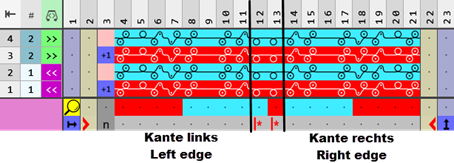
Version 1: Several colors in one color segment for fabric selvedge left and right:
- A design pattern with the necessary colors in the desired width for the fabric selvedge is created.
- 1
- Select the desired rows in the Row control column.
- 2
- Position the cursor in the pattern area.
- 3
- Open the context menu with RMB.
- 4
- Select Selection / Create Color Arrangement:
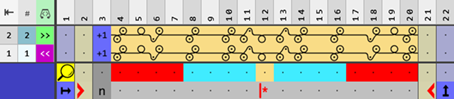
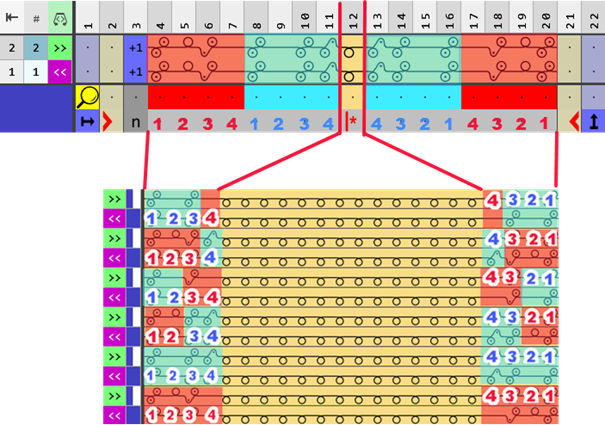
- The Color Arrangement Editor will be opened.
- 5
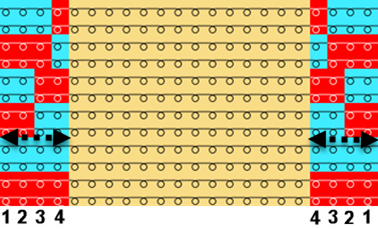
- According to the selvedge width of 4 needles for each used color, insert 4 columns for the left and the right selvedge.
- 6
- Make the desired entries with the tools for Color Arrangement from the CA and Needle Actions / Colors tabs.
- 7
- Check the generated Color Arrangement regarding its correctness with the
 Check
button.
Check
button. - 8
- Save the changes with the
 Apply button and click the
  button to close the Knitting Element editor.
 - Color Arrangement is saved locally in the
 CA tool window.
 - 9
- Enter the generated Color Arrangement in the desired rows in the design pattern.
- The Color Arrangement is expanded by the technical processing.
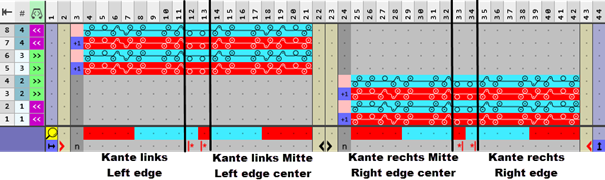
Version 2: Several colors in one color segment for all fabric selvedges of the shape:
- A design pattern with the necessary colors in the desired width for the fabric selvedge and a shape are created.
- 1
- Select the desired rows for the first Color Arrangement in the Row control column.
- 2
- Position the cursor in the pattern area.
- 3
- Open the context menu with RMB.
- 4
- Select / .
- The Color Arrangement Editor for creating the CA #1 will be opened.
- 5
- According to the selvedge width of 4 needles for each used color, insert 4 columns.
- for the left and right selvedge 4 columns each, in red and light blue
- for the left and right selvedge in the neck opening 4 columns each, in red and light blue
- 6
- Make the desired entries with the tools for Color Arrangement #1 from the CA and Needle Actions / Colors tabs.
- 7
- Check the generated Color Arrangement regarding its correctness with the Check button.
- 8
- Then apply the changes with the Apply button.
- Color Arrangement is saved locally in the CA tool window.
- 9
- Enter the generated Color Arrangement in the desired rows in the design pattern.
- The Color Arrangement is expanded by the technical processing.
- 10
- Create the Color Arrangement #2 following the same procedure:
Result: