How to Create a Line-bound Marking
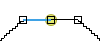
- You need a marking in the center of the sleeve end for linking.
- The dimensioned shape is opened in the Dimensioning View.
- 1
- Run the
 function in the context menu of the sleeve.
- The Line Properties tool window appears.
Line Properties - 2
- Go to the Start group box.
- 3
- Select the Markings of Line tab.
- 4
- Select default line in the table.
- 5
- Run the function in the context menu of the default line.
- A new line appears with line number 1 and default entries.
- 6
- Select the in the picklist of the Anchor Points table cell.
- 7
- Select the Pointelle, Stitch v in the picklist of the Knitting Element table cell.
- 8
- Keep the other entries as they are.
- The line-bound marking point appears at the endpoint of the selected line.
- 9
- Close the dialog box.
- You can see the center of sleeve easily when linking.
Proceed accordingly to set markings for linking in another fabric piece.