Examples for Module Arrangements
- Example 1: Module Arrangement in the area without shape
- Example 2 : Module Arrangement in the area with shape
Example 1: Module Arrangements in the area without shape
- Design Pattern is created:
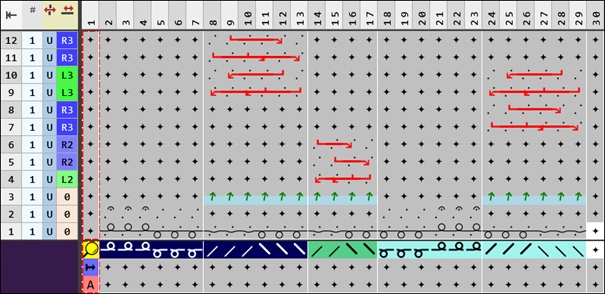
Example: Cable 2x2 <, cable 3x3 < and cable 3x3 >in alternation

- 1
- Select the desired rows in the Fileira control column.
- 2
- Position the cursor in the pattern area.
- 3
- Open the context menu with RMB and select Seleção / Criar um Module Arrangement... .
- The Module Arrangement editor will be opened.
- 4
- Change the transfer sequences in the editor with the
 Mover drawing tool.
 : Attention :
It will not be checked whether the transfer action to be moved matches the transferring row that will be overwritten. The user himself is responsible for the result.
- 5
- Check the generated Module Arrangement regarding its correctness of the module structure with the
 Verificar button.
: The sequence of transferrings will not be checked.
- 6
- Then apply the changes with the
 Aceitar button.
- or –
Close the editor with the button and confirm the prompt with Salvar.
 - Module Arrangement is saved locally in the
 MA tool window.
 - 7
- Enter the generated Module Arrangement in the desired rows in the design pattern.
- The Module Arrangement is expanded by the technical processing.
Example 2: Module Arrangements in the area with shape
- Design Pattern is created:
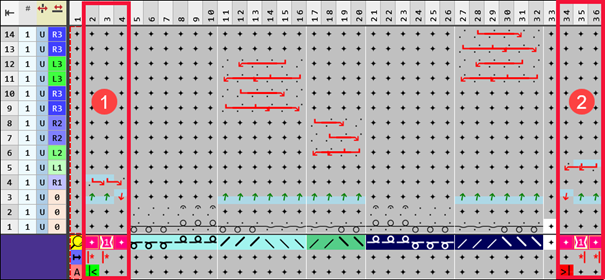
Example: Trança 2x2> , Trança 3x3> and Trança 3x3> in alternation and narrowing modules

- 1
- Select the desired rows in the Fileira control column.
- 2
- Position the cursor in the pattern area.
- 3
- Select the context menu Seleção -> Criar um Module Arrangement... .
- The Module Arrangement Editor appears.
|
| |
|
1 |
Segment for narrowing at the left shape edge |
|
2 |
Segment for narrowing at the right shape edge |


- 4
- Change the transfer actions in the editor with the Mover drawing tool.
: Attention :
It will not be checked whether the transfer action to be moved matches the transferring row that will be overwritten. The user himself is responsible for the result.
- 5
- Check the generated Module Arrangement regarding its correctness of the module structure with the Verificar button.
: The correct sequence of transferrings will not be checked!
- 6
- Apply the changes with the Aceitar button.
- or –
Close the editor with the button and confirm the prompt with Salvar. - Module Arrangement is saved locally in the MA tool window.
- 7
- Enter the generated Module Arrangement in the desired rows in the design pattern.
- The Module Arrangement is expanded by the technical processing.