Create a New Dimensioned Shape
- The measure unit cm is set.
- The reference unit for the stitch density is 10.0 cm.
How to Define the Options for New Shapes
- 1
- Select the basic shape type
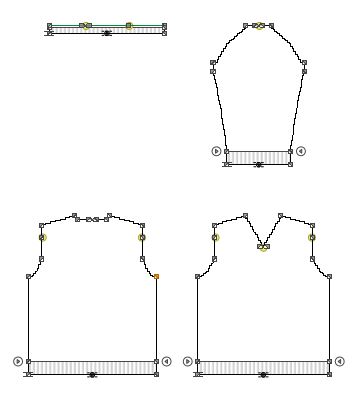
 Set-in Sleeve with Shoulder Gore on the Start page under the New Dimensioned Shape section in the left detail column.
- The possible settings for the selected shape type appear in the middle detail column.
- 2
- Select the Shoulder Gore option in the Shoulder
 list box.
- 3
- Select the V-neck option in the Neckline and Opening list box.
- 4
- Select the Left Shoulder option in the Seam Position of Collar list box.
- 5
- Keep the
 Widening above the armhole narrowing at the front check box deactivated.
- 6
- Keep the Widening above the armhole narrowing at the back check box deactivated.
- 7
- Select the Without Widening or Narrowing option in the Waist list box.
- 8
- Select the Upright to the Shoulder option in the Dimensioning of the Armhole list box.
- 9
- Select the Up to the Start of the Shoulder option in the Dimensioning of the Sleeve Length: list box.
- 10
- Enter the value 32 in the Pattern group box under Stitch Density [10 cm] in the edit box for the Width

- 11
- Enter the value 38 in the edit box for the Height by Rows .
- 12
- Select the Stitch v, with Transfer option in the Filling Element list box.
- 13
- Enter the value 36 in the Waistband of Body group box in the edit box for the Width under Stitch Density [10 cm].
- 14
- Enter the value 42 in the edit box for the Height by Rows .
- 15
- Activate the
 Knitting Element for the Start check box.
- The options for the waistband of the body appear.
- 16
- Select Start, 1x1 in the Start module list box.
- 17
- Select the option 1 System in the Number of Systems list box.
- 18
- Select the option With elastic thread at the rear in the Elastic Thread list box.
- 19
- Select the option With protection yarn in the Protection Yarn list box.
- 20
- Select the option Loose row in the Transition list box.
- 21
- Select the Fair Isle + Doubling, Stitch v option in the Knitting Element for Doubling list box.
- 22
- Enter the value 36 in the edit box for the Width under Stitch Density [10 cm] of the Cuff of Sleeve group box.
- 23
- Enter the value 42 in the edit box for the Height by Rows .
- 24
- Activate the Knitting Element for the Start check box.
- 25
- Select Start, 1x1 in the Start module list box.
- 26
- Select the option 1 System in the Number of Systems list box.
- 27
- Select the option With elastic thread at the rear in the Elastic Thread list box.
- 28
- Select the option With protection yarn in the Protection Yarn list box.
- 29
- Select the option Loose row in the Transition list box.
- 30
- Select the Fair Isle + Doubling, Stitch v option in the Knitting Element for Doubling list box.
- 31
- Go to the Collar and Trimmings.
- 32
- Enter the value 36 in the edit box for the Width under Stitch Density of the Start [10 cm].
- 33
- Enter the value 42 in the edit box for the Height by Rows .
- 34
- Enter the value 32 in the edit box for the Width under Stitch Density within Trimming [10 cm].
- 35
- Enter the value 38 in the edit box for the Height by Rows .
- 36
- Select the Stitch v, with Transfer option in the Filling Element list box.
- 37
- Activate the Knitting Element for the Start check box.
- 38
- Select Start, 1x1 in the Start module list box.
- 39
- Select the option 1 System in the Number of Systems list box.
- 40
- Select the option With elastic thread at the rear in the Elastic Thread list box.
- 41
- Select the option With protection yarn in the Protection Yarn list box.
- 42
- Select the option Loose row in the Transition list box.
- 43
- Select the Fair Isle + Doubling, Stitch v option in the Knitting Element for Doubling list box.
- 44
- Click the Create Dimensioned Shape button.
- The dimensioned shape appears in the Dimensioning View.