Stitch Density
İlmek yoğunluğu
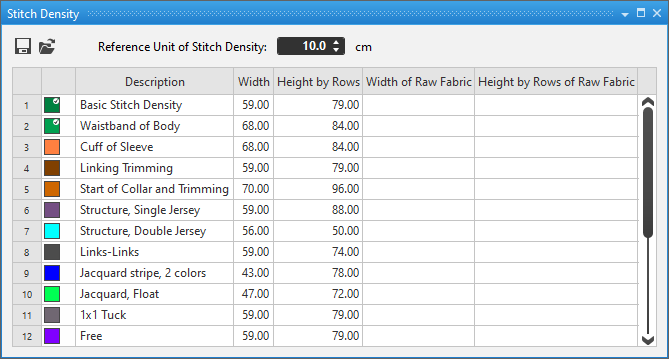
Here you call up the İlmek yoğunluğu tool window:
- In the Desen projesi
- Başlat tab -> Araç penceresi group
- In the Tasarım projesi
- Başlat tab -> Parametreler group
- In the Çizgi kesimi projesi
- Başlat tab -> Parametreler group
- In the Ölçülendirilmiş kesim projesi
- Başlat tab -> Parametreler group
- Additionally in Desen projesi with shape
- Kesim düzenleme tab -> Parametreler group.
Determine stitch density:
To determine the correct value of the stitch density you need a fabric piece on which you are able to count the stitches.
The fabric piece for the reference measure has to match with the pieces that are produced.
The fabric piece has to consist of the same yarn, contain the same structure pattern and be knitted with the same settings at the knitting machine.
The finishing process also has to be taken into account in the determination.
The counting of the stitches on the fabric should only take place after the complete processing chain.
In the stitch density table you can also enter the stitch density of the raw fabric as a guideline. This value does not affect the pattern.
With this value it is possible to check right after knitting if the determined values are still reached.
Use Stitch Density in the Pattern:
If you create a new pattern project, the basic stitch density is entered in the entire pattern by default.
The general stitch density in a pattern can be seen and changed in the Desen özellikleri.
The entries of the İlmek yoğunluğu tool window are available for selection.
Use stitch density in the dimensioned shape:
The stitch density is of particular importance in the dimensioned shape.
Using the entries of the stitch density it is determined how many stitches are assigned to the different measures of the shape.
Different yarns or structures also have different stitch densities. As a result it is possible to define different areas in the shape which then get different entries from the İlmek yoğunluğu tool window assigned to them.
Procedure:
- In the İlmek yoğunluğu tool window enter the desired entries for the different stitch densities that you want to use in the pattern.
- In the dimensioned shape, in the Örgü alanları tool window, you define the different areas and assign them the corresponding stitch densities.
Knitting Ranges - Using the context menu on the shape points you select the desired area and determine the orientation.
Context Menu on a Marking Point
 Observe at the same time that when the dimensioned shape has two areas with the same width but different stitch density in the width in succession, then a multi-step narrowing or widening is inserted.
Stitch density in the lined shape:
The procedure for the usage of stitch density in the lined shape is the same as in the dimensioned shape. Knitting areas with assigned stitch densities are also assigned here using shape points.
In this case the usage of the stitch densities is for the correct rendering of the entered control dimensions in the lined shape.
For control dimensions see:
Make the following settings in the İlmek yoğunluğu tool window:
General settings:
Settings in the table:
In the context menu on the entries:
Results of the stitch density in the pattern: