Creating the shape as lined shape in the pattern project
Open the  模型 tool window:
- 1
- In the 起头 ribbon under
 工具窗口, select the 模型 tool window.
 - In the tool window, the existing shapes of the pattern project are displayed.
- 2
- Place the cursor in the tool window and open the context menu.
- 3
- Select 创建 M 码新模型... in the context menu.
- The 新线模型 dialog box will appear.
- 4
- Select the desired input format.
- 5
- Confirm with the OK key.
- The new lined shape (basic shape) is graphically displayed in the 模型 tool window and in a new document window
 as rectangle.
 : The default attributes will be used for the shape edges of the lined shape.
 - 6
- For creating a lined shape based on the displayed rectangle click the 属性 button in the ribbon under 线表.
- or -
Use the graphic displayed in the document window. - 7
- Create the desired shape lines for multi-step widening.
- 8
- Allocate the desired shape line attributes to the shape line.
 : You may use the method you prefer as both views are always adjusted to each other.
Basic Shape:
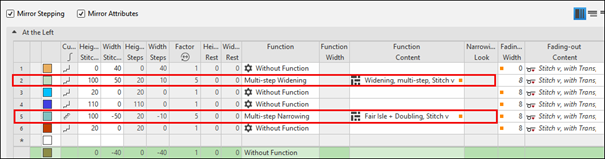
- 9
- Allocate Multi-step Widening to shape line no. 2 under 功能.
- 10
- Select the desired module under 功能 内容:
- 放针,多步骤,线圈 v
- Widening, multi-step, Stitch v, Closing
- 11
- Allocate it to shape line no. 5 under 功能.
- 12
- Select the desired module under 功能 内容:
- 均匀收针+罗纹并针,线圈 v
- 均匀收针+罗纹并针,线圈 ^
- 13
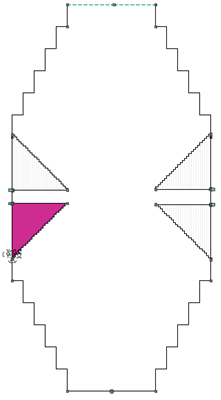
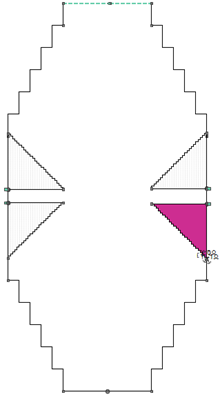
- Create shape elements for the four gore areas.
|
Gore left bottom | |||
|
| |||
|
Gore left top | |||
|
| |||
|
Gore right bottom | |||
|
| |||
|
Gore right top | |||
|
| |||
|
Gore left bottom |
Gore left top |
Gore right bottom |
Gore right top |
|
|
|
|
|


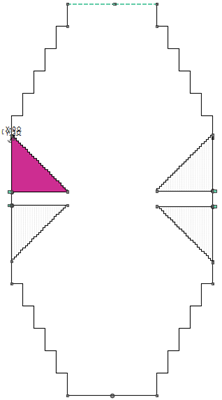

- 14
- Link the 楔形 shape element to shape line points.