Divided stitch cam
Enclosing the Weft Yarn Earlier with DJ Fabrics
- Problem case:
- Enclosing the weft yarn by risen needles in advance.
- Advantages:
- Stitch cam can be exchanged easily.
- The divided stitch cam can be configured separately for each system and for both carriage directions.
- The converted knitting system with "divided stitch cam" can form stitches and tuck without restrictions.
- Disadvantage:
Transferring and split stitches cannot be performed by this system.
Parts for Cam Conversion:
|
System Distance | 6 inch cam box | 5 inch cam box | ||||
Gauge [E] | --- | --- | --- | --- | --- | 14 |
Retrofit kit "Divided stitch cam" | --- | --- | --- | --- | --- | 259661 left 259662 right |
Application Examples :
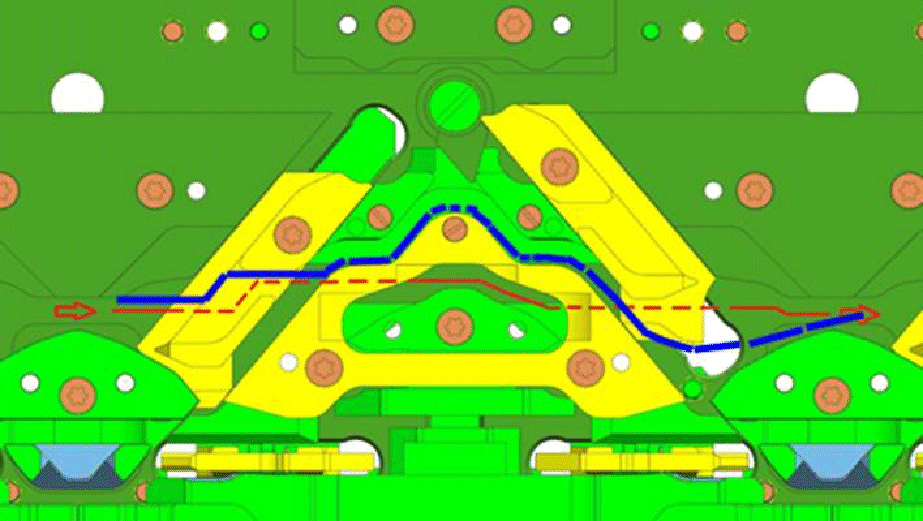
- Newly laid in weft yarns will, as they are not yet enclosed by fabric, not be hold below the needle crossing (crossing point of the supporting surface of opposite needles). Raising the needles earlier by the transferring curve allows to "lock" the weft yarn in the needle bed gap until the following stitch row is knitted.
|
System function | |
| Blue line:
Red line:
|
Needle raising without divided stitch cam | Needle raising by divided stitch cam |
|
|
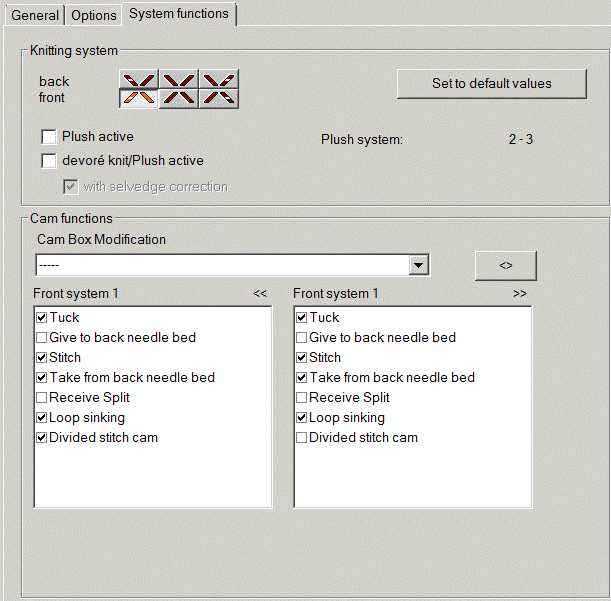
Programming with M1plus:
- Cam is equipped with divided stitch cam.
- 1
- Define the option as cam conversion for each system (in front or/and at rear).
- Present to the rear needle bed will automatically be disabled for this system.
- 2
- Enter
 into the control column.
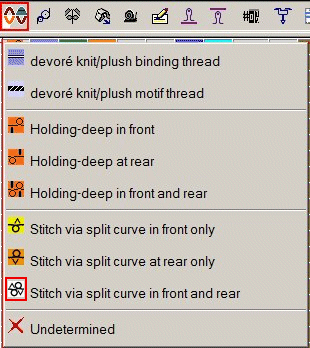
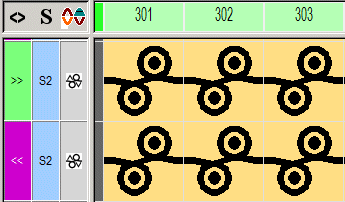
- 3
- Draw in weft and DJ within the same system.
- 4
- Specify the cam function.

The stitch lengths are restricted with a divided stitch cam.
Only the way down from the channel to the loop sinking edge can be used.
Leading to the following gauge-dependent restriction:
|
Gauge | Maximum valid NP value |
|---|---|
E10 | 11.8 |
E12 | 12.6 |
E14 | 13.0 |
E16 | --- |
E18 | --- |
E6.2 | 12.6 |
E7.2 | 13.0 |
E8.2 | --- |
For each system at front / at rear and each direction the technical processing will check:
- divided stitch cam present?
- is the allowed NP value exceeded by specified stitch length?
In such cases the following message appears:
Sintral instruction for stitch via split curve in front and rear with divided stitch cam: #XS%AH(5) %HY (6);