Create the shape in the M1plus Shape Editor
I. Generate a shape:
- 1
- Call up the M1plus Shape Editor via the / menu.
- 2
- Create a table for a new shape with the
 button.
 - 3
- Create table and enter values.
Basic element for front:

- 4
- With
 generate a .
 - 5
- Select Neck opening in the selection list under .
- 6
- Create table and enter values.
Element Neck opening:

- 7
- Deactivate the
 checkbox.
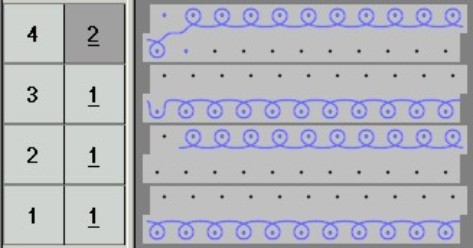
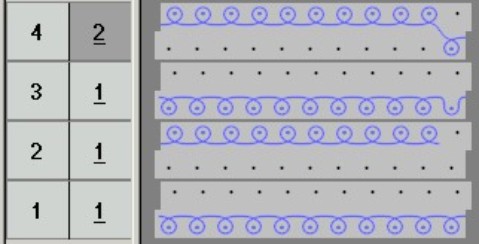
- Different fade-out modules can be allocated to the left
 and right
  neck edge.
|
Settings for the neck opening element | ||||
|---|---|---|---|---|
|
Line |
tab |
tab |
tab | |
|
No. 1 |
|
Left edge |
Module for |
|
|
Right edge |
Module for | |||
|
No. 2 |
Narrowing |
Left edge |
Module for |
With Structure double jersey:
|
|
Right edge |
Module for | |||
- 8
- Allocate the fade-out modules generated by you to the left and right neck opening under in the tab.
- 9
- Specify a value under in theBasic shape and Neck opening elements.
Example: 6
- 12 needles in total will be determined outside shape between the left and the right shape half.
- 10
- Save the shape via the / or menu.
- The shape will be saved in the shp format.
- 11
- Exit the M1plus Shape Editor by
 .
.
II. Generate your own fade-out modules:
- 1
- Via the / / open the New module dialog box.
- 2
- Select the knitting mode of the Structure double jersey module in the tab of the Properties dialog box.
- 3
- Draw the knitting sequence with needle actions in the Module Editor.
|
Fade-out module for the tubular border | |
|---|---|
|
At the Left |
At the Right |
|
|
|
- 4
- Close the Module Editor with .
- The module will be save to the Module Explorer of Database