Working with modules: Module with docking points
Examples of application:
- Applications
- Tubular borders
- Pockets
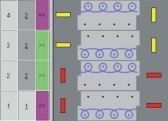
Markings for modules with docking points:
|
|
Meaning |
Module example |
Stitch line |
|---|---|---|---|
|
|
Common processing |
|
|
|
|
Separate processing |
|
|
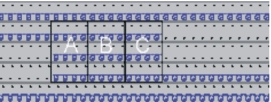
 : The modules A, B and C must contain the same type of docking points
Properties:
- A pattern row of the basic pattern is separated into two parts by a connecting point, a part for knitting-in and the other for knitting-out.
- A connecting point integrates the additional rows of the module into the motif.
- A module may have several docking points.
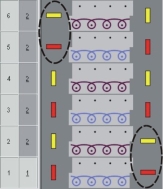
Example: Module with two docking points
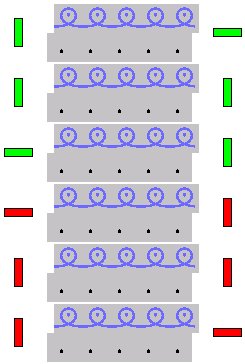
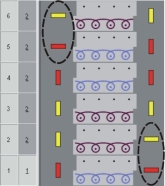
Meaning of the markings:
- Horizontally colored bars mark the knitting in or out rows.
- Vertical colored bars limit the knitting row (= selection end).
- They will be presented with different colors with several docking points.
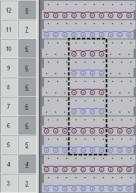
- The number of knitting rows in the module depends on the knitting in/knitting out direction.
|
Module height |
Behavior |
Example |
Application |
|---|---|---|---|
|
Odd number of knitting rows |
Knit-in and knitting out direction differ. |
|
|
|
Even number of knitting rows |
Knit-in and knitting out direction are identical. |
|
|
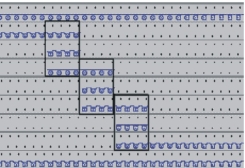
- Several interleaved docking points are possible.
I.e. several existing pattern rows can be processed. - With nested docking points, the sequences of the docking points for knitting-in or knitting-out must be the same.
|
Example |
Before technical processing |
After technical processing |
|---|---|---|
|
|
|
|
|
|
|
|
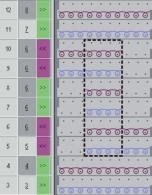
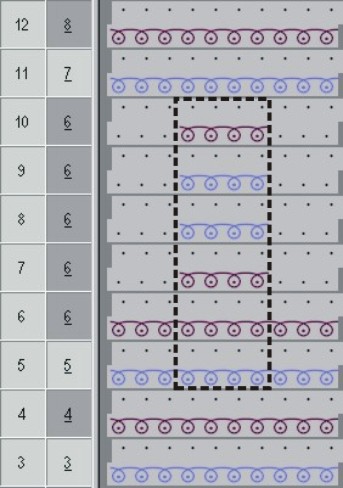
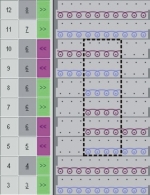
For a better overview, the illustrations were produced with different colors.
Single-color modules can also be created.
Generate modules with docking points:
- A module with a corresponding knitting sequence must be open in the Module Editor.
- 1
- Call up the dialog box via the / menu.
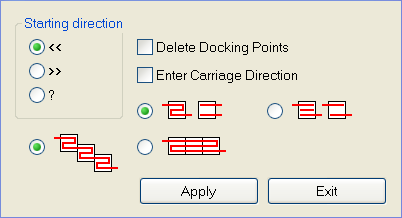
- The Set docking points dialog box appears.
|
|
Function |
|---|---|
|
|
Starting direction to the left |
|
|
Starting direction to the right |
|
|
Starting direction undefined |
|
|
The existing docking points will be deleted |
|
|
Specification of the carriage direction for the technical processing |
|
|
Processing with changing knitting direction (default) |
|
|
Processing with the same knitting direction |
|
|
Common processing |
|
|
Separate processing |
|
Apply |
Apply the settings to the module |
|
Exit |
Close Window |
 <<
<< Delete Docking Points


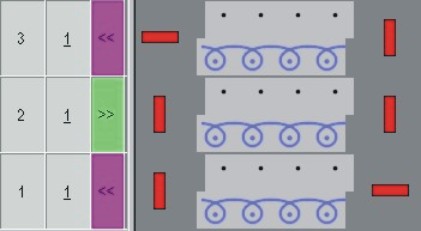
- 2
- Select and group knitting rows in order to define a docking point.
- 3
- Specify the docking points accordingly:
- Mode of processing
- Define the starting direction:
- Undefined: ?
- Carriage direction: << or >>
- 4
- Click on the Apply button.
- The markings for docking points will be applied to the selected rows.