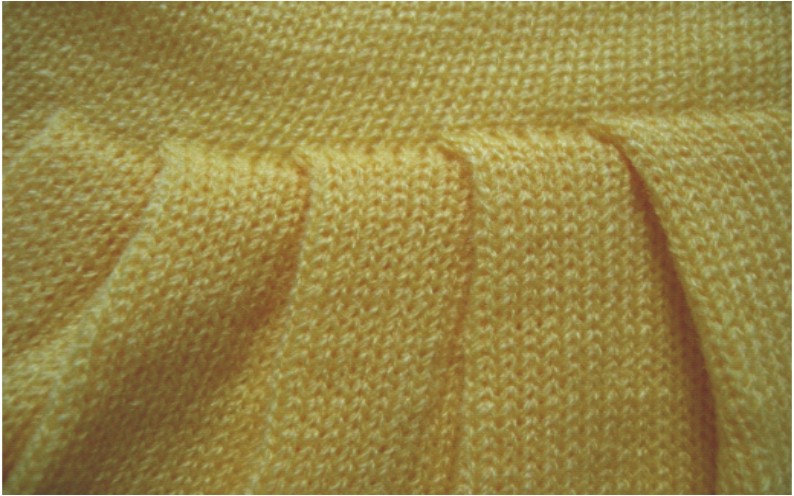
Version 1 Skirt with plissee
The plissee is worked by knitting one row in between, starting from the outer edge.

I. Generate pattern and shape for a plissee skirt:
- 1
- Generate a New pattern via / menu bar.
- 2
- Select machine type.
- 3
- Select Basic pattern (pattern without shape) and .
- 4
- Set pattern size and select the Front stitch basic pattern.
- 5
- Select the start Tubular with draw thread end for the beginning.
- 6
- Confirm the settings with Generate Design Pattern.
II. Create shape:
- 1
- Call up the M1plus Shape Editor via the / menu.
- The dialog box will be opened.
- 2
- Create a new shape in the shp format via / .
- or -
Click the icon.
icon. - 3
- Create a element for a front:
- The checkbox is activated.
Example:
- Total knitting width of 420 needles
- Plissee module 20 needles wide
- Plissee with 10 needles overlapping.
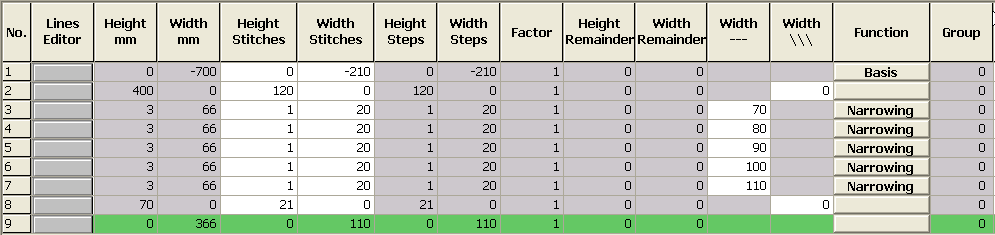
Basic element:
- 4
- Allocate and to the edge lines no. 3-7:
|
Specifications in the basic element left edge | |||
|---|---|---|---|
|
Line of the edge |
Tab |
Tab |
Tab |
|
No. 3 to 7 |
|
No fading-out |
Plissee |
- 5
- Enter the value 70 in the column in order to place the module of the edge line 3 at the right position.
- The module will be inserted 70 needles to right from the left edge.
The step width amounts to 20. Therefore, the right-most needle of the module is located with a distance of 90 needles from the left edge.
- 6
- Call-up the shape attributes of this shape edge.
- 7
- Enter the fade-out width 0 or do not select any module for fading out.
- 8
- Call-up the shape attributes of this shape edge.
- 9
- Select the Plissee module for Structure single jersey.
- 10
- Define a higher stepping as the narrowing width (step 20) for the edge line under .
- 11
- Define the attributes for the other shape edges 4-7 and complete the shape table.
- 12
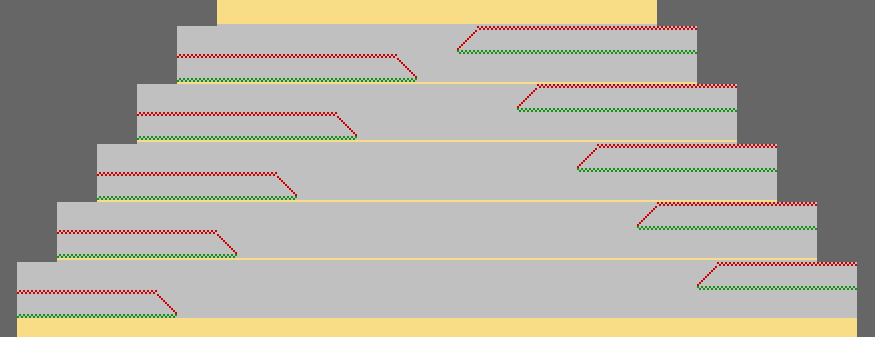
- Insert the pleats as follows:
- with the same width of the pleats
- following step by step
- with a distance of one stitch row between the pleats
Presentation of the fading-out and narrowing distances:

Overview presentation for plissee transferring
- 13
- Save the shape via the / or menu.
- The shape will be saved in the shp format.
- 14
- Close the M1plus Shape Editor with
 .
.
II. Placing the shape in the pattern:
- 1
- Load shape via / .
- The Open dialog box will be displayed.
- 2
- Specify the path and select the desired shape in the shp format.
- 3
- Click the Open button.
- The shape will be laid on the pattern in the shp format.