Open, position shape and draw-in intarsia motif
I. Lay the kaw file onto the basic pattern:
- 1
- Call up the / menu.
- 2
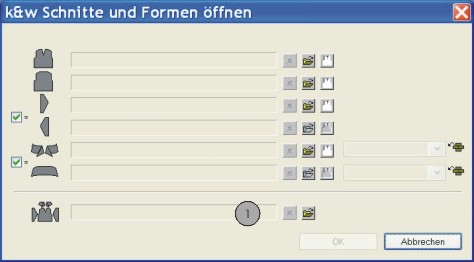
- Load the shape with the *.kaw extension via
 (1).
(1). - 3
- Confirm the selection with OK.
- The kaw file is laid onto the basic motif.
II. Position the shape:
- Shape with k&w Arrangements lies on the basic pattern.
- 1
- Position the shape elements Sleeve and Body on the motif with
 activated and the left mouse button pressed.
- or -
Select the desired shape element with active. Position the selected shape element with the arrow keys of the keyboard or of the Tool properties toolbar.
III. Draw-in the intarsia motif in the basic pattern:
Options when drawing:
-
Use yarn colors
Do not use the option when
when  .
. -
Use yarn carrier colors
Use the option when .
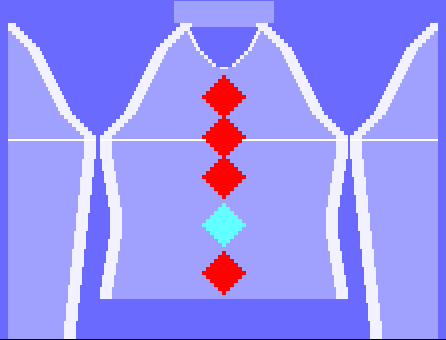
Example:
Yarn colors were used for generating the motif in this example.
- The shape for the body (front and back) is positioned on the basic pattern.
- 1
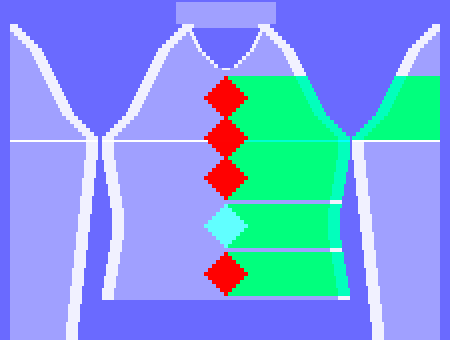
- Switch the presentation of the symbol view with
 .
.
- Only the columns (knitting needles) of the layer L0 are displayed in the symbol view.
- 2
- Draw-in the intarsia motif on the front layer (L0) of the basic pattern:
- 3
- Draw-in further colors as search color in the area of the intarsia motif:
- 4
- Switch the symbol presentation with the
 button.
- All the columns of both layers are displayed in the symbol view.
- 5
- Cut out the shape with in the Steps of Processing toolbar.
- The k&w Options for Cut out dialog box appears.
- 6
- The option: Deactivate .
- 7
- Confirm the settings in the dialog box with OK.
- The Insert/Replace k&w Start dialog box appears.
- 8
- Select the desired start.
- 9
- Confirm the settings with OK.
- The selected start is inserted.