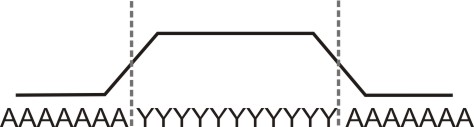
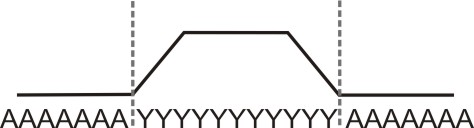
Power Tension Setting - PTS
Adjust the behavior with Power Tension Settings (PTS):
- 1
- Call up the menu via the menu bar.
- The stitch length table gets open.
- 2
- Make the desired setting in the PTS column.

|
Setting |
Presentation |
Meaning |
|---|---|---|
|
= |
|
Stitch tension change in both areas |
|
! |
|
Stitch tension change in the A area |
|
! |
|
Stitch tension change in the Y area |

- The default carriage speed in the area of the stitch tension change is MSEC=1.0.
- With the Sintral command MSECNPJ, the carriage speed can be changed in the area of PTS / NPJ.
Call up the tab via / and activate the checkbox.
Carriage Speed and adjustment values
|
MSECNPJ |
1.0 |
0.9 |
0.8 |
0.7 |
0.6 |
0.5 | ||||||
|---|---|---|---|---|---|---|---|---|---|---|---|---|
|
|
y |
x |
y |
x |
y |
x |
y |
x |
y |
x |
y |
x |
|
E 3 |
1.3 |
1.2 |
1.2 |
1.1 |
1 |
1 |
0.9 |
0.8 |
0.8 |
0.7 |
0.7 |
0.6 |
|
E 3,5 |
1.6 |
1.3 |
1.4 |
1.2 |
1.3 |
1 |
1.1 |
0.9 |
1 |
0.8 |
0.8 |
0.7 |
|
E 5 (2,5.2) |
1.5 |
1.7 |
1.4 |
1.5 |
1.2 |
1.4 |
1 |
1.2 |
0.9 |
1 |
0.8 |
0.9 |
|
E 7 (3,5.2) |
2.1 |
2.1 |
1.9 |
1.9 |
1.7 |
1.7 |
1.5 |
1.5 |
1.3 |
1.3 |
1.1 |
1.1 |
|
E 8 |
2.4 |
2.3 |
2.2 |
2.1 |
1.9 |
1.8 |
1.7 |
1.6 |
1.4 |
1.4 |
1.2 |
1.2 |
|
E 10 (5.2) |
3 |
2.8 |
2.7 |
2.5 |
2.4 |
2.2 |
2.1 |
2 |
1.8 |
1.7 |
1.5 |
1.4 |
|
E 12 (6.2) |
3.6 |
3.3 |
3.2 |
3 |
2.9 |
2.6 |
2.5 |
2.3 |
2.2 |
2 |
1.8 |
1.7 |
|
E 14 (7.2) |
4.2 |
3.7 |
3.8 |
3.3 |
3.4 |
3 |
2.9 |
2.6 |
2.5 |
2.2 |
2.1 |
1.9 |
|
E 16 (8.2) |
4.8 |
4.2 |
4.3 |
3.8 |
3.8 |
3.4 |
3.4 |
2.9 |
2.9 |
2.5 |
2.4 |
2.1 |
|
E 18 (9.2) |
5.4 |
4.6 |
4.9 |
4.1 |
4.3 |
3.7 |
3.8 |
3.2 |
3.2 |
2.8 |
2.7 |
2.3 |
y = Number of needles for changing the stitch tension by one value
x = Number of needles for the idle time between the stitch tension change
Observe the motif distances and the idle periods so that the machine can process the change of the stitch length.