Working with Shapes
In a Design Project, you can create new dimensioned shapes and lined shapes or open and position existing shapes on the pattern.
How to open, position and edit a shape
How to create a new lined shape
- User Interface for Lined Shape Projects
- Create New Lined Shape Project
- Line Properties
- Shape Elements
How to create a new dimensioned shape
- User Interface of Dimensioned Shape Projects
- Tools
- Shape Configuration
- Shape Generation with the Help of Basic Shapes
- Modifying Shapes
- Line Properties
- Shape Elements
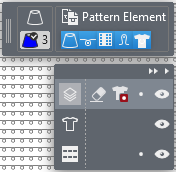
The different layers:
Editing Layer
If a shape is positioned on the design, you are able to edit the shape as well as the design independently from each other.
Below the display of the drawing attributes, a dialog box appears where you select the layer to edit and where you can make different settings.
|
|
Hide or display the entire layer control. | |
|
|
Hide or display the editing options of the different layers. | |
|
|
Edit Finishing Layer In the Finishing layer, you can make needle-exact adjustments to the positioned shape without having to adjust the shape. The changes are not transferred to the shape. | |
|
|
Finishing Eraser Eraser drawing attribute to erase on the finishing layer. | |
|
|
Transparency of Pending Shape Transparency drawing attribute to mask out data of the shape layer. | |
|
|
Lock Finishing Layer | |
|
|
Toggle the Finishing Layer | |
|
|
Edit Lined Shape Layer (Y) With Edit Lined Shape Layer enabled, you can modify shape elements via their context menus. | |
|
|
Toggle the Lined Shape Layer | |
|
|
Edit Pattern Layer | |
|
|
Lock the Pattern Layer | |
|
|
Toggle the Pattern Layer | |
|
|
With selecting the lined shape layer, a button appears that allows you to move the shape on the pattern. The shape is moved by steps of ten with a pressed CTRL key. | |


