Step by Step to 'Pattern-10'
- A pattern project with one pattern and the desired settings is created.
- 1
- To draw select any desired drawing tool under the Drawing group.
- 2
- In the Pattern Colors tool window, select the desired pattern colors from the Yarn Colors color palette to draw the motif:
- 3
- Draw the desired motif in the
 Design Pattern.
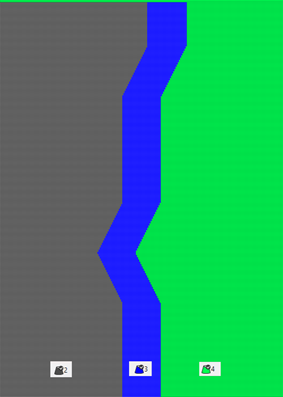
 :
:
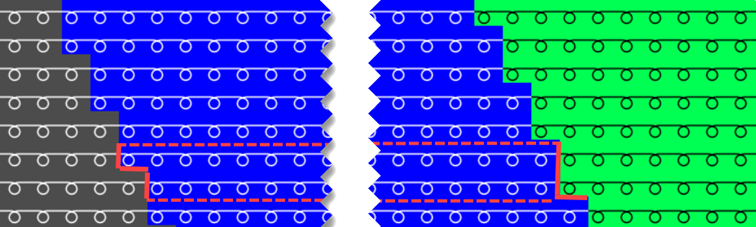
The widening of the color field is shifted in height by one row.
This makes the tuck binding at the edge of the color field more secure.
- 4
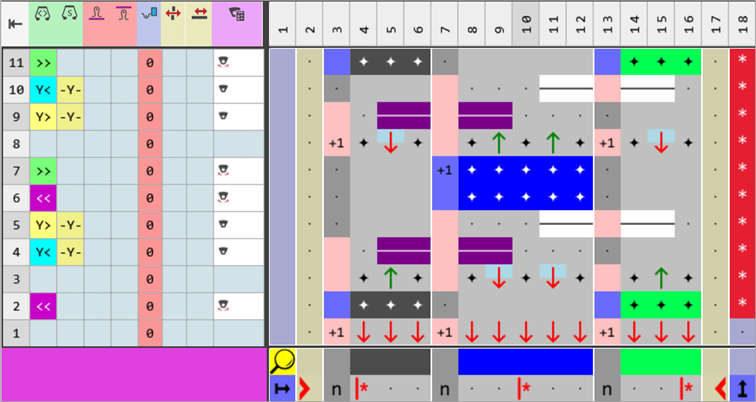
- In the Pattern Row control column, select the first 2 pattern rows.
- 5
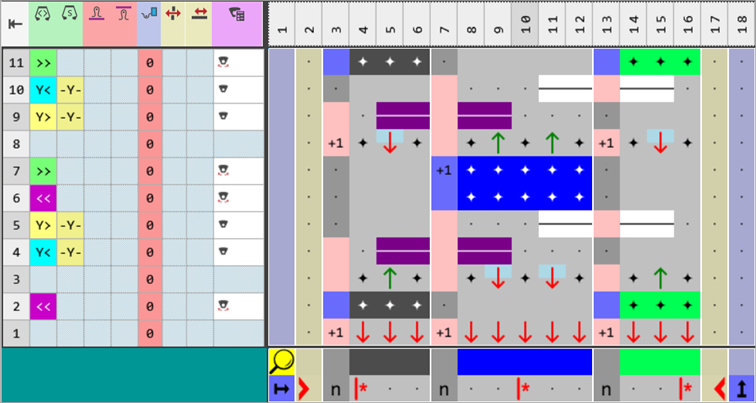
- Call up the context menu and select Selection
/
 Create Color Arrangement:
.
Create Color Arrangement:
. - The Color Arrangement editor appears with the default CA.
- 6
- Make the desired changes in the Color Arrangement:
- Insert the required number of columns into the color segments of the 3 search colors
- In the processing area:
- Insert additional rows for the pattern related transferring and draw-in Transfer to front or Transferring optionally to the front.
- Insert rows for the additional yarn carriers that knit the ornamental seam on the left and on the right.
- Modifications in Control Columns
 Carriage Direction control column:
- Carriage Directions
- Enter
 /
/  to move the yarn carriers independently
  System control column:
- Enter yarn carriers without overrun path
 or with overrun path
 Intarsia Binding control column: Switch off the binding.
- Switch on/off the swiveling of yarn carriers in the
 Yarn Carrier Presettings control column.
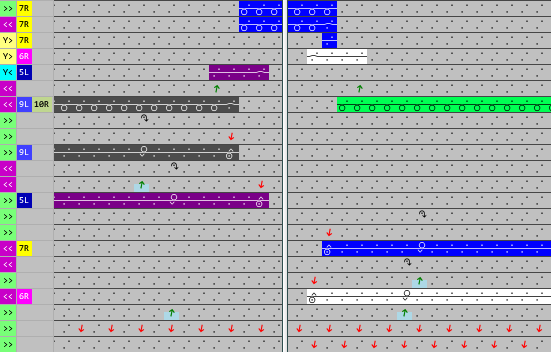
|
Color Arrangement CA1: Start |
|
|
|
|
- 7
- Check the generated Color Arrangement on correct entries with the
 Check button.: The knitting procedure cannot be checked!
 - 8
- Enter the generated Color Arrangement via the
 control column into the first two rows of the design pattern.
 - 9
- In the Pattern Row control column, select the following 2 pattern rows.
- 10
- Call up the context menu and select Selection
/ Create Color Arrangement:
.
- 11
- Make the desired changes as in the previous Color Arrangement.
|
Color Arrangement CA2: Pattern |
|
|

- 12
- Check the generated Color Arrangement on correct entries with the Check button.: The knitting procedure cannot be checked!
- 13
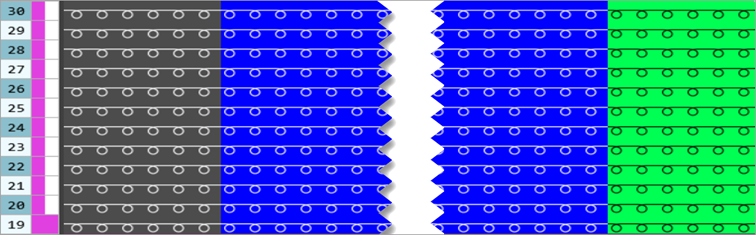
- Enter the generated Color Arrangement via the control column into the following rows up to the row that is 2 rows below the end of the design pattern.
|
Result |
|
|
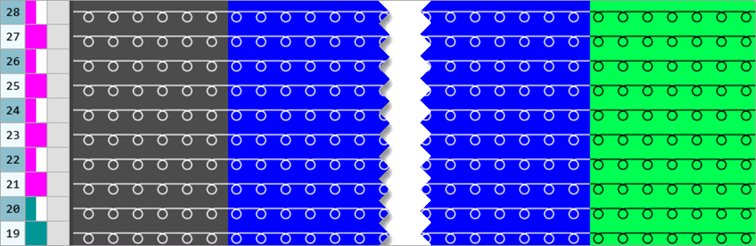
With a repeating of rows in the Color Arrangement, it is possible to use a single CA for the entire pattern.
Color Arrangement with a repeating of rows |
|
Entry in the pattern |
|
- 14
- Open the Yarn Carriers tool window.
- 15
- In the Color Parameters table make the desired changes in the following groups:
- Knitting-in :
-
 Module for Knitting-in
-
 Knot / Binding, Knitting-in
|
Example
|
|
|
- Knitting-out
-
 Module for Knitting-out
-
 Knot, Binding, Knitting-out
- 16
- If desired, make the desired presets in the following control columns:
- Stitch Length (NP)
- Main Take-down (WMF)
- Speed (MSEC)
- 17
- Carry out all the steps of processing.
 : The extracted file "ADF530-32W.Pattern-10.zip" can be loaded onto the machine with an USB stick or via Ethernet.