Autarkic yarn carriers
Autarkic yarn carrier:
|
ADF yarn carriers |
Function |
|---|---|
|
|
Yarn carriers are moved autarkic in horizontal and vertical direction |
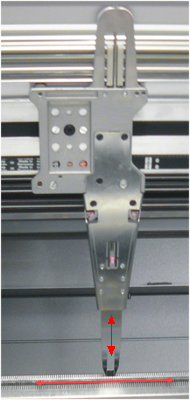
Rail allocation with 32 autarkic yarn carriers:
- At the yarn carriers of the rails 1-4, the yarn carrier tips are closed at the front - open at the rear for threading-up
- At the yarn carriers of the rails 5-8, the yarn carrier tips are open at the front for threading-up - closed at the rear
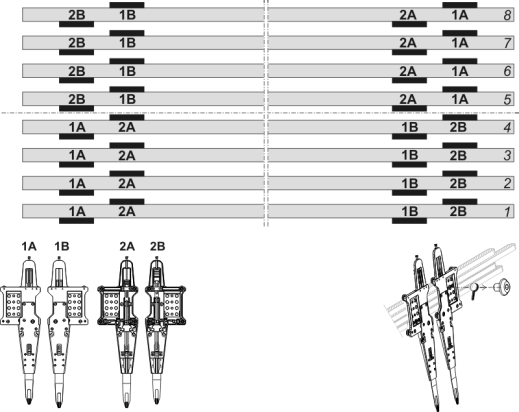
Two different construction types:
- Yarn carrier 1A corresponds to the yarn carrier 2B
- Yarn carrier 1B corresponds to the yarn carrier 2A
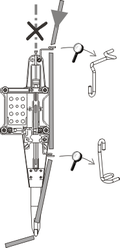
Spezial yarn carrier with yarn bypass:
|
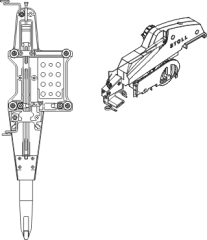
Yarn Carriers |
Threading up |
|---|---|
|
|
Bypass:
|
|
| |
|
Usage of the yarn carrier with bypass |
Explanation |
|
The yarn is too thick, and cannot be threaded in the yarn tube |
|
After the carriage reversal, the yarn is to be fetched back (tensioned) by the tension arm of the yarn control unit so that no yarn loop is formed. The increased friction results in a yarn loop, which leads to a fault in the fabric (yarn loop, hole, drop stitch, yarn breakage). |
- 121
- Abrir las cubiertas.
- 122
- Empuje el guiahilos a una posición donde pueda enhebrarlo con más facilidad - por ejemplo fuera del sector de tisaje.
- 123
- Enhebrar guiahilos.
Utilice para ello el enhebrador (1). El enhebrador se encuentra en los accesorios. 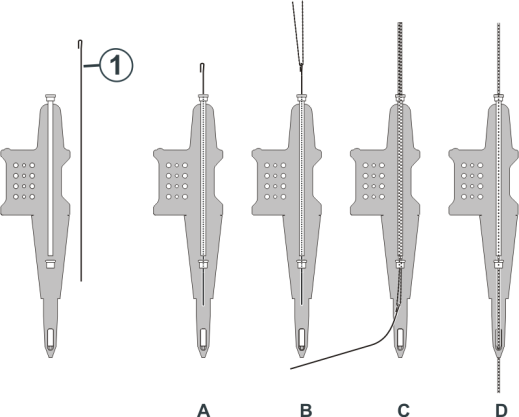
- 124
- Empujar el enhebrador a través del tubito para hilo hacia abajo (A).
- 125
- Formar un bucle con el hilo (B) (aprox. 30 cm), para ello tomar el hilo doble.
- 126
- Tirar el enhebrador hacia abajo (C).
- 127
- Desenhebrar el bucle de hilo y enhebrarlo manualmente en la boquilla del guiahilos (D).
- 128
- Sostener firmemente el final del hilo.
PELIGRO

El guiahilos vuelve a su posición de tisaje!
Peligro de pinzamiento y de cizallamiento por los guiahilos autárquicos.
- Los guiahilos que fueron desplazados vuelven automáticamente a su posición de tisaje.
- No meta la mano en el sector de los guiahilos.
- Cuidadosamente tirar solo un poquito de la barra de arranque hacia arriba.
- 129
- Tirar con cuidado de la barra de arranque hacia arriba.
- Los guiahilos vuelven automáticamente a su posición de tisaje.
- 130
- Si los guiahilos se encuentran en su posición de tisaje, el carro se pone en marcha e inserta el hilo en las agujas.
- 131
- Una vez que el hilo se encuentra insertado seguro en las agujas, soltar la barra de arranque.
- El carro se detiene.
- 132
- Soltar el final del hilo y cerrar las cubiertas.
- 133
- Seguir desplazando el carro hasta el punto de reenvío y pararlo.
- 134
- Quitar el final del hilo.
- 135
- Reanudar la producción o comenzar una nueva pieza de tisaje.