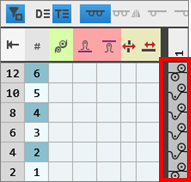
Structure Modules Directory with Knitting Element Type: Structure Module

Structure Modules
- for knitting on all needles
- for knitting on all needles mirrored
- for knitting by 1x1 technique
- for knitting by 1x1 technique mirrored
Types of structure modules
- For all types of structures
- Structures without transfer as e.g. basic stitch structures, tuck structures, etc.
- Structures with transfer as e.g. cable stitches, Aran, tuck racking structures, etc.
 : All the variants of structures can be saved in one knitting element.
- Structure Applications
- Structure modules with connecting points without repetition
- Structure modules with connecting points with repetition
Options for creating a new structure module
- In the
 Knit Explorer:
-> Nuevo elemento de tisaje
 -
In the
 Proyecto de muestra:
-> Elementos de tisaje / Crear módulo nuevo tool window - In the
 Muestra de diseño:
-> Selección / Módulo de estructura
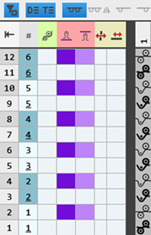
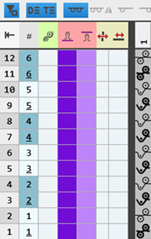
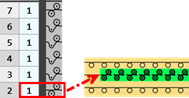
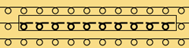
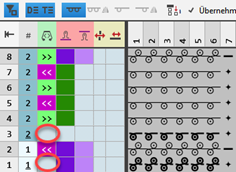
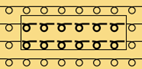
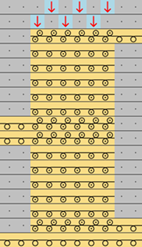
Example: Structure module with knitting rows only
- 1
- Open the Nuevo elemento de tisaje dialog box with Nuevo elemento de tisaje.
- or -
In the Elementos de tisaje tool window / select Crear módulo nuevo.
 - 2
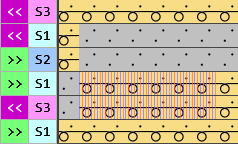
- Make the following settings:
- Técnica de tisaje
- Todas las agujas
- Tipo de elemento de tisaje:
- Módulo de estructura
- Elementos de relleno
- No yarn color / magazine color or yarn carrier color
- No Needle Action
- Dimensión [mallas]
- Anchura
- Altura
- 3
- Close the dialog box with OK.
- The Knitting Element Editor is opened.
- 4
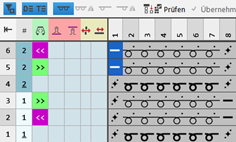
- Select the Acciones de la aguja / Colores tab.
- 5
- In the drawing canvas, in the
 , in the displayed technical rows draw the desired structure with needle actions.
 - The design rows are generated automatically.
|
|
: |
 :
:
- 6
- Select a color for drawing the knitting element if desired:
- Without color: Knitting element is color-independent when drawing
- With color: Knitting element is color-dependent when drawing
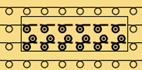
Without pattern colors | With pattern colors |
|
|
The needle action has no | The needle action has an assigned color, i.e. the structure module will be drawn in the design pattern with this color. |
 color, i.e. the structure module can be drawn in the design pattern into every color area.
- 1
- Enter the desired control column data in the corresponding control column of the corresponding technical rows.
- Stitch Length
- Fabric Take-down
- Carriage Speed
- etc.
|
Entry |
Meaning |
|---|---|
|
Color entry |
Assignment of a parameter value from the corresponding table |
|
No color entry |
Standard entry from the design pattern is kept |
- 2
-
Design Rows:
Enable the Columnas de control button to apply the control column data from the technical rows to the design rows.
Behavior of control column data
No control column data | Control column data in technical rows only | Control column data in technical rows and design rows |
|---|---|---|
|
|
|
With drawing in the design pattern and with the technical processing, no entry is made in the control columns. | These data from the technical rows will be inserted by the technical processing if in advance the standard entry is manually removed from the desired control columns of the design pattern. | When drawing in the design pattern it can be decided whether the control column data are to be entered in the design rows with the help of the cursor attributes.
|

- 1
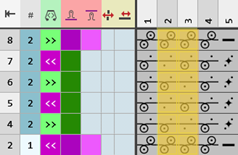
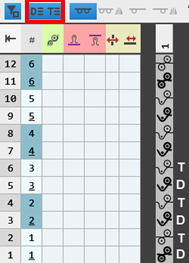
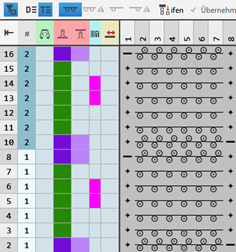
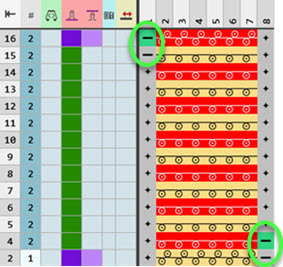
- Depending on the structure of the knitting element, it may be necessary to group the technical rows:
Group the pattern rows in the knitting element:
When multiple technical rows build a pattern row, then these have to be grouped. The grouping affects the behavior during drawing and the subsequent technical processing.
- A knitting element with multiple technical rows is created.
- Each technical row corresponds to one design row.
- 1
- Select all the technical rows to be grouped.
- 2
- Group the selected technical rows with Ctrl + G.
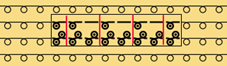
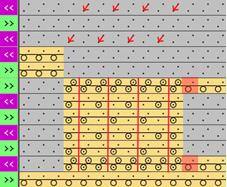
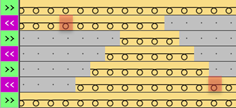
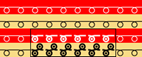
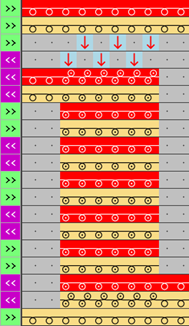
Behavior of ungrouped / grouped technical rows when drawing in the design pattern
|
|
| Ungrouped technical rows: All pattern rows are drawn-in one-to-one in the design pattern. This means that the corresponding number of pattern rows will be overwritten in the design pattern. |
|
|
| Grouped technical rows: When drawing, only the first technical row is drawn in the design pattern. This means that the remaining technical rows of the group will only be added to the pattern by the technical processing. |
| |||


Ungroup rows:
- In the knitting element the technical rows are grouped.
- 1
- Select one or several technical rows.
- 2
- Cancel the selection of the technical rows by Ctrl + Shift + G.
: If necessary, repeat the process multiple times.
- 3
- If desired, create further variants of this structure.
- Variants:
- All needles knit

- All needles knit mirrored

- 1x1 Technique

 1x1 Technique, Mirrored
Creating another variant based on the existing variant of the knitting element:
- A variant is created.
- 1
- Position the cursor in the drawing canvas and press the RMB.
- The context menu is displayed.
- 2
- Select Create or Update Variant in the context menu.
- 3
- Select the variant to be created in the submenu.
- The created variant is displayed in the drawing canvas.
- 4
- If desired, make changes in the technical rows and in the control column data.
- 5
- Check the knitting element with
 Manualmente regarding correct entries in the knitting element.: The knitting procedure cannot be checked!
 - 6
- If necessary, in case of a knitting element already used in the design pattern, apply the changes to the basic pattern with the
 Aplicar button.
 - 7
- Close the Nuevo elemento de tisaje tool window with
 .
.
- The knitting element is saved.
Example: Structure module with knitting and not knitting rows
Not knitting rows are:
- Transferring rows.
- Casting-off rows
- Rows for post loop sinking
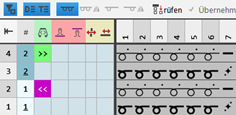
Creating structure module with knitting and not knitting rows:
- 1
- Open the Nuevo elemento de tisaje dialog box with Nuevo elemento de tisaje.
- or - Elementos de tisaje tool window / Crear módulo nuevo context menu - 2
- Make the following settings:
- Knitting technique:
Todas las agujas - Type of Knitting Element:
Módulo de estructura - Filling Elements, e.g:
- No yarn color / magazine color or yarn carrier color
- No Needle Action
- Dimension
- Width:
- Height
- 3
- Close the dialog box with OK.
- The Knitting Element Editor is opened.
- 4
- Select the Acciones de la aguja / Colores tab.
- 5
- Draw the desired structure with the required needle actions for knitting and transferring into the technical rows of the drawing canvas.
- The design rows are generated automatically.
- 6
- If necessary, select a color for drawing.
- Without color: Knitting element is color-independent when drawing
- With color: Knitting element is color-dependent when drawing
|
Without pattern colors |
With pattern colors |
|
|
|
|
The needle action has no |
The needle action has an assigned color, i.e. the structure module will be drawn in the design pattern with this color. |
- 7
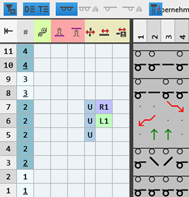
- Enter the control column data in the transfer rows:
- Racking Type

- Racking Value

- Racking Correction (VCI)
- Main Take-down (WMF)
- etc.
- 8
- If necessary, enter the desired data in the other control columns.
- 9
- Select technical rows as follows:
- Knitting row with following transfer rows
- or - - Transfer rows with following knitting rows
- 10
- Group the selected rows with the CTRL + G keys.
|
|
|

- 11
- If desired, create further variants of this structure.
- Variants:
- All needles knit
- All needles knit mirrored
- 1x1 Technique
-
1x1 Technique, Mirrored
Creating another variant based on the existing variant of the knitting element:
- A variant is created.
- 12
- Position the cursor in the drawing canvas and press the RMB.
- The context menu is displayed.
- 13
- Select Create or Update Variant in the context menu.
- 14
- Select the variant to be created in the submenu.
- The created variant is displayed in the drawing canvas.
- 15
- If desired, make changes in the technical rows and in the control column data.
- 16
- 17
- Check the knitting element with Verificar regarding correct entries in the knitting element.
- 18
- If necessary, in case of a knitting element already used in the design pattern, apply the changes to the basic pattern with the Aplicar button.
- 19
- Close the Nuevo elemento de tisaje tool window with .
- The knitting element is saved.
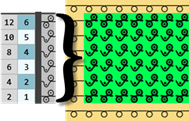
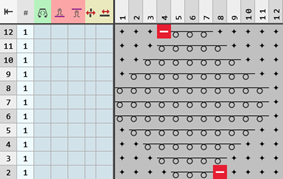
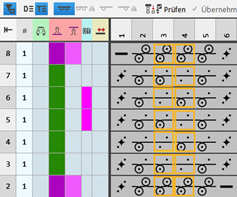
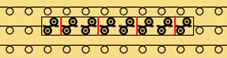
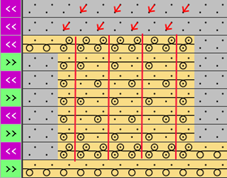
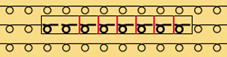
According to the connecting points, the structure module is integrated into a technical row and knitted.
Properties:
- A knitting-in and knitting-out row in the knitting element is defined by a connection point.
- A connecting point integrates the design row of the knitting element in to the design pattern.
- A knitting element may have one or more connecting points.
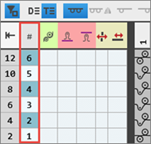
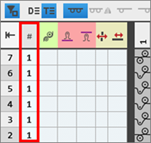
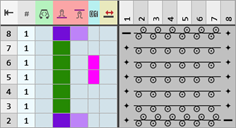
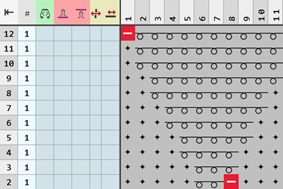
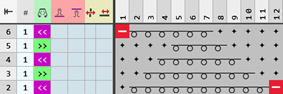
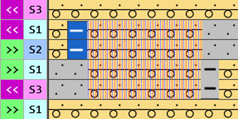
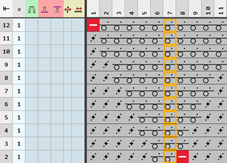
- Quantity of technical rows
- Even-numbered: Knitting-in and knitting-out on the same side
- Odd-numbered: Knitting-in and knitting-out on the opposite side
- Technical Rows
-
Without entry of carriage direction = stroke independent
: The structure module with connecting point can be used (mirrored) for both stroke directions. -
With entry of carriage direction = stroke dependent
: The structure module with connecting point is stroke dependent and therefore cannot be used (mirrored) for the other carriage direction.
Example: Create structure module with connecting points without repetition:
- 1
- Open the Nuevo elemento de tisaje dialog box with Nuevo elemento de tisaje.
- or -
In the Elementos de tisaje tool window / select Crear módulo nuevo. - 2
- Make the following settings:
- Técnica de tisaje
- Todas las agujas
- Tipo de elemento de tisaje :
- Módulo de estructura
- Elementos de relleno
- No yarn color / magazine color or yarn carrier color
- No Needle Action
- Dimensión [mallas]
- Anchura : fix width
- Altura : even-numbered or odd-numbered
- 3
- Close the dialog box with OK.
- The Knitting Element Editor is opened.
- 4
- Select the Acciones de la aguja / Colores tab.
- 5
- In the drawing canvas, in the technical rows, draw the desired structure with the knitting needle action.
- The design rows are generated automatically and not displayed.
- 6
- If necessary, select a color for drawing.
- Without color:
No allocation of a yarn carrier, i.e. color of the design pattern is used - With color:
allocation of a yarn carrier, i.e. the used color is applied to the design pattern.: If desired, adapt this design row to the color of the structure module.
- 7
- Insert an empty column on the left and right side of the structure.
- The columns don't have any needle action.
- 8
- Overwrite these columns with
 Transparente.
 - 9
- Select the Control tab.
- 10
- Select the
 icon and draw it into the technical rows of knitting in and out.
Símbolos referidos a agujas en pasadas de ejecución section -> Atributo de transición: Not into the design rows! - 11
- If desired, allocate any desired color to the icon of the Colores de definición section.: No effect on the development, only for a better overview.
- 12
- Enter the desired control column data in the technical rows:
- Stitch Length
- Fabric Take-down
- Cycle
- Carriage Direction
- No entry of a carriage direction:
The knitting element is independent of the carriage stroke and can be entered on any desired pattern row of the Muestra de diseño. - Entry of a carriage direction:
The knitting element depends on the carriage stroke and can must be entered on the corresponding pattern row of the Muestra de diseño.: All technical rows must have a preset carriage direction. - etc.
- Design Rows: Enable the Columnas de control button to apply the control column data from the technical rows to the design rows.
- 13
- Select technical rows for grouping.
- 14
- Group the selected rows with the CTRL + G keys.
- 15
- Check the knitting element with Verificar regarding correct entries in the knitting element.
- 16
- If necessary, in case of a knitting element already used in the design pattern, apply the changes to the basic pattern with the Aplicar button.
- 17
- Close the Nuevo elemento de tisaje tool window with .
- The knitting element is saved.
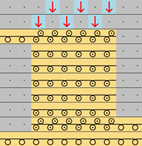
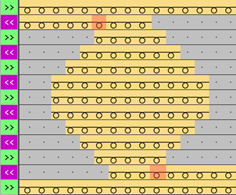
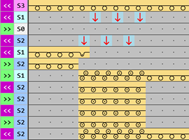
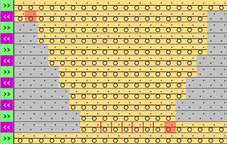
Odd-numbered quantity of technical rows in height
Example 1 |
| |
|
| |
|
| |
Example 2 |
| |
|
| |
Example 3 |
| |
|
| |
Example 4 |
| |
|
| |

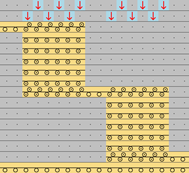


Even-numbered quantity of technical rows in height
Example 1 |
| |
|
| |
Example 2 |
| |
|
| |
Odd-numbered quantity of technical rows in height for each connecting point
Example 1 |
| |
|
| |
Even-numbered quantity of technical rows in height for each connecting point
Example 1 |
| |
|
| |
Odd-numbered quantity of technical rows in height for each nested connecting point
Example 1 |
| |
|
| |
Example: Create structure module with connecting points and repetition:
- 1
- Open the Nuevo elemento de tisaje dialog box with Nuevo elemento de tisaje.
- or -
In the Elementos de tisaje tool window / select the Crear módulo nuevo context menu. - 2
- Make the following settings:
- Técnica de tisaje
- Todas las agujas
- Tipo de elemento de tisaje :
- Módulo de estructura
- Elementos de relleno
- No yarn color / magazine color or yarn carrier color
- No Needle Action
- Dimensión [mallas]
- Anchura : fix width
- Altura : even-numbered or odd-numbered
- 3
- Close the dialog box with OK.
- The Knitting Element Editor is opened.
- 4
- Select the Acciones de la aguja / Colores tab.
- 5
- In the drawing canvas, in the technical rows, draw the desired structure with the knitting needle action.
- The design rows are generated automatically and not displayed.
- 6
- If necessary, select a color for drawing.
- Without color:
No allocation of a yarn carrier, i.e. color of the design pattern is used - With color:
allocation of a yarn carrier, i.e. the used color is applied to the design pattern.: If desired, adapt this design row to the color of the structure module.
- 7
- Insert an empty column on the left and right side of the structure, if desired.
- The columns don't have any needle action.
- 8
- Overwrite these columns with Transparente.
- 9
- Select the Control tab.
- 10
- Select the icon and draw it into the technical rows of knitting in and out.
Símbolos referidos a agujas en pasadas de ejecución section -> Atributo de transición: Not into the design rows! - 11
- If desired, allocate any desired color to the icon of the Colores de definición section.: No effect on the development, only for a better overview.
- 12
- Select the
 Siguiente repeticiónsymbol.
Símbolos referidos a agujas en pasadas de ejecución section → Repeticiones - 13
- Define the repeating cycle related to columns by the selected icon.
- 14
- Enter the desired control column data in the technical rows:
- Stitch Length
- Fabric Take-down
- Cycle
- Carriage Direction
- No entry of a carriage direction:
The knitting element is independent of the carriage stroke and can be entered on any desired pattern row of the Muestra de diseño. - Entry of a carriage direction:
The knitting element depends on the carriage stroke and can must be entered on the corresponding pattern row of the Muestra de diseño.: All technical rows must have a preset carriage direction. - etc.
- 15
- If desired, apply the control column data from the technical rows to the design rows with the
 Columnas de control button activated.
 - 16
- Select technical rows for grouping.
- 17
- Group the selected rows with the CTRL + G keys.
- 18
- Check the knitting element with Verificar regarding correct entries in the knitting element.
- 19
- If necessary, in case of a knitting element already used in the design pattern, apply the changes to the basic pattern with the Aplicar button.
- 20
- Close the Nuevo elemento de tisaje tool window with .
- The knitting element is saved.
- 21
- Select a knitting element.
- 22
- Position the cursor in the Muestra de diseño.
- Make both of the following steps in order to insert the knitting element with repetition into the pattern.
Dibujar con elemento de repetición - Iniciar adaptación de tamaño - Paso 1 de 2 :
Inicie la adaptación de tamaño de la repetición con un clic en el sector de agujas. O con <Ctrl> + <Alt> y un movimiento de ratón.
Dibujar con elemento de repetición - Finalizar adaptación de tamaño - Paso 2 de 2:
Finalice la adaptación de tamaño con un nuevo clic del mouse.
Odd-numbered quantity of technical rows in height
Example 1 |
| |
|
| |
Example 2 |
| |
|
| |
Even-numbered quantity of technical rows in height
Example 1 |
| |
|
| |