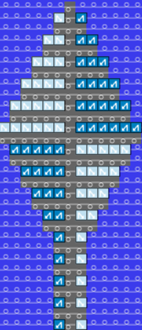
Step by Step to 'Pattern-20'
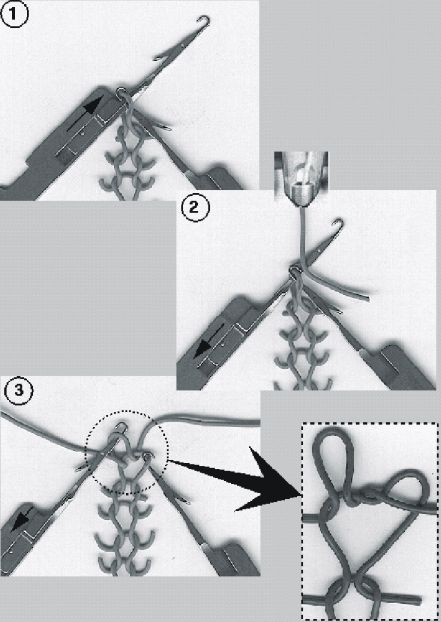
Split-stitch technique
With this knitting technique, you can close holes that can be caused by transferring stitches.
 : The following combinations are excluded in a common technical row:
- split-stitch technique with tuck
- Split-stitch technique with DJ knitting technique
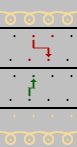
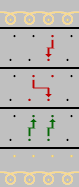
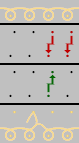
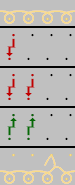
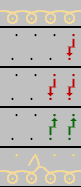
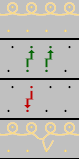
Sequence of the knitting technique
|
| |
|
1 |
Needle raising
|
|
2 |
Yarn insertion only into needles in transfer position |
|
3 |
|
|
| |
|
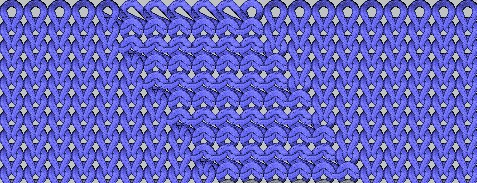
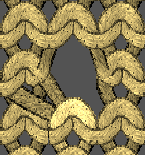
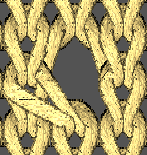
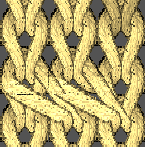
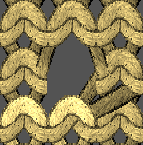
Fabric View from the front |
|
|
|
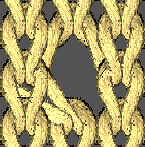
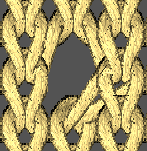
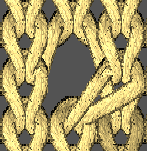
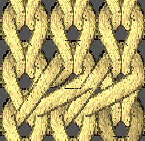
Fabric view from the rear |
|
|
|
How to use:
|

- A pattern project with one pattern and the desired settings is created.
- 1
-
Open
 Knit Explorer.
 - 2
- Select the knitting element Pétinet, maille v to draw from the Knit Explorer under Modules de structure -> Par défaut -> Pétinet .
| Name | Fabric View | Symbol View |
|---|---|---|---|
Pétinet | Pétinet, maille v |
|
|
|
| ||
Pétinet, maille ^ |
|
| |
|
| ||
Pétinet (stitch above) | Pétinet, maille v, au-dessus |
|
|
|
|


- 3
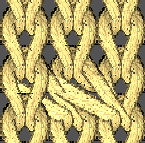
- Draw the desired 'Pointelle' structure.
|
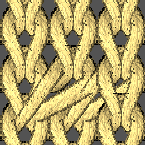
Presentation in yarn color |
Presentation by module color |
|
|
|
- 4
- Select this structure in the desired width and height.
- 5
- Create from selection:
- With CTRL + C create a temporary pattern element to draw.
- Open the context menu -> Sélection
-> select
 Élément du dessin:
Pattern element is saved in the Parties de dessin tab.
- 6
- Open the pattern element by double clicking.
- 7
- Replace needle action
 Maille arrière avec report with
  Transparent. : This makes it easier to draw-in pattern elements with offset but without overwriting the pattern element that has already been placed.
 - 8
- Draw-in the pattern element as desired into the basic pattern.
- 9
- Then, select the knitting element Pétinet, maille bouche-trou v <= to draw from the Knit Explorer under Modules de structure -> Par défaut -> Pétinet, reprise/bouche-trou.
| Name | Fabric View | Symbol View |
|---|---|---|---|
Pointelle with Split | Pétinet, maille bouche-trou v, en dessous |
|
|
|
| ||
Pétinet, maille bouche-trou v <= |
|
| |
|
| ||
Pétinet, maille bouche-trou ^, au-dessus |
|
| |
|
| ||
| |||

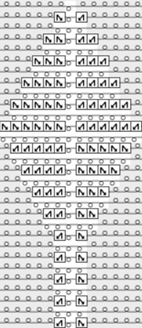
- 10
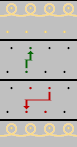
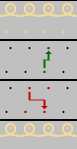
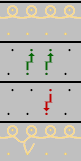
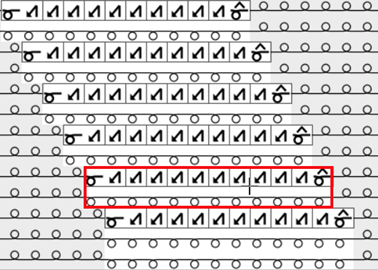
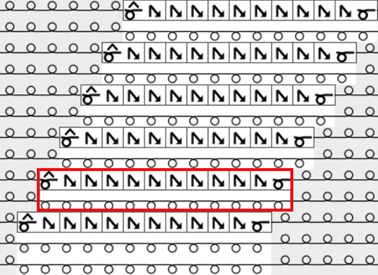
- Create structure for the diagonal to the right and for the diagonal to the left.
|
Pattern element for the diagonal to the left |
Pattern element for the diagonal to the right |
|
|
|
|
Pétinet, maille bouche-trou v <=
|
Pétinet, maille bouche-trou v <=
|
|
Tuck and R-R are not allowed in a common technical row when you use split! | |
 All Needles
 All Needles, Mirrored
- 11
- Select this structures in the desired width and height.
- 12
- Create from selection:
- With CTRL + C create a temporary pattern element to draw.
- Call-up the context menu Sélection
->
 Élaborer la partie de dessin...
:
Élaborer la partie de dessin...
:
-> Pattern element is saved in the Parties de dessin tab.
- 13
- Rename the pattern elements.
- 14
- Select the pattern element for drawing the diagonal to the left at left side of the design pattern.
- 15
- Select the drawing tool
 Copie multiple.
 - 16
- Draw the desired quantity of the diagonal upwards to the left.
- 17
- Select the pattern element for drawing the diagonal to the right.
- 18
- Draw the same quantity of the diagonal upwards to the right with the active Copie multiple drawing tool.
- 19
- Select this structure of diagonals to the left and to the right.
- 20
- Open the context menu -> Sélection
-> select Élaborer la partie de dessin...
:
- Pattern element is saved in the Parties de dessin tab.
- 21
- Draw the structure with this pattern element upwards into the design pattern.
- 22
- Draw the diagonals of the right side of the design pattern the same way, create pattern element of it Élaborer la partie de dessin...
, and draw it into the pattern.
- Design Pattern is created.
- 23
- If necessary, call-up the
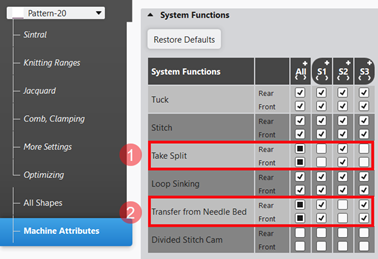
 Configuration tool window in the ribbon, select the Attributs de machine tab and make the required settings under Fonctions système:
- The conversion of the cams for all gauges is necessary:
- With OKC machines of all component types
- With EKC machines up to component type 000
- With EKC machines starting with component type 001
- NO conversion with the gauges from E10 to E18 and from E6.2 to E9.2
- Conversion for all coarse gauges is necessary
|
| |
|
| |
|
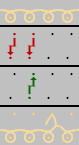
1 |
Specification of the systems in which ‘splitting of stitches' is to be carried out. |
|
2 |
Specification of the systems in which ‘transferring' is to be carried out. |
|
| |
- 24
-
Start the
 Élaboration
technique:
Élaboration
technique: Show symbol view after technical processing.
 - 25
-
Generate
 Sintral.
 - 26
-
Start the
 Contrôle du Sintral.
 - 27
-
 Extraire the knitting program.
 - A program for the knitting machine will be created: CMS530.Pattern-20.zip.
- Load knitting program into the machine.
 : The extracted file "CMS530.Pattern-20.zip" can be loaded onto the machine with an USB stick or via Ethernet.