Step by Step to 'Pattern-13'
- A pattern project with one pattern and the desired settings is created.
- 1
- Open the Explorer with
 Knit Explorer button.
 - 2
- Open directory:
Deposito elementi di lavoro -> fully fashion -> Diminuzione . - 3
- Select the Diminuzione, Trasporti separati narrowing module.
- 4
-
Call-up
 Copia in the context menu.
- or –
Call up Copia in the ribbon of the Knit Explorer. - 5
- Save the copy of the narrowing module to the desired directory of the Knit Explorer:
Call-up Incolla in the context menu of the same directory.
- or -
Call up Incolla in the ribbon of the Knit Explorer. - The copy appears in the selected directory.
- 6
- Change the name of the narrowing module:
- e.g. Mindern Franz_Narrow French
- 7
- Open the narrowing module by double click.
- The whole content of the module with all variants appears.
- 8
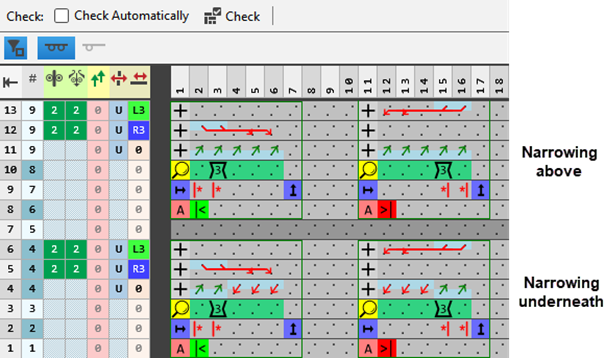
- Delete tiles (columns / rows) or variants which are no longer needed.
Keep this variants only:
- All Needles
- Racking by 3 needles
- For narrowing above and / or underneath
|
Display after deleting unnecessary information |
|
STOLL Narrowing Module:-> Diminuzione, Trasporti separati |
- 9
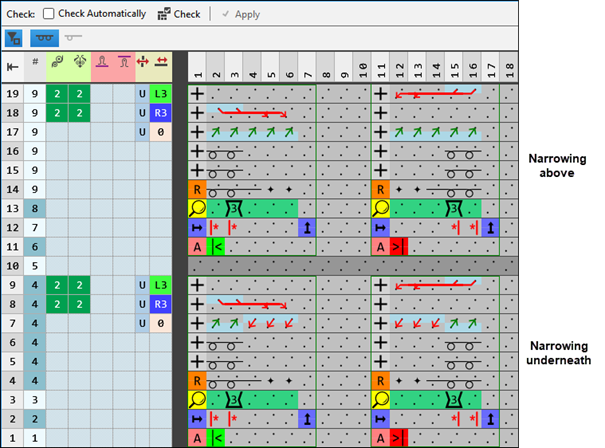
- Insert the required quantity of rows in to both tiles:
- For Diminuzione sottostante on all needles
- For Diminuzione sovrapposta on all needles
- 10
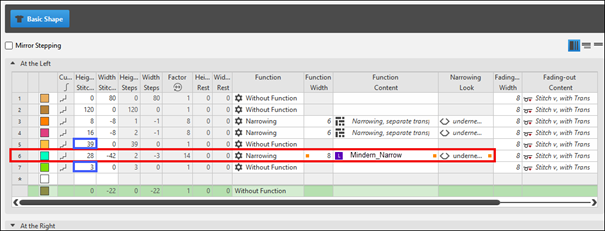
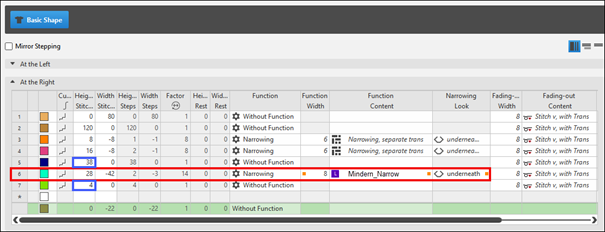
- Draw the desired narrowing sequence for 'French shoulder'
Left shape line - Shoulder | Right shape line - Shoulder |
| |
Watch out when generating modules:
- The narrowing module must be matched to the shape.
- The narrowing stepping which exists in the shape must be observed by the racking step in the module.
|
New Narrowing Module: Mindern Franz_Narrow French |
|
|
- 11
- Check the formal correctness of the entries in the knitting element with the
 Controllo: button.
 : The knitting procedure cannot be checked!
 - 12
- Close the tool window with
 .
. - The knitting element is saved and can be allocated to a shape line
- 13
- To create a project-related lined shape, select the
 Tagli tab in the tool window.
 - 14
- Open the context menu with RMB and select Crea nuovo taglio nella taglia M… .
- The Nuovo taglio lineare tool window is opened.
| |||
Nome del taglio | Name for the shape element | ||
Commento | Information about the shape | ||
| |||
Input Format | |||
Maglia | Entry in the table of the lined shape
| ||
Gradi | Entry in the table of the lined shape
| ||
Lavorazione a mano (giri) | Entry in the table of the lined shape
| ||
Rules for widening with hand knitting | |||
| Knitting before widening following the start | ||
| Widening before knitting following the start (default setting) | ||
Crea taglio da immagine |
| No images will be used | |
| Use image as template | ||


- 15
- Make the desired entries:
- Nome del taglio: Any
- Formato input: Stitch
- 16
- Confirm with the OK key.
- The new lined shape (basic shape) is graphically displayed in the Tagli tab and in a new document window
 as rectangle.
: The default attributes will be used for the shape edges of the lined shape.
Menu File -> Opzioni -> Taglio lineare -> Opzioni per un nuovo taglio lineare
- 17
- Open the docked line table by LMB in the document window.
- or -
Use the graphic displayed in the document window. - The table Taglio lineare with the values of the rectangular shape appears.
: The method (table or graphic) to create a project-related lined shape is freely eligible, since the views are always updated simultaneously.
- 18
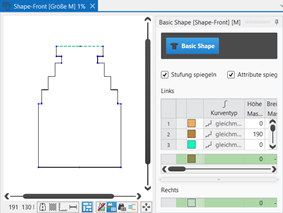
- Insert new shape lines in the table and enter the desired values for the basic shape.
- 19
- Allocate the desired attributes to the new shape lines:
- Function: Function content + Function width
- Fade-out: Fade-out content + Fade-out width
- Line 6: Shape Line 'French Shoulder'
- Narrowing width: 3 needles
- Step height: 2 rows of
- Private narrowing module
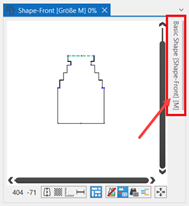
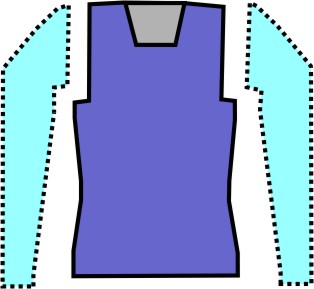
Example: Lined shape for Pattern-13
|
Basic Shape: Back on the left |
|
|
|
|
|
Basic Shape: Back on the right |
|
|
|
To be observed when generating the shape:
|
Rules for creating a shape for the knitting mode SJ:
Example Front:
Shape Attributes | Rules / possible settings |
|---|---|
Knitting Mode: | Single Jersey |
Step width of widening | 1 needle (stitch) per knitting row |
Step height of widening | As desired |
Quantity of rows without shape modification | As desired |
Step width when narrowing | 1 - 3 needles (stitches) |
Step height when narrowing | As desired |
Fading-out Width | As desired |
Knitting mode for fading-out | Front Stitch with Transfer |
Binding-off width: | Stepping > 3 stitches |
Binding-off methods | Binding-off, Structure, Single Jersey
|
- 20
- In the Tagli tool window select the created shape with LMB.
- 21
- Open the context menu -> Posiziona taglio -> select Pattern name.
- The shape is floating in the selected basic pattern.
- 22
-
Start the
 Elaborazione
tecnica:
Elaborazione
tecnica: Show symbol view after technical processing.
 - 23
-
Generate
 Sintral.
 - 24
-
Start the
 Controllo Sintral.
 - 25
-
 Estrazione the knitting program.
 - A program for the knitting machine will be created: CMS530.Pattern-13.zip.
- Load knitting program into the machine.
 : The extracted file CMS530.Pattern-13.zip can be loaded onto the machine with an USB stick or via Ethernet.