Change the default settings for the stitch length
Change the specifications for the stitch lengths in the pattern:
- See and modify the default settings for the stitch lengths in the
 Amostra de desenho.
 - The Graduação dianteira (NPv)
 / Graduação traseira (NP^)
  control columns appear.
- 1
- Open the existing Projecto de amostra and save it with a new name via the Arquivo / Salvar como menu.
- or -
Create new Projecto de amostra with an individual pattern. - 2
- Set the cursor to the Graduação dianteira (NPv) / Graduação traseira (NP^) control columns of the Amostra de desenho document window and click the RMB.
- or -
Open the Graduação (NP) context menu in the second row of the table header containing the default settings. - The stitch lengths context menu appears.
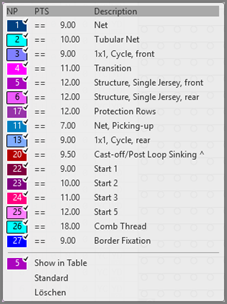
- The stitch lengths used in the pattern are displayed and are marked by the
 symbol.
 - The entries marked as favorites in the
 Graduação (NP) / Predefinição tab under the Graduação section of the Pattern Parameters
tool window are displayed.
Graduação (NP) / Predefinição tab under the Graduação section of the Pattern Parameters
tool window are displayed.
- 3
- Select the desired stitch length and enter it in the control column.
- or -
Fill a selection.
The stitch lengths shown in the context menu correspond to the table in thePattern Parameters
tool window under the Graduação section of the Graduação (NP) / Usuário tab.