Step by Step to 'Pattern-8_1system'
Stoll-ikat plating ®
For Stoll-ikat plating®, two plating colors (= a plating color combination) per pattern row are required for each color change by one system. You can use a different plating color combination in each system. A maximum of 30 changes of position are allowed in one pattern row, where a distance of 2 inches (with 1.0 m/s) between the color changes is to be respected.
- A pattern project with the Pattern-8_1system pattern and the desired settings is created.
- 1
- To draw select any desired drawing tool under the Desenhar group.
- 2
- In the Cores da amostra tool window, select the desired pattern colors from the Cores de fio color palette to draw the motif:
- 3
- Draw the desired motif with e.g. yarn color #4 in the
 Amostra de desenho (yarn color #31):
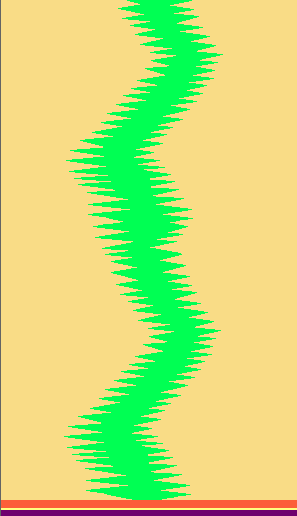
- 4
- Open the Cores de vanizagem dialog box with
 in the Cores da amostra tool window.
 - 5
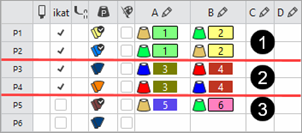
- Create the desired plating colors:
|
Stoll-ikat plating ® | |||
|
|
Quantity of Plating Colors |
Plating Offset | |
|
1 |
1 system |
2 Plating Colors |
YPI index 1 YPI index 2 |
|
2 |
2 systems |
4 Plating Colors |
YPI index 3 YPI index 4 |
|
3 |
Start |
1 plating color more |
YPI index 5 YPI index 6 |
|
|
| ||
- 6
- Paste the respective yarn colors of P1 and P3 in exchanged order into row P2 and P4.
- 7
- For the plating colors that are used for Stoll-ikat plating ®, activate the selection in the 'Ikat' column with
 .
. - 8
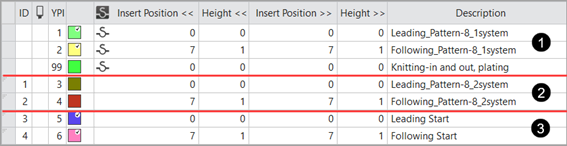
- Open the Plating Offset (YPI) table and assign the desired values.
- YPI index 1/3/5: Leading yarn carrier
- YPI index 2/4/6: Following yarn carrier
- 9
- Enter the settings for the selected YDI indices in the table.
|
| |
|
1 |
Plating offset values YDI for pattern-8 for 1-sytem knitting |
|
2 |
Plating offset values YDI for pattern-8 for 2-sytem knitting |
|
3 |
Plating offset values YDI for the start |
- 10
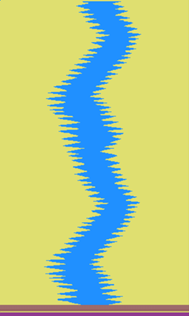
- Draw the plating color P1 and P2 into the design pattern Pattern-8_1system.
- 11
- Modify the knitting element Começo, 2x2 by the plating color P5.
- 12
- Select the
 Cortes tab of the tool window and create a new shape.
 - 13
- Insert new shape lines in the table and enter the desired values for the basic shape.
Example: Lined Shape for Pattern-8
|
Basic Shape: Front |
|
|
- 14
- Allocate the desired attributes to the shape edges.
- 15
- Position the shape on the Amostra de desenho.
- 16
- If necessary, make the desired settings in the
 Guia-fios tool window.
 - 17
- Carry out all the steps of processing.

 : The extracted file "ADF530-32W.Pattern-8_1system.zip" can be loaded onto the machine with an USB stick or via Ethernet.