Preset Stepping
How to choose a variant:
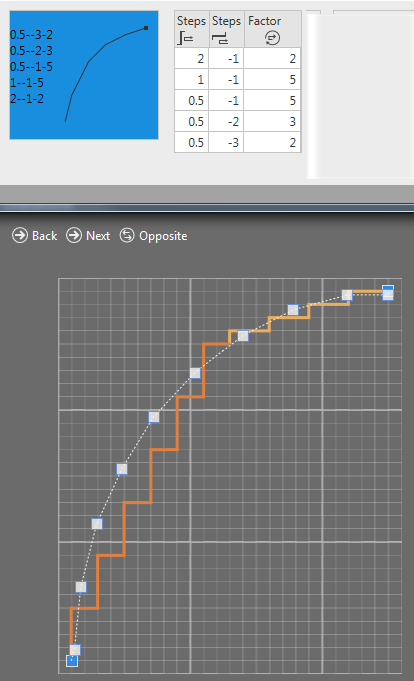
- The Line Properties are opened with preset stepping over several rows.
- 1
- Click the Propose Stepping... button next the Stepping Kind picklist.
- 2
- The Proposed Steppings dialog box appears.
- 3
- Click on the desired variant.
- 4
- Apply the selection with OK.
- The values are applied to the Line Properties.
The dialog box is closed.
Example:
- 5
- If desired:
- Adjust the values of the sub rows of the line table.
- Move the preference points.
How to determine the steppings in the armhole narrowing at the body via preference points:
- The dimensioned shape is opened in the Dimensioning View
 .
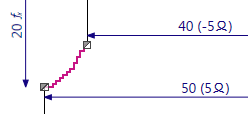
. - The startpoint and endpoint of the armhole narrowing are dimensioned horizontally and vertically.
- 1
- Open the context menu for the left diagonal shape line of the narrowing of armhole at the front.

- 2
- Select the

- The Line Properties tool window appears.
- 3
- Activate the
 Line View.
- The selected shape line appears in the line view.
- 4
- Go to the Stepping Parameters group box.
- 5
- Select the
 Preset Stepping option in the Stepping Kind
  list box.
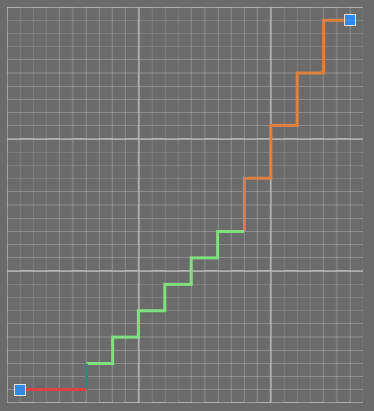
- The line view updates. The line curve is displayed as a dotted line.
- 6
- Activate the
 Binding-off at Line Foot check box.
- The Line Width by Stitches
 edit box appears enabled.
 - 7
- Select the value 5 in the Line Width by Stitches edit box.
- 8
- The line view updates.

- 9
- Open the context menu in the background of the Line View.
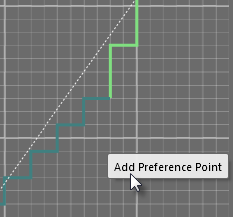
- 10
- Click .
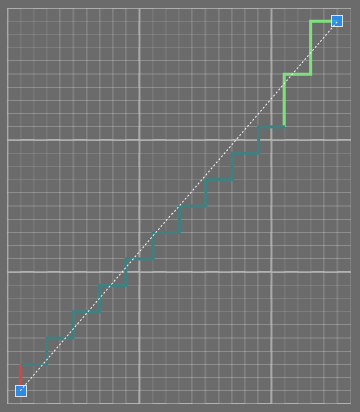
- The preference point is displayed as a rectangular point.

- The line view updates. The polyline goes through the preference point.
The steppings fit the new polyline the best possible way.

- 11
- Drag the preference point to the desired position with the left mouse button pressed.
 Add as many preference points as necessary.
- Module, width and look of the narrowing from the default settings are assigned in the sub-rows with the Narrowing function.
 How to change the narrowing settings
 - The steppings in the narrowing of armhole approach the preference point.
