Step by Step to 'Pattern-13'
- Copy the 'Pattern-12' pattern project and rename it.
- With it, the shape is copied as well.
- 1
- Open the tool window 添纱颜色 with
 in the 花型颜色 tool window.
 - 2
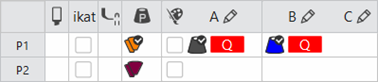
- Create a plating color in line P1 of the 添纱颜色 tool window:
- In column A:
- The used yarn color #2
- The
 symbol via the
  selection menu for the weft yarn carrier 1
 - In column B:
- The additional yarn color e.g. #3
- The symbol via the selection menu for the weft yarn carrier 2
- 3
- Select the
 颜色排列 tab of the tool window.
 - 4
- Open the existing Color Arrangement.
- 5
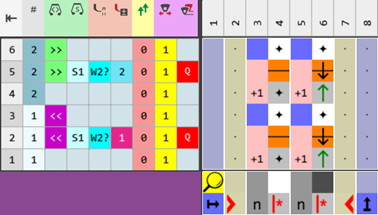
- Make the desired changes:
- Changes in the processing area:
- In the technique rows 2 + 5, overwrite the entered yarn color with the plating color P1.
- Modifications in the control column:
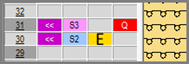
 导纱器修正 (YC / YCI) control column:
 : To control the weft yarn carriers, as this is not possible by assigning a plating offset!
You specify the insertion position in the Pattern Parameters
tool window -> 导纱器 -> 导纱器修正 (YC / YCI) tab.
in the Pattern Parameters
tool window -> 导纱器 -> 导纱器修正 (YC / YCI) tab.
|
Color Arrangement CA1 |
|
|
|
Variant CA1 |
|
|
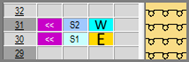
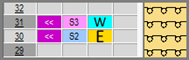
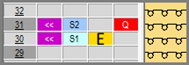
Control Columns:
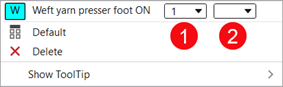
 W 压脚 (weft yarn presser foot)
 E 压脚 (knitting-in presser foot)
: These control columns can be used in the design pattern and in the Color Arrangement editor as well.
Control Column | |
| |
1 | Selection of the presser foot type mounted to the machine Example:
|
2 | Switch W presser foot on
|
| |
Control Column | |
| |
1 | Selection of the presser foot type mounted to the machine |
2 | Activate the E presser foot
|

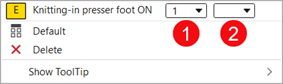
| System 1 | The E presser foot is activated | Result: The presser feet collide. |
System 2 | The W presser foot is activated | ||
| System 2 | The E presser foot is activated | |
System 3 | The W presser foot is activated | ||
| System 1 | The E presser foot is activated | Result: Presser foot collides with weft yarn carrier |
System 2 | W yarn carrier active | ||
| System 2 | The E presser foot is activated | |
System 3 | Weft yarn carrier active |
Activating the Presser Feet
Attention!
Presser feet at front and rear must not be activated at the same time, otherwise they will collide.
These unallowed combinations will be detected by the technical processing and the processing will be canceled.
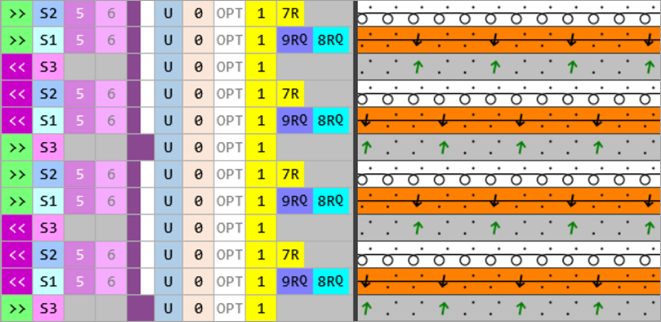
Needle actions for the weft yarn:
Needle Action | Meaning |
|---|---|
| The yarn carrier (weft yarn) runs before the knitting system with which transferring to the back over the weft yarn is performed. |
| The yarn carrier (weft yarn) runs before the knitting system with which transferring to the front over the weft yarn is performed. |
| The system that precedes the weft yarn transfers the stitches to the front. The yarn carrier (weft yarn) runs before the knitting system with which transferring to the back over the weft yarn is performed. |
| The system that precedes the weft yarn transfers the stitches to the rear. The yarn carrier (weft yarn) runs before the knitting system with which transferring to the front over the weft yarn is performed. |
| The yarn carrier (weft yarn) runs before the knitting system which raises needles of the front needle bed without a yarn carrier over the weft yarn. The front stitch is cast-off. In contrast to transferring, the opposite needle is not driven out for receiving. |
| The yarn carrier (weft yarn) runs before the knitting system which raises needles of the rear needle bed without a yarn carrier over the weft yarn. The rear stitch is cast-off. In contrast to transferring, the opposite needle is not driven out for receiving. |
| |


Apply the symbols for the weft yarn in the Color Arrangement:
- Insert a for the weft yarn carrier into the
 添纱偏移 (YPI) control column.
Symbol | Meaning |
|---|---|
| Possible definition for a yarn carrier as weft yarn carrier
|
Working with Yarn Carrier Corrections in CA:
- The Color Arrangement is opened.
- 6
- Display the 导纱器修正 (YC / YCI) control column.
- 7
- Open the context menu with RMB.
- 8
- Select the desired YCI index e.g. YCI1 and enter it in the control column.
- 9
- Open the context menu with RMB and select 在表中显示.
- Pattern Parameters
tool window / 导纱器 tab / 导纱器修正 (YC / YCI) section
|
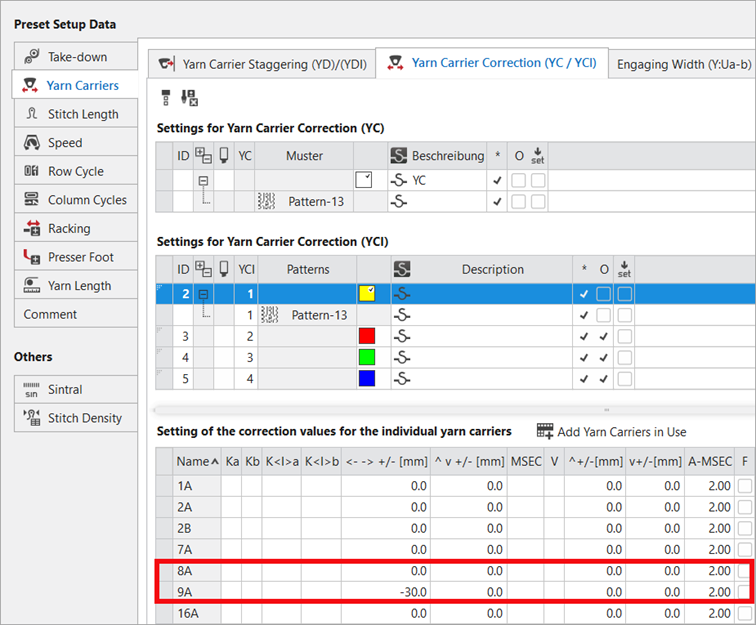
- 10
- Enter a negative value for yarn carrier 9A into the column.
- The yarn carrier 9A therefore runs in front of the yarn carrier 8A by the value of -30 mm.
- 11
- Close the Color Arrangement.
- 12
- Check the generated Color Arrangement on correct entries with the
 检验 button.: The knitting procedure cannot be checked!
 - 13
- Enter the created Color Arrangement via the control column from the 3rd pattern row into the remaining pattern rows in the design pattern.
- 14
- Select an existing shape from the
 模型 tab of the tool window.
 - 15
- Position the shape on the
 设计花型.
设计花型. - 16
- If necessary, make the desired settings in the
 导纱器 tool window.
 - 17
- If desired, make the desired presets in the following control columns:
- 线圈长度 (NP)
- 主牵拉(WMF)
- 速度 (MSEC)
- 18
- Carry out all the steps of processing.
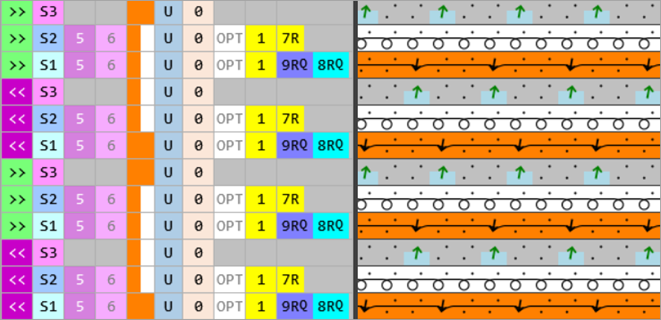
|
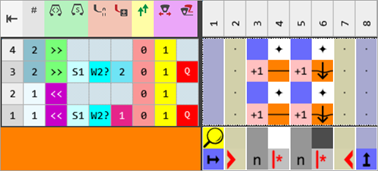
After Technical Processing: Knitting cycle with 2 weft yarn carriers |
|
CA1 |
|
|
|
|
|
|
|
Variant CA1 |
|
|
 : The extracted file "ADF530-32W.Pattern-13.zip" can be loaded onto the machine with an USB stick or via Ethernet.