Import an image in the opened pattern project
Importing an image:
- A pattern project is created.
- An image with reduced quantity of colors (max. 163 colors) is available in the tif, png, jpg or bmp format.
- 1
- Select the
 Pattern Elements tab of the
  Modules tool window.
 - 2
- Open the context menu in the tool window with RMB.
- 3
- Select
 Import Image... in the context menu.
 - 4
- Select the desired image in the Open dialog box.
 : Image in the format tif, png, jpg or bmp
 - 5
- Load the file with Open.
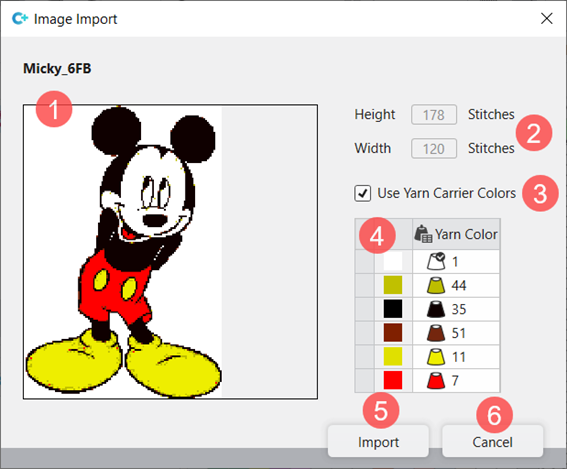
- The dialog box appears.
|
| |||
|
1 |
File name and image preview | ||
|
2 |
Height and width of the imported image | ||
|
3 |
Use Yarn Carrier Colors | ||
|
|
Allocation of the pattern colors when importing the image without the usage of colors from the Yarn Carrier Colorstable | ||
|
|
Allocation of the pattern colors when importing the image with the usage of colors from the Yarn Carrier Colorstable | ||
|
| |||
|
4 |
Table with the image colors in use In the | ||
|
5 |
Import |
Image imported and saved as a pattern element. | |
|
6 |
Cancel |
Closing of the dialog box without applying the changes | |


 column, you can now allocate other colors to the colors in use.
Changing the colors of an image in the pattern project:
- A pattern project is created.
- An image with reduced quantity of colors is available in the tif, png, jpg or bmp format.: The image can have up to 163 colors.
- An image is imported and is displayed in the Image Import dialog box.
- 20
- If necessary, change the displayed colors in the Image Import dialog box in the table (4) using the selection menu.
- 21
- Close the dialog box with the Import button.
- The changed image is saved as a pattern element and can be drawn into the pattern.