What was new in CREATE PLUS V2.6
Release V2.6. 11/2023
Version de fichier : 14 (V2.6)
Compatible with:
- EKC 3.0
- CKC 2.0
- OKC 6.6
Déterminer automatiquement la tricotage en entrée sur le côté opposé in Configuration / Réglages supplémentaires
-
 Déterminer automatiquement la tricotage en entrée sur le côté opposé
 - Default for tandem with comb
- Default for machines with clamping at the right only
- Setting applies always to all yarn carriers
- Tricotage à plusieurs pièces
- Yarn carriers of the right fabric piece are at YG right
- Yarn carriers of the left fabric piece are at YG left
- Alternating binding-off of left and right fabric piece.
You can toggle the display of the stitch lengths within Sintral.
Call up the Fichier tab -> Options dialog box.
Option of the  Options dialog box, Project Settings sections:
|
|
All the NP values used in the pattern are displayed as comment within the Sintral. |
|
|
The NP values are not displayed as comment within Sintral. |


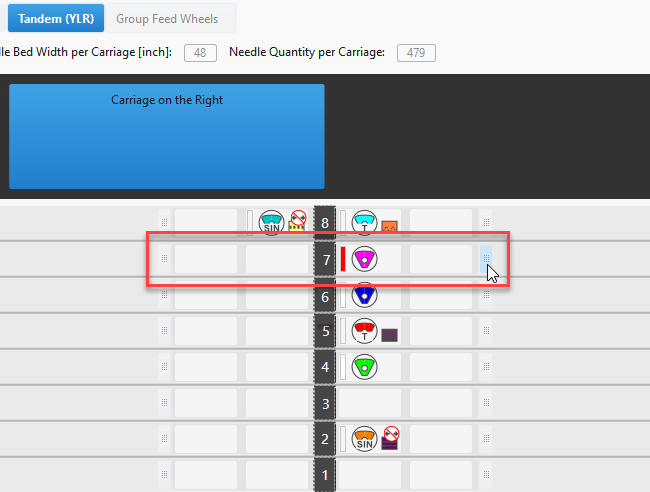
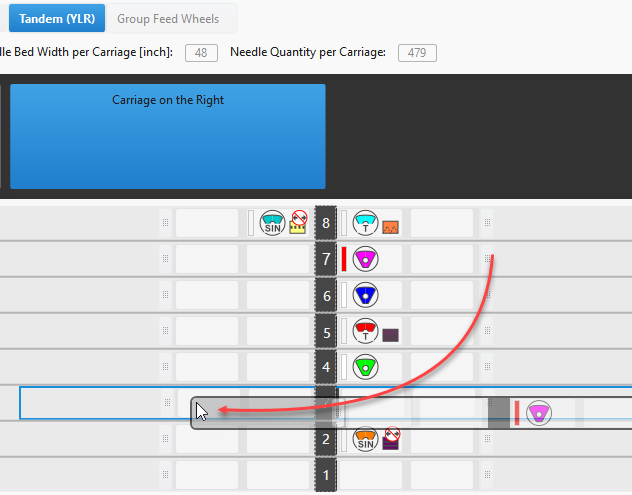
Move the yarn carriers for the right carriage in tandem mode
With the tandem mode enabled on the machine, you can modify the yarn carrier allocation of the right carriage independently to left carriage.
- 159
- Call up the Tandem (YLR) tab in the Guide-fil tool window.
- 160
- Click the right carriage.
- 161
- Click the button at the right or left of the yarn carrier home positions and drag the whole yarn carrier track to the desired position.
Do Not Combine Yarn Carriers
New option in the Réglages supplémentaires tab of the Configuration dialog box under Regrouper les guide-fils:
 Do not combine.
Each yarn carrier of intarsia sequences is knitted by a separate system within the whole pattern.
Detect Knitting-in to Opposite Side Automatically
- You can specify for each yarn carrier to be knitted-in to the opposite side by the Tricoter en entrée sur le côté opposé option of the Guide-fil tool window.
- Now the Déterminer automatiquement la tricotage en entrée sur le côté opposé option is available.
- Configuration -> Réglages supplémentaires
- For each yarn carrier, the knitting-in to the opposite side will be determined automatically.
- The yarn carriers which will be used closer the opposite side of the home position will be knitted-in before the start to the opposite side.
- The Tricoter en entrée sur le côté opposé function in the Guide-fil tool window will get disabled.
- General settings
Start modules of the Technique de démaillage 1x1 type
New start modules of the Technique de démaillage 1x1 knitting technique are available in the Knit Explorer under the path of the same name.
You will find these modules under Débuts / 1x1 Démailler:
- Début, 1x1, technique de démaillage 1x1
- Début, 1x1, technique de démaillage 1x1, grosse jauge
- Début, 2x1, technique de démaillage 1x1
- Début, 2x1, technique de démaillage 1x1, grosse jauge
- Début, 2x2, technique de démaillage 1x1
- Début, 2x2, technique de démaillage 1x1, grosse jauge
- Début, tubulaire, technique de démaillage 1x1
- Début, tubulaire, technique de démaillage 1x1, grosse jauge
Saving the patterns of a pattern project individually.
In the Dessin tool window, you will find the Export Pattern... function in the context menu of a pattern.
- A new pattern project will be created.
- The pattern you clicked will be saved within this pattern project.
- Context menu on the pattern name
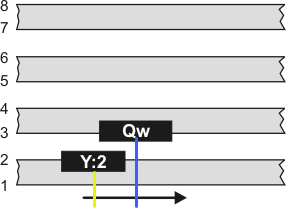
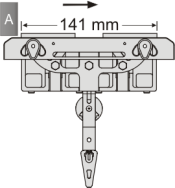
CMS W - New Weft Yarn Carrier Qt
Another type of weft yarn carrier available for the CMS W machines:
|
Up to now |
Qw yarn carrier One weft yarn carrier can be used per system. |
|
|
New |
Qt yarn carrier Up to three weft yarn carriers can be used per system. |
|
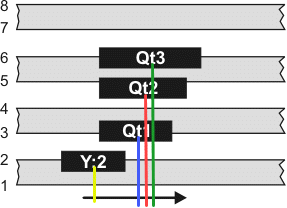
There are three versions of the Qt weft yarn carrier:
- Qt1 – 141 mm (ID 4170 282 857)
- Qt2 – 161 mm (ID 4170 282 858)
- Qt3 – 181 mm (ID 4170 282 859)
The yarn carrier plunger (A) drives of the yarn carrier carriage at the outside and pushes the yarn carrier ahead.
Advantage:
- No additional system is required for the weft yarn.
- One system only inserts the weft yarn and encloses it.
|
Working with Qt |
One system only inserts the weft yarn and encloses it (S2).
|
|
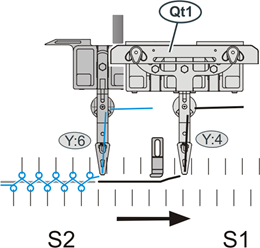
 The yarn carriers must be on different tracks.
Notes:
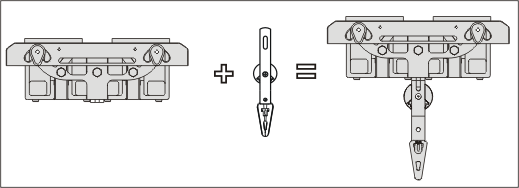
- Height of the Qt yarn carrier = Height of a normal yarn carrier
- The yarn carrier bow is taken from the corresponding normal yarn carrier.
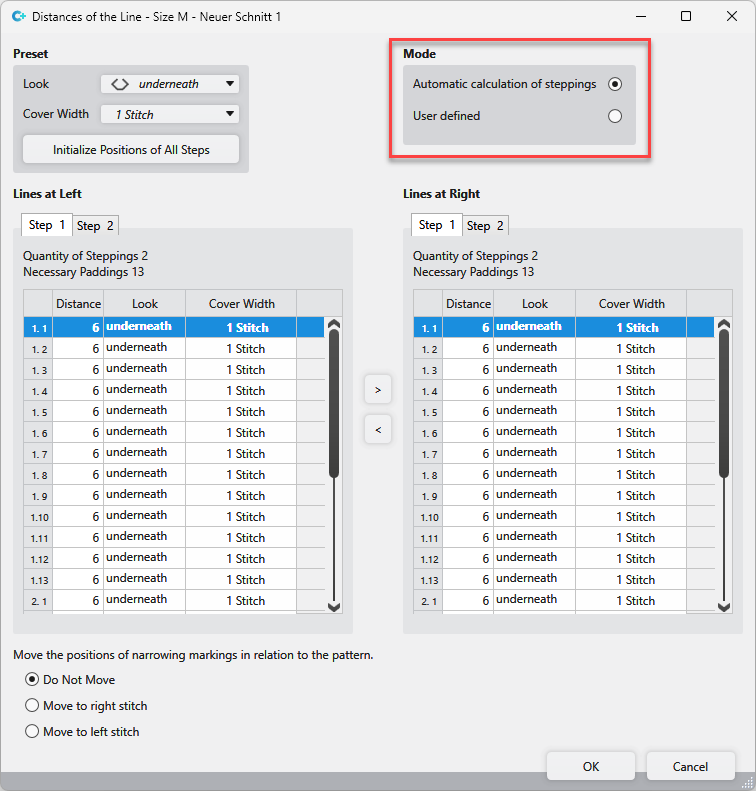
New feature for the Fair Isle stepping kind.
Now you can select the calculation of the steppings in the Distances de la ligne tool window:
- Calcul automatique des gradations
- - or -
- Définie par l'utilisateur
- Multi-step Narrowing
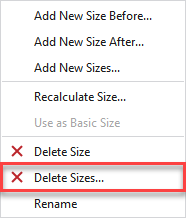
Dimensioned Shape - Deleting Several Sizes at Once
You will find the Delete Sizes... function in the context menu of the status bar of the Dimensioned Shape.
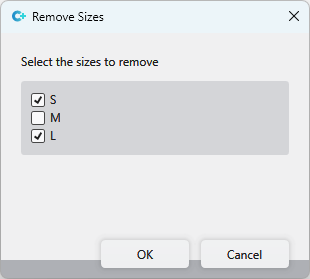
Select the sizes to be removed in the Supprimer tailles dialog box.
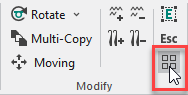
Cancel Selection in the Start Ribbon
You can call-up the  Annuler la sélection
function directly in the Modifier group of the Accueil tab.
Annuler la sélection
function directly in the Modifier group of the Accueil tab.
New functions of the Chercher et Remplacer dialog box
- The cursor attributes will be applied to the Rechercher and the Remplacer area by calling-up the dialog box.
-
Delete All function at the top right of the dialog box
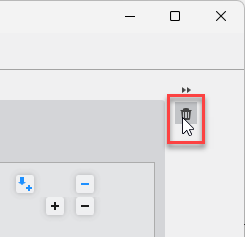
All data input will be removed from the dialog box. - Find and Replace
Symbols for deleting within the Knitting Element Editor.
The symbols for deleting are all available in the top row of the Knitting Element Editor.
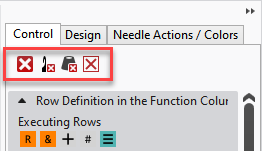

Applies to the following tool windows and tabs:
- Actions de l'aiguille
- Icônes de forme
- Couleurs de dessin
- Commande
- Conception
- CA
Renaming Multiple Knitting Elements Simultaneously
You can select and rename multiple knitting elements at the same in the Modules, CA, MA and Parties de dessin tool windows.
- 162
- Select the knitting elements.
- 163
- Call up Renommer plusieurs entrées... function of the context menu.

- The Renommer plusieurs entrées dialog box appears.
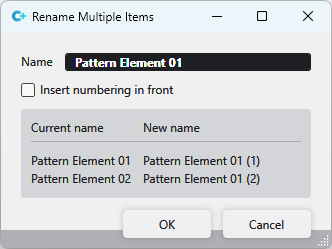
Make the following settings in this dialog box:
|
Nom |
Enter the new and common name for the knitting elements. |
|
|
The numbering appears in front of the name. |
|
|
The numbering follows the name. |
|
Display |
The current and the new names of the knitting elements are shown in the lower part of the dialog box. |
Open a module inserted in a table.
Now you can open modules inserted in a table via the context menu.
Within shape edges for examples:

Recolor a multicolored pattern element:
You can change the colors of a multicolored pattern element as desired before you draw with the pattern element.
With selecting the pattern element, an arrow appears next to the pattern color in the cursor attributes.
You can open the presentation of the colors of a pattern element by this arrow.
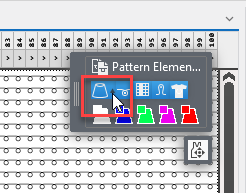
- 164
- Click a color of the Couleurs de dessin which you want to insert.
- 165
- Click the color of the pattern element which you want to replace.
- 166
- Repeat this procedure with all colors which you want to replace.
- 167
- Delete the color selected at last from the cursor attributes.
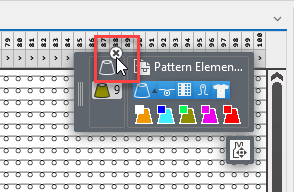
- 168
- Insert the pattern element with the new color combination into the pattern.
New Function: Move Raster Shape Part
You will find the Déplacer la forme de quadrillage function under the display of the cursor attributes.
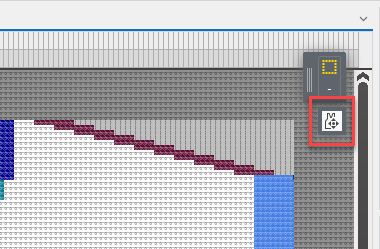
- The function is only available if no shape is positioned on the pattern.
- Click on the Déplacer la forme de quadrillage function to select the raster-shape.
- Move the raster-shape to the desired position with the mouse button pressed on the selection.
- Then click Déplacer la forme de quadrillage again to cancel the selection.
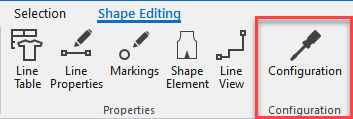
Call-up Shape Configuration Directly
You can open the Toutes les coupes tab of the Configuration dialog box directly in the Élaboration de la coupe tab of the lined shape layer.
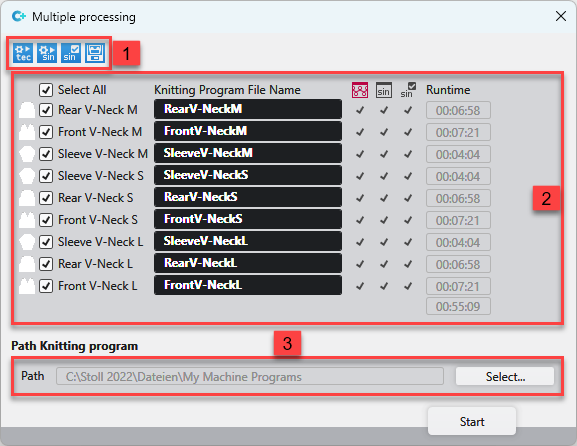
New Dialog Box for Multiple Processing
You start the joint technical processing and creation of the knitting programs exclusively in Multiple Processing dialog box.
Call up the dialog box in the Accueil tab next to the Sintral group.

Therefore, the Élaboration multiple tab is completely eliminated.
Make the following settings in the Multiple Processing dialog box:
|
1 |
Select the steps of processing you want to be done. You can click only the patterns which are ready for this selection. |
|
2 |
Select the patterns that you want to get processed. You can edit the file name of the knitting programs. The knitting time appears after the Sintral Check at right of the pattern. |
|
3 |
Enter the path where the knitting programs shall be saved. |
Additional tabs of Données Setup.
In connection with the Éditeur de modèles STOLL, the following tool windows are integrated into the Données Setup:
- Sintral
- Appel de fonction (F:)
- Instruction Sintral / PRINT
- Sintral Functions
- Densité des mailles
- Couleurs
These tool windows are therefore exported together with the Modèle de données de Setup.
Données Setup and configuration data of a pattern project can be saved as a template, edited and used in a new pattern project.
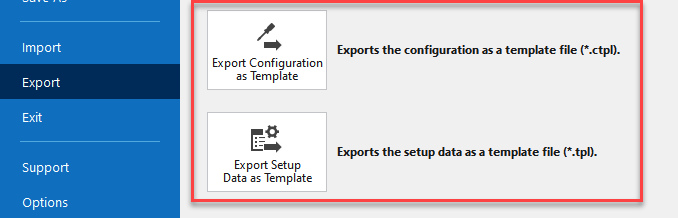
Exporter
From an existing pattern project, setup data and the configuration can be exported as a template file.
Buttons of the Backstage View / Exporter :
|
Exportation comme modèle |
Exporte la configuration en fichier modèle (*.ctpl).
Default path: |
|
Exportation comme modèle |
Exporte les données de Setup en fichier modèle (*.ctpl). |
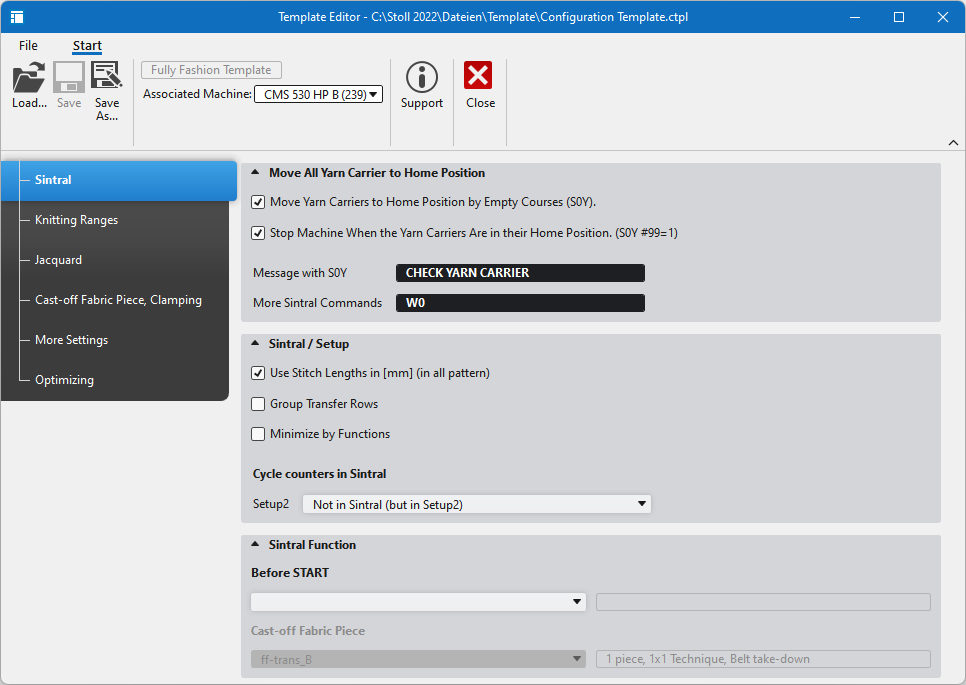
Éditeur de modèles STOLL
Open the Éditeur de modèles STOLL on the Page de démarrage.
You can load, edit and save template files.
 Only project relevant data will be saved in the setup file.
This affects both the configuration and the setup data.
Use Modèles Setup in a pattern:
- 169
- Open the En général section of the Options dialog box via the Backstage View.
- 170
- Load a Modèle Fully Fashion under Modèles Setup.

- This template will be used by every new pattern project.

- The G ( √ = L'entrée est sauvegardée dans sa globalité pour les projets suivants. ) column is omitted.
Use configuration templates in in a pattern.
You assign configuration templates to your own machines in the Sélectionner la machine dialog box.
- The configuration template must be saved in the same folder as your own machine.
Default path:
C:\Users\[username]\AppData\Local\Stoll [CPS|CDESIGN|CLITE]\Machines
- 171
- Create a private machine in the Sélectionner la machine dialog box.
- 172
- Open the Caractéristiques de machines dialog box via the context menu of this machine.
- 173
- Load the Modèle Fully Fashion under En général of the properties.
- The data of the corresponding configuration template will always be used for this machine then.
Statistics Dialog Box
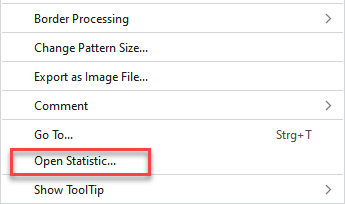
You will find the statistical evaluations of the settings and the knitting elements of a pattern project in the Statistics dialog box.
You open the dialog box by the context menu.
The Statistics dialog box can be opened within the following realms:
- All layers of the pattern editing except the lined shape and the dimensioned shape.
- All knitting elements
Make the following settings in the Statistics dialog box:

|
1 |
Define the scope and recalculate the statistical data. |
|
2 |
Select the data that is to be displayed. |
|
3 |
Joint display of the entries and the statistical evaluation |
|
4 |
Open a second view and make zoom settings. |