What was new in V2.8

http://software.stoll.com/createdesign/software_updates/index.html
Release V2.8 09/2024
File Version: 16 (V2.8)
Stepping Kind Preset Stepping
Up to now only available for Dimensioned Shape.
Now, in the Lined Shape as well.
 :
:
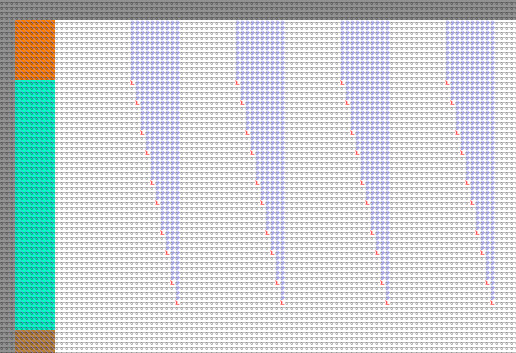
- With a preset stepping, it is not always possible to reach any desired target point!
Example:
- If only even-numbered steps have been specified, no target point can be reached at an odd-numbered position.
Therefore, the line table contains the following information for a preset stepping:
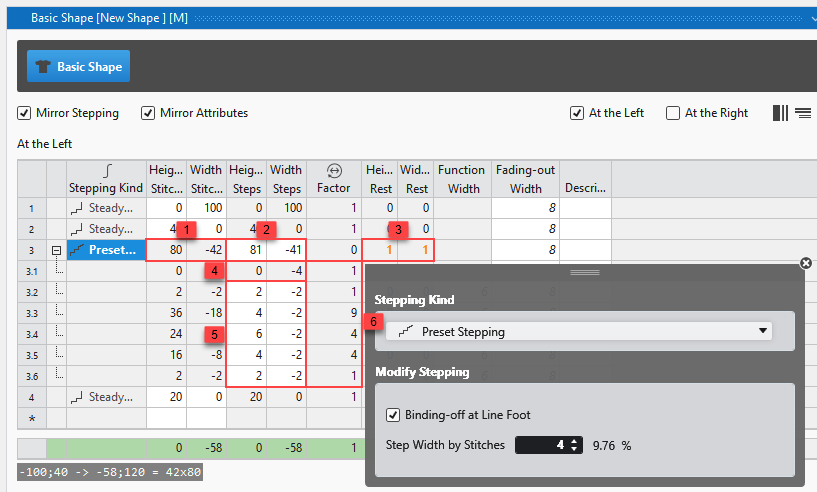
|
1 |
Actual height and width of the line
|
|
2 |
Desired height and width of the line in total
|
|
3 |
Deviation of the calculated target point in height and width The deviation of the actually reached target point from the desired target point is displayed in red. |
|
4 |
Bind-off Step The width of the bind-off step is specified via the line properties. The total bind-off width is calculated and determined by the factor. |
|
5 |
Preset Stepping The preset stepping is specified by the user. |
|
6 |
Factor of the stepping The factor for each step is calculated so that the desired overall height and width of the line is achieved as precisely as possible. |
Deviating target point of a line
If the desired target point of a line is not reached in the lined shape, both points are displayed separately.
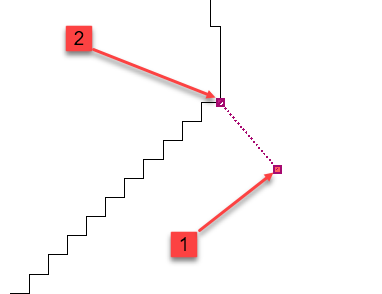
|
1 |
Desired Target Point |
|
2 |
Actually Achieved Target Point |
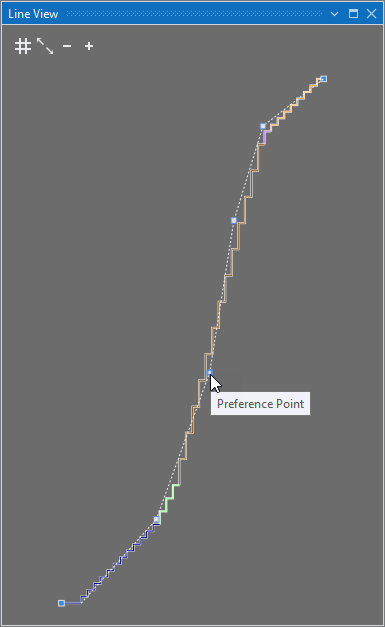
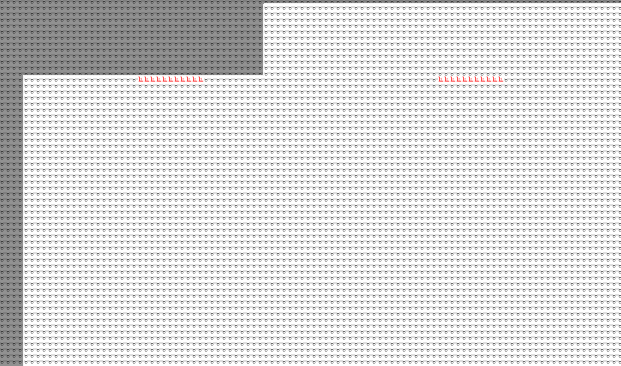
Line View
In addition to the stepping line, a dashed line appears.
- You can set preference points on the line and remove them via the context menu.
- Add Preference Point
- Delete Preference Point
- The stepping line adapts to this curve as closely as possible, according to the preset stepping.
- You can move the preference points as desired.
This means, you can form the line as desired according to the preset stepping.
Display of Line Dimensions
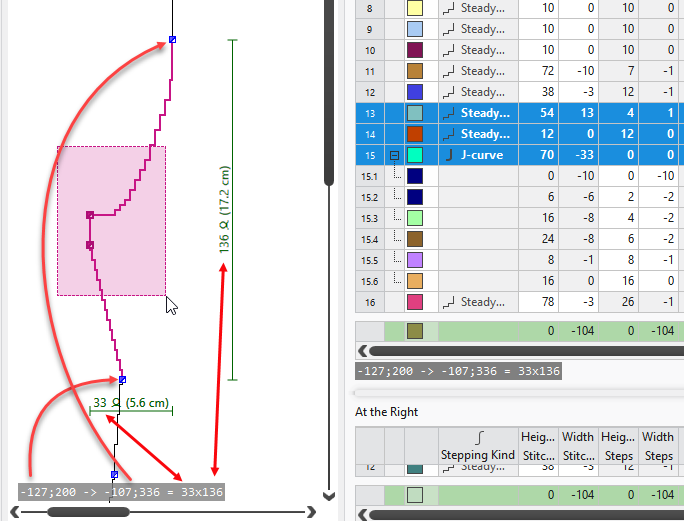
If one or more lines are selected in a lined shape, the following information about this selection is displayed.
- Coordinates of the start point
- Coordinates of the endpoint
- Absolute width and height
 The start and endpoints correspond to the first and last points of the selected lines of the shape.
This information appears at the lower left of the views.
- Line Table
- Lined Shape Editor
- Lined Shape Layer
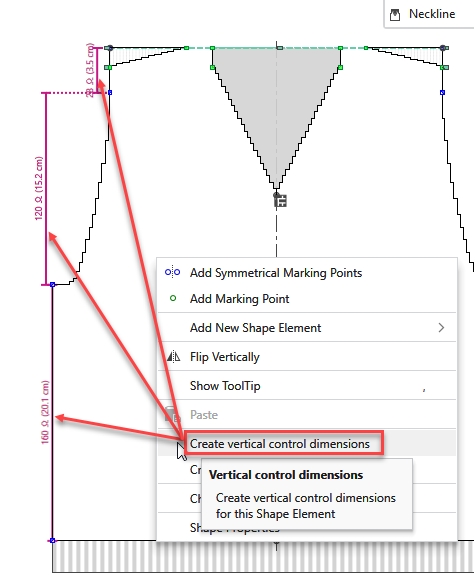
Function to Create Control Dimensions in Lined Shapes
Functions in the context menu of Basic Shape or Shape Element of a lined shape:
- Create Vertical Control Dimensions
- Creates vertical control dimensions for this shape element.
- Create Horizontal Control Dimensions
- Creates horizontal control dimensions for this shape element.
- Delete Control Dimensions
- Deletes all control dimensions.
Team Depot in Knit Explorer
In the Knit Explorer, you can set up a shared folder on the local network or in the cloud to manage the knitting elements.
Different users can access this folder and thus use common knitting elements.
- Select a common folder in the Options / Project Settings / Storage Location dialog box:

- The Team Depot entry appears in the Knit Explorer.
-

- Save and Manage Knitting Elements Centrally Under this Path
- Add Subfolders
- Green checkmark: Folder is synchronized
-
 - OUT OF SYNC - :
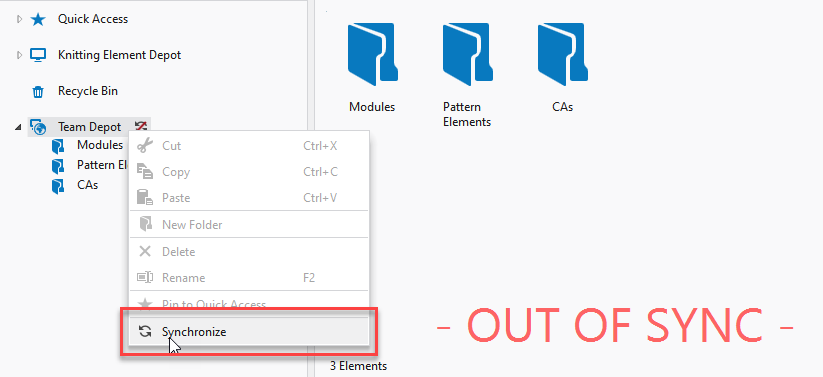
- You can synchronize the Team Depot via the context menu of the folder.
 Synchronize
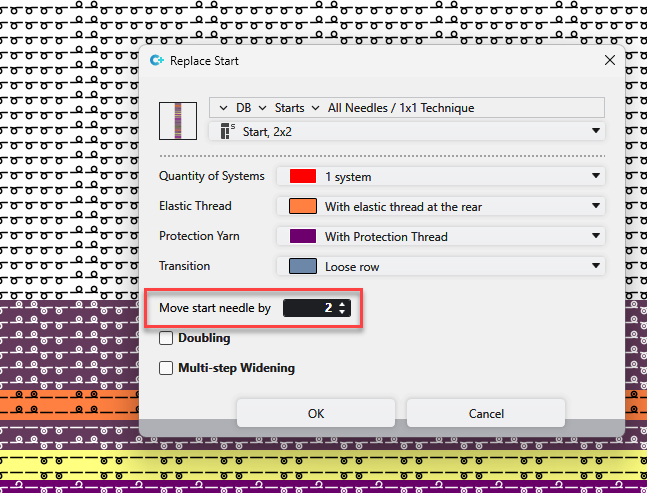
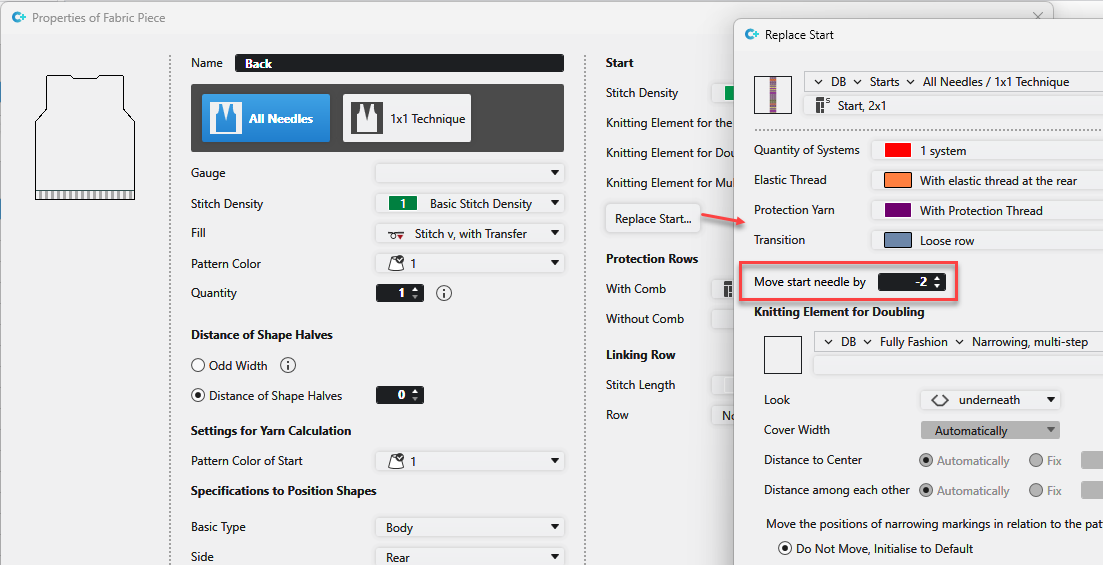
Move Starts Horizontally
- Via the Replace Starts dialog box
- In the Pattern
- In the Lined Shape
- In the Dimensioned Shape
- Positive value of the edit box moves the start to the right.
Negative values to the left.
In the Pattern
Replace Start in Pattern... context menu / Replace Starts dialog box
In the Lined Shape
Shape Properties / Replace Starts dialog box

In the Dimensioned Shape
Properties of Fabric Piece / Replace Starts dialog box
New functions of the Text drawing tool

|
Font Size |
Enter the font size. |
|
Angle (degrees) |
Rotate the text by the specified angle. |
|
Max. Width |
Enter the maximum width of the text. |
|
Max. Height |
Enter the maximum height of the text. |
|
Preview |
Shows a thumbnail of the text according to specified settings. |
|
Create Pattern Element |
Creates a pattern element with the text and saves it to the Pattern Element tool window.
|
 Cursor attributes selected together with the text are applied to the pattern element.
Release V2.7 03/2024
File Version: 15 (V2.7)
Compatible with:
- EKC 3.1
- CKC 2.1
- OKC 6.6
Enhanced settings of the line properties.
|
1 |
|
|
2 |
|
Stepping Kind User Defined
User defined lines are exclusively defined by the sub-rows of the Line Table.
With selecting the User Defined stepping kind, no Stepping and no Function will be offered in the Line Properties.
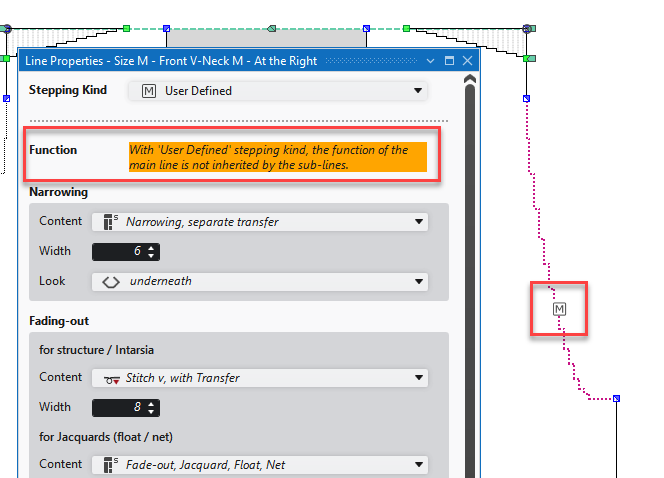
- User defined lines are marked with M in the view of the lined shape.
- In the view of the lined shape, you cannot change a user defined line, as it is exclusively defined by the sub-rows of the Line Table.
If a start or end point of a user defined line is moved, the whole line will get moved the same way. - Line Properties
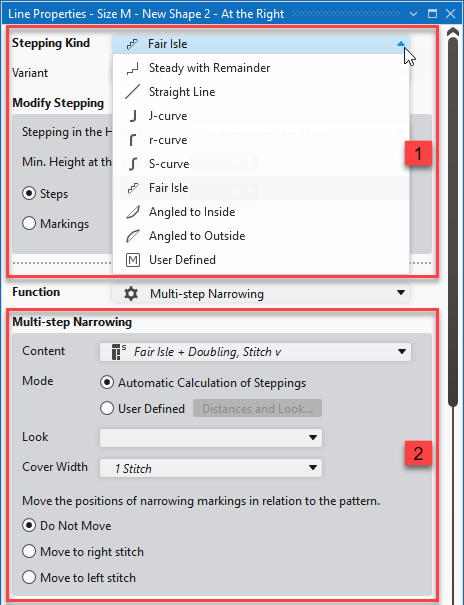
New variants of Fair Isle within the lined shape.
Four variants of the Stepping Kind Fair Isle are available within the lined shape.
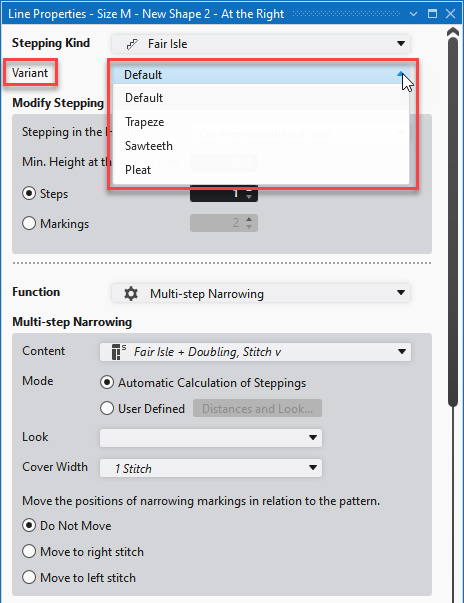
The variants are offered in the Line Properties for selection.
- Default
- Knitting technique as before with the Fair Isle selection.
- Trapeze
- In the Lined Shape:
- Expanded in the rasterized view:
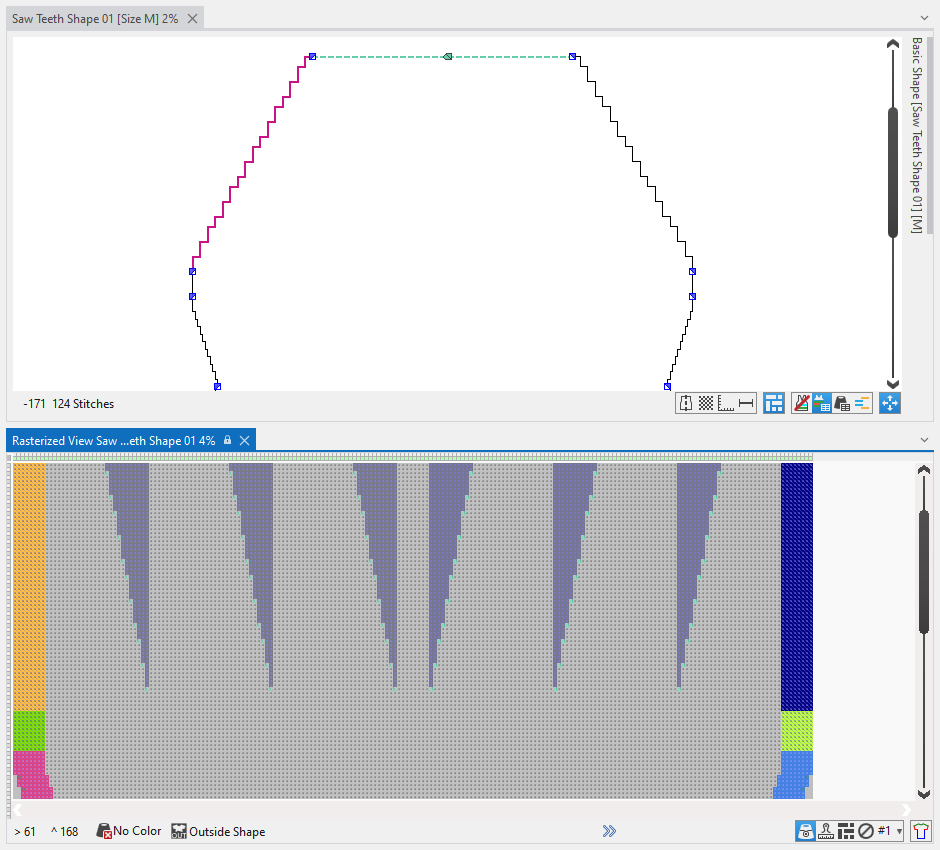
- Saw Teeth
- In the Lined Shape:
- Expanded in the rasterized view:
- Pleat
- In the Lined Shape:


Each variant has specific options.
- Multi-step Narrowing
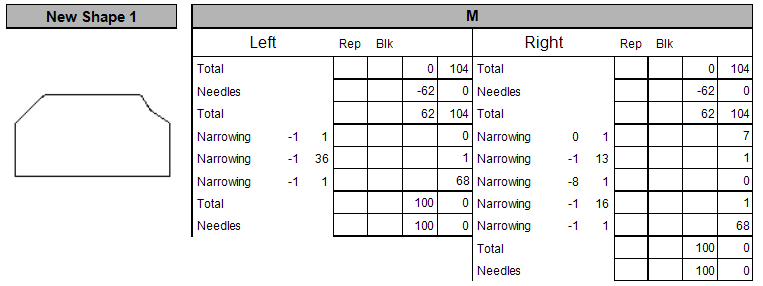
Each lined shape has its own line table.
Each lined shape has its own Line Table docked to the document window.
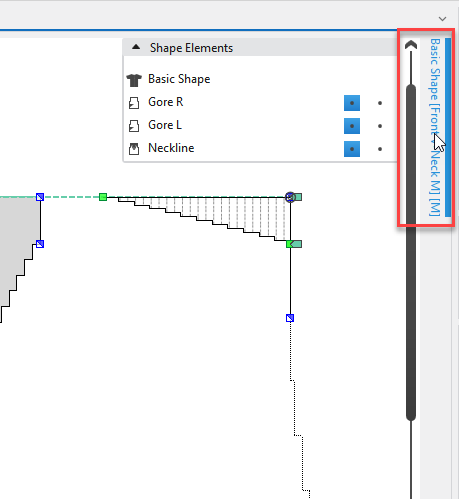
- The Line Table is pinned to the right edge by default.
You can drag it to any desired edge of the document window. - You can expand the Line Table and unpin it from the edge.
- The table always remains related to the same shape.
- You can dock the Line Table again to the corresponding lined shape by the Dock function in the context menu of the title bar.
- You can hide a docked Line Table via the pin in the title bar.
- You can open and edit several line tables of different shapes at the time.
- You can copy areas of a Line Table and paste them into another Line Table.
- Calling up the Line Table is no longer possible in the Home ribbon or the context menu of the lined shape layer.
- Line Table
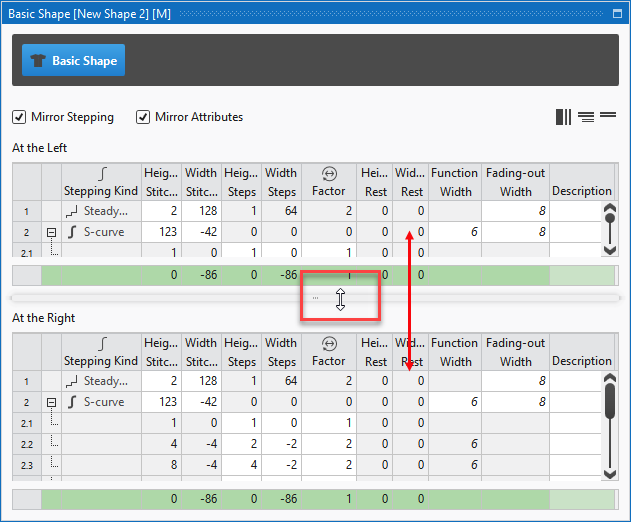
Adjustable view on the lines of the right and the left shape halves
You can move the areas of the shape lines of the left or right shape half in the Line Table.
Therefore, drag the separator between the areas as desired to the top or bottom.
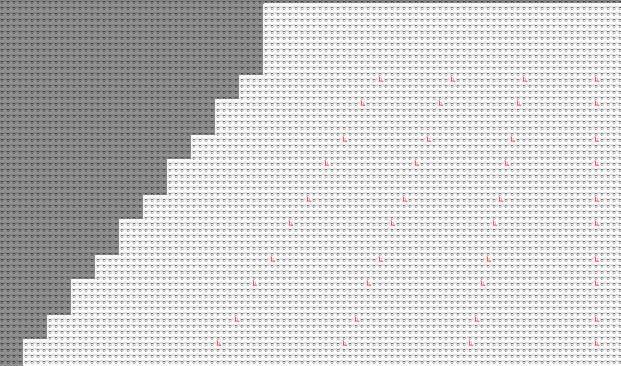
Raster-Shape Preview of a Lined Shape
You can get the rasterized view for each lined shape of the Shapes tool window via the context menu.
- Rasterized view appears folded-out.
- Especially helpful for the Trapeze and Saw Teeth variants of Fair Isle.
- The rasterized view cannot be edited.
- Context menu on the shape
Modified behavior of starts with positioned shapes (≤ V2.6 vs. V2.7)
- Behavior when positioning a shape without start on a pattern with start:
- The start of the pattern gets allocated to the shape.
- If the shape is moved on the pattern, the start will be moved accordingly.
- With the positioned shape, the start can only be modified by the start module and not within the pattern.
- If the shape is withdrawn from the pattern, the start returns to its original position within the pattern.
- Behavior when loading or importing a pattern of a former version (≤ V2.6):
- The pattern of the former version has a positioned shape.
- The start of this pattern has been modified within the pattern having the positioned shape.
Therefore, the start within the pattern is different from the start module. - When loading or importing this pattern in version V2.7, the pattern will be converted to a raster-shape.
With it, the modified start will be kept in the pattern.
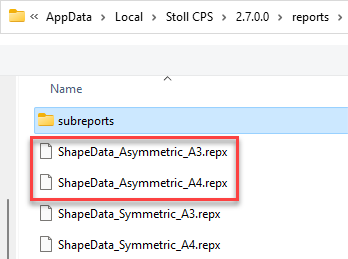
Fully Fashion – Shape Data Print
Improved Print Function for Lined Shapes and Dimensioned Shapes
- In the Editor of Lined or Dimensioned Shapes:
File ribbon / Shape Data Report. - Shape Data Report (view)
The individual topic:
- All shape elements will appear in the preview
- The shape lines of asymmetric shapes appear next to another for the left and right halves of shape.
- Layouts for asymmetric shapes:
Detecting opened knitting elements, shapes and patterns
Opened knitting elements, shapes and patterns are marked by OPEN label in the tool window.
- Opened
Label with gray background
- Opened and active
Label with blue background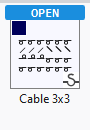
New function Draw with Selection
- In the Home ribbon / Modify ribbon group
- In the Selection ribbon
With Draw with Selection, the drawing area is at once selected when drawing.
- The selection is added when drawing additively.
With CTRL - The selection is canceled when drawing subtractively.
With CTRL + ALT - Modify (Ribbon Group)
The Description column is added to several tool windows.
The Description column is available in the Plating Colors, Multiple System Colors, Yarn Allocation and Line Table table.
Ruler in the Fabric View
At the left and upper edge of the Fabric View
Define the unit of measure by cm or inch in the Project Settings tab of the Options dialog box for new projects.
- Fabric View
Revision of the Options dialog box.
The tabs of the Options dialog box has partly been renamed and updated
The functions within the tabs have been simplified, made more consistent and better organized.
- Optional Features
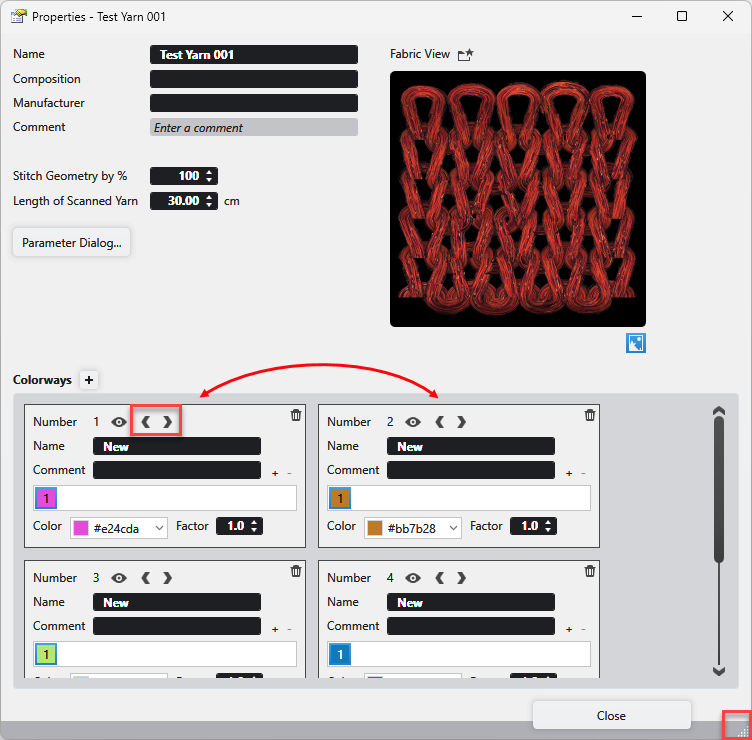
You can manage the colorways more easily in the properties dialog box of a yarn or of a yarn from image.
- You can change the arrangement of colorways by their arrows.
- The arrangement can also be changed via drag and drop on the colorways.
- For a better overview, the dialog can be enlarged as desired.
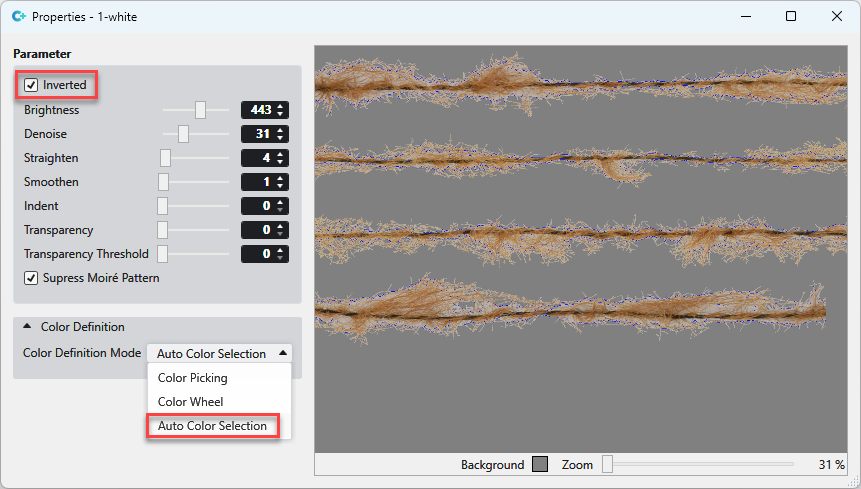
- With the
 Inverted function of the Parameters dialog box, you can process yarns scanned on a bright background with high contrast.
As used to, all parameters are available for the corresponding setting. - In addition, the Auto Color Selection function is available to define the color.
This function automatically selects the most common color in the yarn from the color wheel.
Release V2.6. 11/2023
File Version: 14 (V2.6)
Compatible with:
- EKC 3.0
- CKC 2.0
- OKC 6.6
Detect Knitting-in to Opposite Side Automatically in Configuration / More Settings
-
 Detect Knitting-in to Opposite Side Automatically
 - Default for tandem with comb
- Default for machines with clamping at the right only
- Setting applies always to all yarn carriers
- Multi-Piece Knitting
- Yarn carriers of the right fabric piece are at YG right
- Yarn carriers of the left fabric piece are at YG left
- Alternating binding-off of left and right fabric piece.
You can toggle the display of the stitch lengths within Sintral.
Call up the File tab -> Options dialog box.
Option of the  Options dialog box, Project Settings sections:
|
|
All the NP values used in the pattern are displayed as comment within the Sintral. |
|
|
The NP values are not displayed as comment within Sintral. |

- Options
Move the yarn carriers for the right carriage in tandem mode
With the tandem mode enabled on the machine, you can modify the yarn carrier allocation of the right carriage independently to left carriage.
- 72
- Call up the Tandem (YLR) tab in the Yarn Carriers tool window.
- 73
- Click the right carriage.
- 74
- Click the button at the right or left of the yarn carrier home positions and drag the whole yarn carrier track to the desired position.
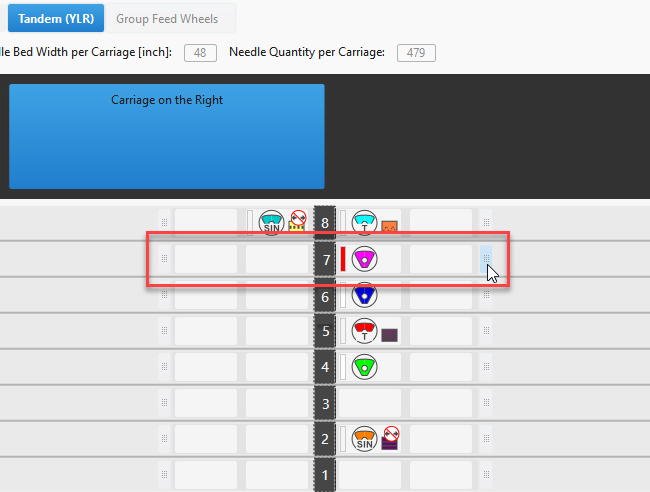
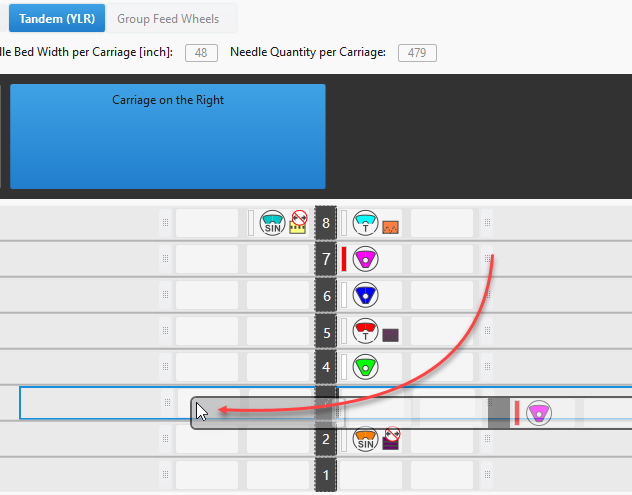
- Tandem (YLR) Tab
Do Not Combine Yarn Carriers
New option in the More Settings tab of the Configuration dialog box under Combine Yarn Carriers:
 Do not combine.
Each yarn carrier of intarsia sequences is knitted by a separate system within the whole pattern.
- Combine Yarn Carriers
Detect Knitting-in to Opposite Side Automatically
- You can specify for each yarn carrier to be knitted-in to the opposite side by the Knit-in to opposite side option of the Yarn Carriers tool window.
- Now the Detect Knitting-in to Opposite Side Automatically option is available.
- Configuration -> More Settings
- For each yarn carrier, the knitting-in to the opposite side will be determined automatically.
- The yarn carriers which will be used closer the opposite side of the home position will be knitted-in before the start to the opposite side.
- The Knit-in to opposite side function in the Yarn Carriers tool window will get disabled.
- More
Start modules of the 1x1 Cast-off Technique type
New start modules of the 1x1 Cast-off Technique knitting technique are available in the Knit Explorer under the path of the same name.
You will find these modules under Starts / 1x1 Cast-off Technique:
- Start, 1x1, 1x1 Cast-off Technique
- Start, 1x1, 1x1 Cast-off Technique, Coarse Gauge
- Start, 2x1, 1x1 Cast-off Technique
- Start, 2x1, 1x1 Cast-off Technique, Coarse Gauge
- Start, 2x2, 1x1 Cast-off Technique
- Start, 2x2, 1x1 Cast-off Technique, Coarse Gauge
- Start, Tubular, 1x1 Cast-off Technique
- Start, Tubular, 1x1 Cast-off Technique, Coarse Gauge
Saving the patterns of a pattern project individually.
In the Patterns tool window, you will find the Export Pattern... function in the context menu of a pattern.
- A new pattern project will be created.
- The pattern you clicked will be saved within this pattern project.
- Context menu on the pattern name
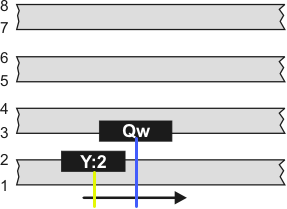
CMS W - New Weft Yarn Carrier Qt
Another type of weft yarn carrier available for the CMS W machines:
|
Up to now |
Qw yarn carrier One weft yarn carrier can be used per system. |
|
|
New |
Qt yarn carrier Up to three weft yarn carriers can be used per system. |
|
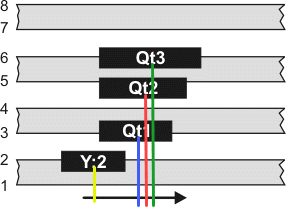
There are three versions of the Qt weft yarn carrier:
- Qt1 – 141 mm (ID 4170 282 857)
- Qt2 – 161 mm (ID 4170 282 858)
- Qt3 – 181 mm (ID 4170 282 859)
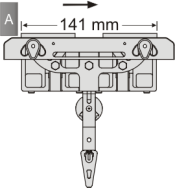
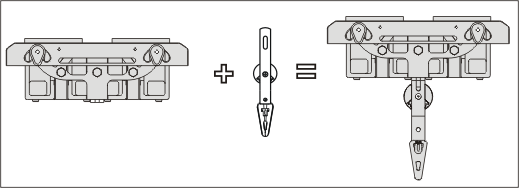
The yarn carrier plunger (A) drives of the yarn carrier carriage at the outside and pushes the yarn carrier ahead.
Advantage:
- No additional system is required for the weft yarn.
- One system only inserts the weft yarn and encloses it.
|
Working with Qt |
One system only inserts the weft yarn and encloses it (S2).
|
|
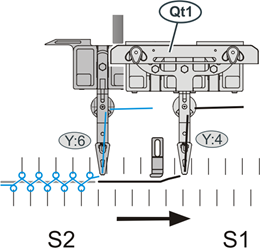
 The yarn carriers must be on different tracks.
Notes:
- Height of the Qt yarn carrier = Height of a normal yarn carrier
- The yarn carrier bow is taken from the corresponding normal yarn carrier.
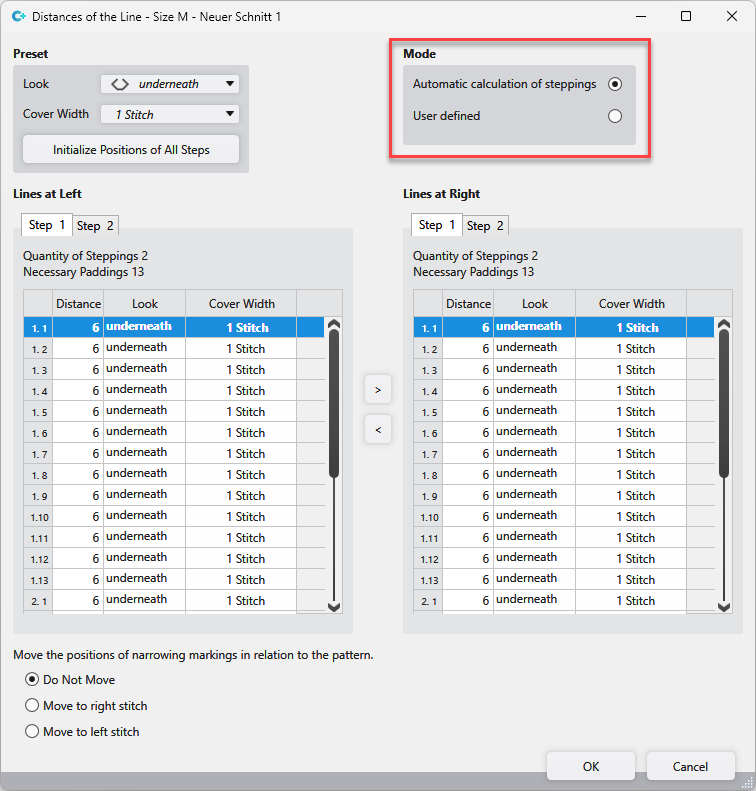
New feature for the Fair Isle stepping kind.
Now you can select the calculation of the steppings in the Distances of the Line tool window:
- Automatic Calculation of Steppings
- - or -
- User Defined
- Multi-step Narrowing
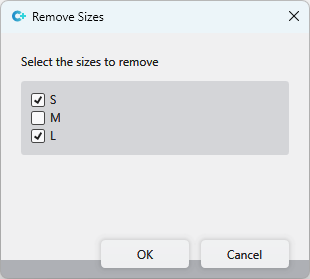
Dimensioned Shape - Deleting Several Sizes at Once
You will find the Delete Sizes... function in the context menu of the status bar of the Dimensioned Shape.
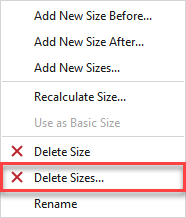
Select the sizes to be removed in the Delete Sizes dialog box.
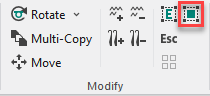
Cancel Selection in the Start Ribbon
You can call-up the  Cancel Selection
function directly in the Modify group of the Home tab.
Cancel Selection
function directly in the Modify group of the Home tab.
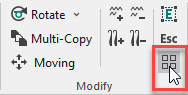
- Modify (Ribbon Group)
New functions of the Find and Replace dialog box
- The cursor attributes will be applied to the Find and the Replace area by calling-up the dialog box.
-
Delete All function at the top right of the dialog box
All data input will be removed from the dialog box. - Find and Replace
Symbols for deleting within the Knitting Element Editor.
The symbols for deleting are all available in the top row of the Knitting Element Editor.
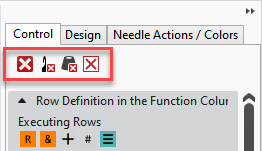

Applies to the following tool windows and tabs:
- Needle Actions
- Raster-Shape Symbols
- Pattern Colors
- Control
- Design
- CA
- Needle Actions
- Raster-Shape Symbols
- Pattern Colors
- Symbols for Knitting Elements
Renaming Multiple Knitting Elements Simultaneously
You can select and rename multiple knitting elements at the same in the Modules, CA, MA and Pattern Elements tool windows.
- 75
- Select the knitting elements.
- 76
- Call up Rename Multiple Items... function of the context menu.
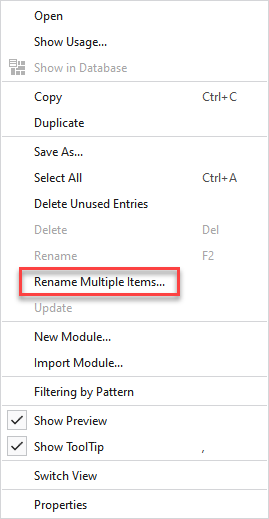
- The Rename Multiple Items dialog box appears.
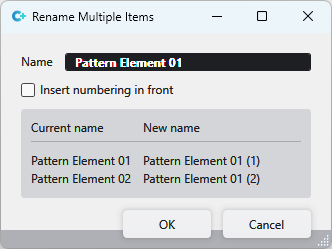
Make the following settings in this dialog box:
|
Name |
Enter the new and common name for the knitting elements. |
|
|
The numbering appears in front of the name. |
|
|
The numbering follows the name. |
|
Display |
The current and the new names of the knitting elements are shown in the lower part of the dialog box. |
- Context menu on the modules
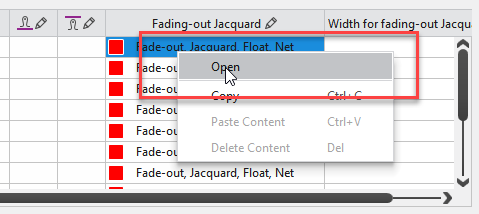
Open a module inserted in a table.
Now you can open modules inserted in a table via the context menu.
Within shape edges for examples:
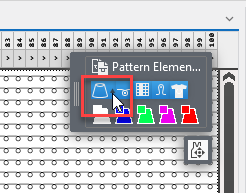
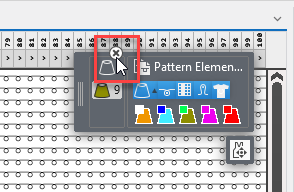
Recolor a multicolored pattern element:
You can change the colors of a multicolored pattern element as desired before you draw with the pattern element.
With selecting the pattern element, an arrow appears next to the pattern color in the cursor attributes.
You can open the presentation of the colors of a pattern element by this arrow.
- 77
- Click a color of the Pattern Colors which you want to insert.
- 78
- Click the color of the pattern element which you want to replace.
- 79
- Repeat this procedure with all colors which you want to replace.
- 80
- Delete the color selected at last from the cursor attributes.
- 81
- Insert the pattern element with the new color combination into the pattern.
New Function: Move Raster Shape Part
You will find the Move Raster Shape Part function under the display of the cursor attributes.
- The function is only available if no shape is positioned on the pattern.
- Click on the Move Raster Shape Part function to select the raster-shape.
- Move the raster-shape to the desired position with the mouse button pressed on the selection.
- Then click Move Raster Shape Part again to cancel the selection.
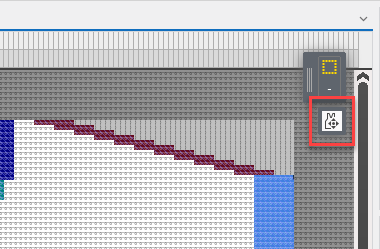
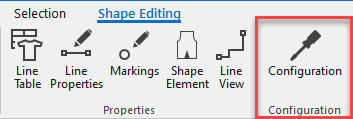
Call-up Shape Configuration Directly
You can open the All Shapes tab of the Configuration dialog box directly in the Shape Editing tab of the lined shape layer.
New Dialog Box for Multiple Processing
You start the joint technical processing and creation of the knitting programs exclusively in Multiple Processing dialog box.
Call up the dialog box in the Home tab next to the Sintral group.

Therefore, the Multiple Processing tab is completely eliminated.
Make the following settings in the Multiple Processing dialog box:
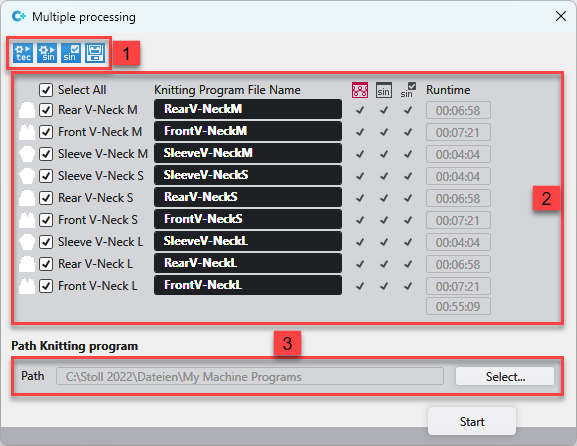
|
1 |
Select the steps of processing you want to be done. You can click only the patterns which are ready for this selection. |
|
2 |
Select the patterns that you want to get processed. You can edit the file name of the knitting programs. The knitting time appears after the Sintral Check at right of the pattern. |
|
3 |
Enter the path where the knitting programs shall be saved. |
Additional tabs of Pattern Parameters .
In connection with the STOLL Template Editor , the following tool windows are integrated into the Pattern Parameters :
- Sintral
- Function call (F:)
- Sintral Instruction / PRINT
- Sintral Functions
- Stitch Density
- Colors
These tool windows are therefore exported together with the Setup Data Template .
- Pattern Parameters
Pattern Parameters and configuration data of a pattern project can be saved as a template, edited and used in a new pattern project.
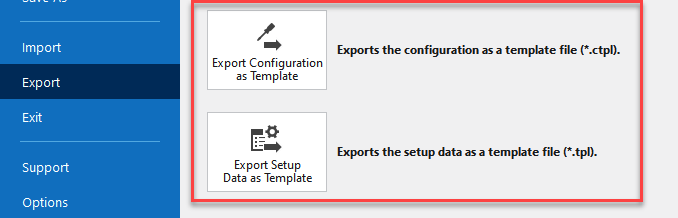
Export
From an existing pattern project, setup data and the configuration can be exported as a template file.
Buttons of the Backstage View / Export :
|
Export Configuration |
Saves the configuration data as a template (*.ctpl).
Default path: |
|
Export Pattern Parameters as Template |
Saves the pattern parameters as a template (*.tpl). |
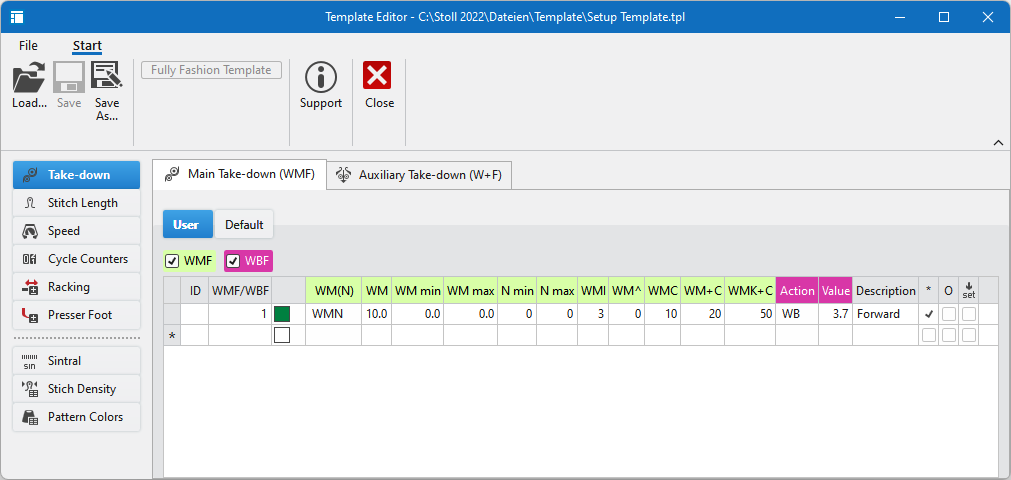
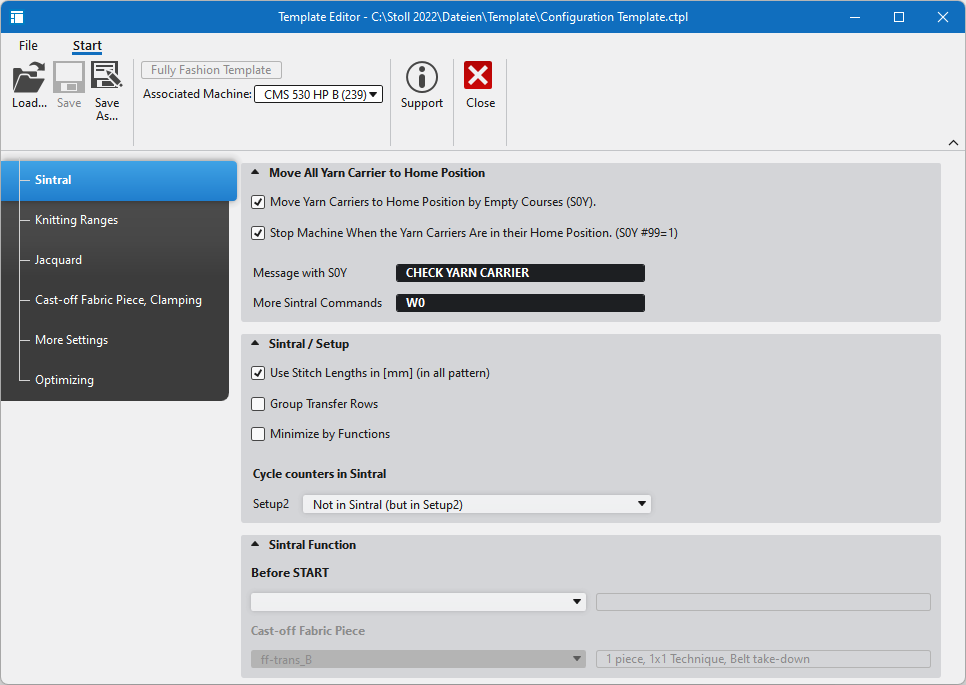
STOLL Template Editor
Open the STOLL Template Editor on the Start Page.
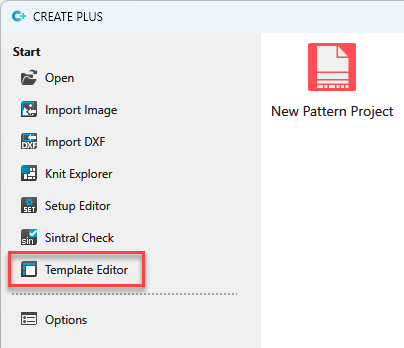
You can load, edit and save template files.
 Only project relevant data will be saved in the setup file.
This affects both the configuration and the setup data.
Use Setup Data Templates for New Projects in a pattern:
- 82
- Open the General section of the Options dialog box via the Backstage View.
- 83
- Load a Fully Fashion Template under Setup Data Templates for New Projects.

- This template will be used by every new pattern project.
- The G ( √ = entry will be saved globally for following projects. ) column is omitted.
Use configuration templates in in a pattern.
You assign configuration templates to your own machines in the Select Machine dialog box.
- The configuration template must be saved in the same folder as your own machine.
Default path:
C:\Users\[username]\AppData\Local\Stoll [CPS|CDESIGN|CLITE]\Machines
- 84
- Create a private machine in the Select Machine dialog box.
- 85
- Open the Machine Properties dialog box via the context menu of this machine.
- 86
- Load the Fully Fashion Template under General of the properties.
- The data of the corresponding configuration template will always be used for this machine then.
Statistics Dialog Box
You will find the statistical evaluations of the settings and the knitting elements of a pattern project in the Statistics dialog box.
You open the dialog box by the context menu.
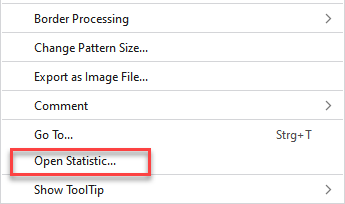
The Statistics dialog box can be opened within the following realms:
- All layers of the pattern editing except the lined shape and the dimensioned shape.
- All knitting elements
Make the following settings in the Statistics dialog box:
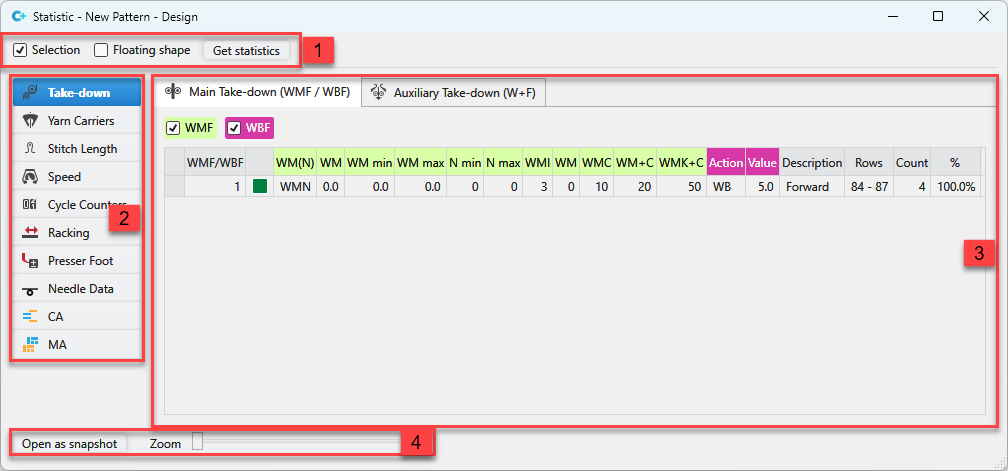
|
1 |
Define the scope and recalculate the statistical data. |
|
2 |
Select the data that is to be displayed. |
|
3 |
Joint display of the entries and the statistical evaluation |
|
4 |
Open a second view and make zoom settings. |
- Statistics