Generate Color Arrangement from Selection
The situation:
A sequence of different knitting rows results from yarn and yarn carrier fields drawn in neighboring. This knitting sequence can lead to undesired results.
You can specify the knitting sequence by arranging the knitting rows strategically.
The Color Arrangement from a selection is a proposal of the M1plus for the knitting sequence. With the selection, at first you determine the range and order of the colors in the Color Arrangement.
Using the control columns in the Color Arrangement, you determine the corresponding parameters of the different actions. The data from the CA control columns will not be overwritten by the M1plus afterwards.
The segments in the processing area will be applied to the pattern in the same way, the colors are present in the processing area from left to right and from bottom to top.
This means: The specifications of a segment can be overwritten by the subsequent segment (positioned at its right).
The Sintral Check checks whether a Color Arrangement can be knitted.
Generate a Color Arrangement from a selection:
- 1
- Create the pattern in the Design Mode.
- 2
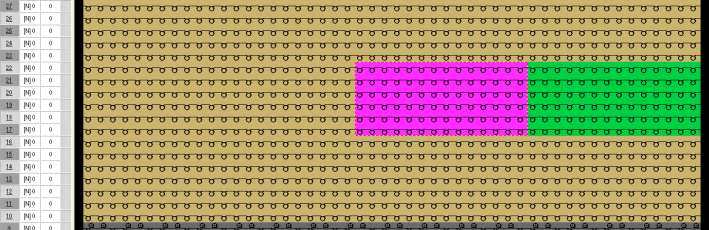
- Draw-in two color fields neighboring.
- 3
- Select the knitting row with all the different yarn and yarn carrier fields.

You can also generate Color Arrangements above row areas that are not contiguous.
- 4
- Click the
 icon in the Default toolbar.
- or -
Call up the / function of the menu. 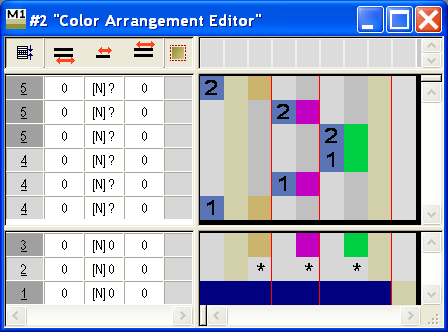
The search colors will be arranged in the search area the same way the colors are present in the selection from left to right and from bottom to top.
Depending on the pattern, it may be useful to select an area or just one individual row with all the desired colors as a basis of the Color Arrangement.
- 5
- Click the
 icon in the Drawing tools toolbar.
 - 6
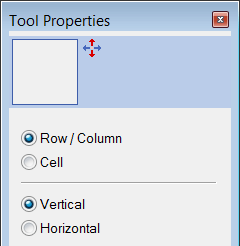
- Activate the options Row in the dialog box.
- 7
- Click on the color segment that is to be moved.
- 8
- Move the cursor to the desired row.
- 9
- Click on the desired row.
- The selected segment will be moved into the clicked row.
- 10
- Repeat moving for all the desired fields.
- 11
- Edit individual segments with the functions from the Color Arrangement toolbar.
- 12
- Insert additional rows with
 from the Color Arrangement toolbar and allocate functions.
 - 13
- Select empty rows and delete with the DEL key.
- 14
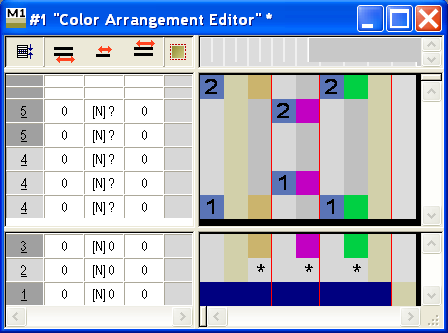
- Group rows in the processing area so that the grouping matches the pattern rows that are to be arranged.
- 15
- Close the Color Arrangement Editor.
Confirm the query with Yes.
- The Color Arrangement will automatically be entered in the control column of the selected pattern area.

The Color Arrangement will be saved with the pattern and can be selected in the tab of the Module toolbar.
For Intarsia areas with Multi Gauge, you specify the binding in the dialog box Yarn Field Allocation, as this is not reliably possible via the Color Arrangement.