Knitting in racking for the 3x3 cable stitch
When knitting in racking, a shorter running time is achieved with a cable stitch pattern by crossing the cable stitch in only one empty row.
To be able to lay a shape onto a cable stitch pattern with knitting in racking, the VJA^0 command must be used. With this command, the jacquard can be constructed in such a way that the selection of the rear needle bed is alongside the front needle bed without racking.
If a row in the control column is assigned the value 0, the data of the rear needle bed is not displayed racked. By this you can place a shape without taking the racking into account.
Cross cables with only one empty row:
You can find the corresponding pattern example in the Ready-to-use Pattern Collection:
pattern M54_F_08.mdv(fully fashion with cables for optimized production)
- 1
- To display the control column in the technical view, right-click a symbol of the control columns and execute the function.
- The Select columns dialog box appears, in which you can select the control column.
- 2
- Select the VJA^0 function via the context menu of the control column.
- VJA will be displayed at the cursor.
- 3
- Allocate the VJA^0 sintral command to all rows of the pattern from the last row of the start to last row.
The VJA^0 sintral command is also allocated to the last row of the start in order to collect the rib correctly even if the racking of the last row of the start is different to the first pattern row.
- 4
- Generate a complete pattern cycle and transition between start and pattern.
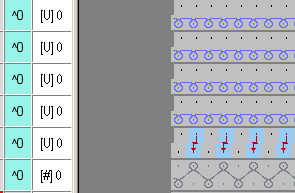
The first four knitting rows are knitted in V0. - 5
- Enter cable stitch cross-over.
The following knitting rows are knitted in the racking position of the last cable stitch racking. - 6
- To get a cable stitch cycle, switch back to racking position V0.
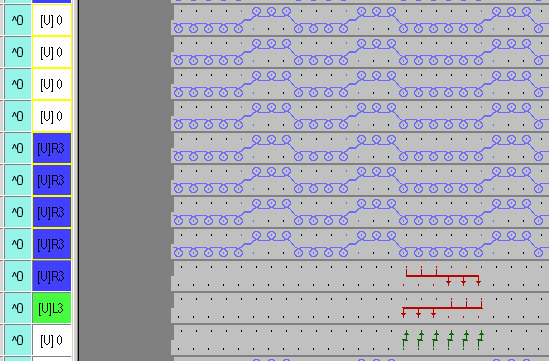
In this example, the cycle consists of four rows with racking R3 and four rows with racking 0.
Select these rows in the racking control column and insert them into the complete pattern via Copy/Paste.
- 7
- Generate module for the cable stitch.
The [V] 0 racking must be kept in the module.
By this you can place the module several times next to each other without adding up the main racking.
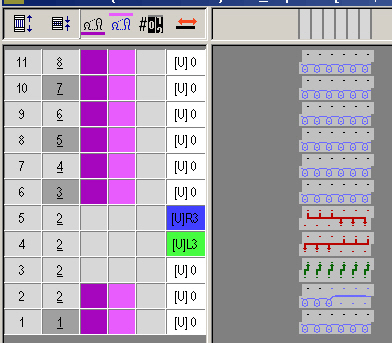
The transfer rows of the cable stitch must be arranged according to the previous pattern rows.
For better production, a yarn carrier is now required on both sides
- 8
- Draw a cable stitch cycle in another color after the first cable stitch cross-over.
- Eight rows of this color alternate with eight rows of the basic color.
- 9
- Draw a module with the setting Apply needle actions in the entire pattern.
- 10
- Fill the ribs with the Back stitch with transfer module.
- 11
- Make settings in configuration dialog box:
- Group yarn fields with a spacing of up to eight rows.
- Transfer surrounding area to the front starting with racking of three needles.
- Select racking priority left or right in the modules so that the right narrowing is entered when laying on the shape.