Create a pattern with multi gauge modules
I. Preparations for generating patterns:
- 1
- Open the required module group MG Binding elements of the Module Explorer of Database under Stoll / multi gauge coarse and make it available.
- or -
Move the module group MG Binding elements to Favorites (tab of theModules toolbar).
II. Make pattern and machine related settings:
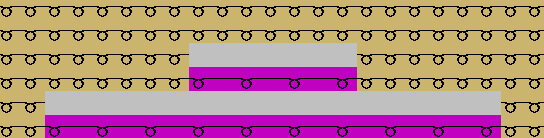
The transition from the coarse to the fine knitting area at the motif end can be carried out in different ways.
- 1
- Make the desired setting in Configuration dialog box under the / tab:
- Pickup coarse Split
 : When selecting the Pick-up split coarse module it is recommended to mount the split cams.
 - Pick-up Stitch Fine
III. Create pattern:
- 1
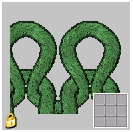
- Draw a multi gauge motif with the modules of the module group multi gauge coarse.
Module | Module for the right edge |
|---|---|
| mg_Edge_Stitch v is contained in this combination module. |
|
|
- 2
- Switch-over to multi gauge
 to select the yarn colors in the Pattern Colors toolbar.
 - 3
- Select yarn colors with the marking
 .
. - 4
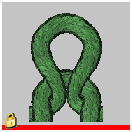
- Create the motif with the drawing tool
 and the MG_Stitch v Compound module.
 - 5
- When using the drawing tool
 and the MG_Stitch v with transfer module, draw in MG_selvedge stitch v at the right motif edge.
With the Multi-Gauge knitting technique, a stitch ratio between coarse and fine of 1:2 stitches results.
If several coarse areas are positioned neighboring, it is recommended to place the MG modules at the same height for production reasons.