Define cycles for different widths (Sizes)
You can create different sizes with different elements for width control.
I. Define pattern cycles for different widths:
Width cycles with machines with comb:
Under start with selection the option has to be selected.
Result: Thereby the starting rows Casting-off and Comb thread will be inserted as a Sintral function.
- 1
- Save existing pattern under a new name and delete the length cycles.
- or -
Generate new pattern. - 2
- Select the columns for the width control in the column bar of the symbol view.
Watch out the following points with width cycles:
- Cycle width of the start:
- 1x1 rib: 2 needles
- 2x1 rib: 3 needles
- 2x2 rib: 4 needles
- Cycle of the draw thread
- Structure of the pattern (Cable / Aran)
The can be activated as a help in the column bar of the symbol view.
- 3
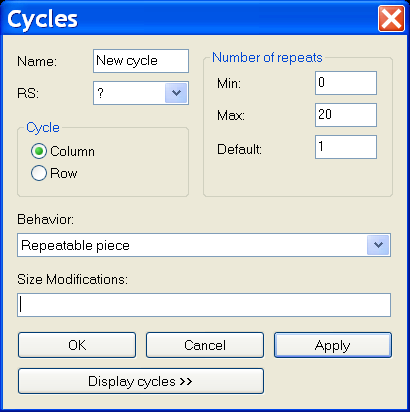
- Open the Cycles dialog box via / .
|
Section: |
Element: |
Function: |
|---|---|---|
|
|
Name |
Name cycle |
|
RS |
Used cycle counter | |
|
Cycle | ||
|
|
Column: |
Width cycle |
|
Row: |
Length cycle | |
|
Number of repeats | ||
|
|
Min: |
Use for the specified size |
|
Max: |
Use for the specified size | |
|
Default |
Repetition factor | |
|
Behavior | ||
|
Entry in the selection list |
Repeatable piece |
Pattern area with the possibility of repeats Multiple use with repetition factor |
|
Middle piece |
Center of motif Will be used only once. | |
|
Connecting part |
Left / right fabric selvedge Each will be used only once. | |
- 4
- Enter the designation of the cycle under .
- 5
- Allocate a cycle counter or a counter under .
If you do not enter anything in the RS field, the setting from the Configuration dialog box will be automatically used. (Default RS16)
The option under is preset by the selected columns.
- 6
- Set the column type under behavior:
- Repeatable piece
- Middle piece
- Connecting part
- 7
- Enter under
- the smallest size (number) for which the defined part is defined at .
- the biggest size (number) for which the defined part is defined at .
- the repetition factor for the repeatable part type at .
- 8
- Confirm the settings with Apply.
- 9
- Call up the context menu in the column bar and activate .
- The inserted cycles are displayed colored in the column bar.

- 10
- Open cycle table via Display cycles >> if necessary.
- The inserted column cycles are listed.
- 11
- Change the specifications in the cycle table by clicking, if necessary.
- or -
Call-up the context menu to carry out changes in the cycle table.
II. Different possibilities for width control:
|
Color Presentation |
Short Name |
Function |
Possibilities for use |
|---|---|---|---|
|
|
AT |
Connecting part |
Without repetition factor |
|
|
WT |
Repeatable piece |
With / without repetition factor |
|
|
MT |
Middle piece |
With / without size correction switch |


|
Possible sequence of the parts | |
|---|---|
|
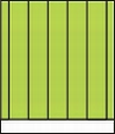
Only WT |
|
|
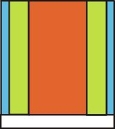
AT / WT / MT / WT / AT |
|
|
AT / MT / AT |
|
|
AT / WT / different T / WT / AT |
|
|
Possibilities |
CMSWith Comb ( FF-Mode ) |
CMSWithout Comb ( no FF - Mode ) |
|---|---|---|
|
AT / WT / AT |
Not possible |
Not possible |
|
WT / MT / WT |
possible |
possible |
|
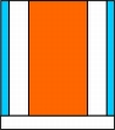
AT / MT / AT |
possible |
possible |
|
Only MT |
possible |
possible |
|
Only AT |
Not possible |
Not possible |
|
AT / WT / MT / WT / AT |
possible |
possible |
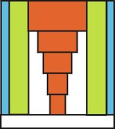
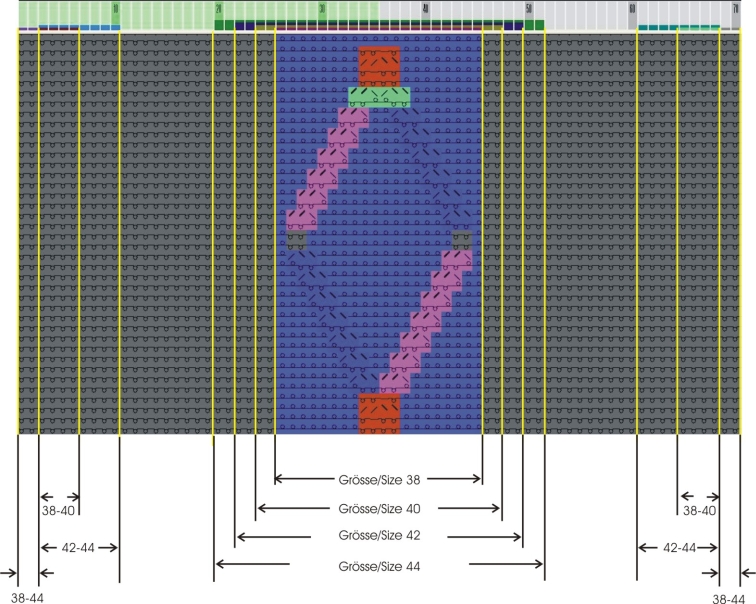
III. Example for different knitting sizes (= Size table)
- Connecting parts for the left and the right edge
- Different Repeatable parts for the width adaption
- Different Center parts for the motif center
|
Generating connecting parts | ||
|---|---|---|
|
Edges at the left and right for the sizes 38-44 | ||
|
Name: |
Edge left |
Edge right |
|
RS: |
16 |
16 |
|
Behavior: |
Connecting part | |
|
Min.: |
38 |
38 |
|
Max: |
44 |
44 |
|
Generating left repeatable parts | ||
|---|---|---|
|
Different repeatable parts at left for sizes 38 - 44 | ||
|
|
Size 38 + 40 |
Size 42 + 44 |
|
Name: |
Width regulation left | |
|
RS: |
16 |
16 |
|
Behavior: |
Repeatable piece | |
|
Min: |
38 |
42 |
|
Max: |
40 |
44 |
|
Standard: |
2 |
3 |
|
Create different repeatable parts for the right accordingly | ||
|
Generating center part | ||||
|---|---|---|---|---|
|
Different center parts for sizes 38 - 44 | ||||
|
Name: |
Size 38 |
Size 40 |
Size 42 |
Size 44 |
|
RS: |
16 |
16 |
16 |
16 |
|
Behavior: |
Middle piece | |||
|
Min: |
38 |
40 |
42 |
44 |
|
Max: |
38 |
40 |
42 |
44 |