Step 2: Loading and Adjusting Shapes in the ShapeWizard
Upload shape parts to the ShapeWizard
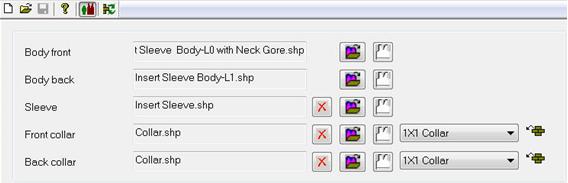
Combine the shape parts front, back, sleeve and collar in the ShapeWizard to a k&w file.
- 1
- Run the ShapeWizard via the / menu.
- 2
- Upload the corresponding shape parts using the browser key
 .
.
- The Open dialog box appears in order to select a shape file.
- 3
- Select and upload shape.
- 4
- Via the
 selection menu specify the 1x1 Collar knitting mode front/back.
- The currently loaded shapes are displayed in the dialog windows.
With sleeve and collar the loaded shapes can be removed again with the  button.
In order to correct loaded shapes call-up the Shape editor with the  button.
Settings in the ShapeWizard
- 1
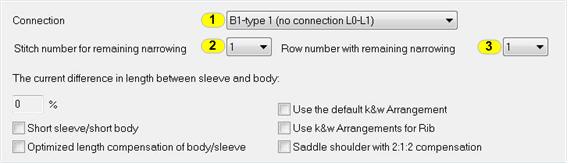
- Carry out the settings for the corresponding shapes in the ShapeWizard.
- Docking points are calculated.
- k&w arrangements are loaded.
|
|
Function |
Setting |
|
1 |
Connection |
B1 – Type1 (no connection L0-L1) |
|
2 |
Stitch number for remaining narrowing |
1 |
|
3 |
Row number with remaining narrowing |
1 |
To the next step 3: Set docking points