Creating patterns controlling the cast-off function via RS17
Create a new pattern:
- 1
- Select / from the menu bar.
- or -
Click .
. - 2
- Enter a Pattern name.
- 3
- Select the machine type and the desired setup type.
- 4
- Select Basic pattern (pattern without shape) and .
- 5
- Set pattern size and select the Front stitch with transfer basic knitting mode.
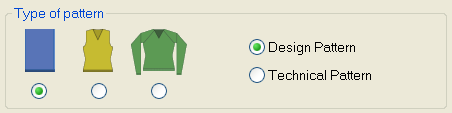
- 6
- Select start considering the cast-off function via RS17:
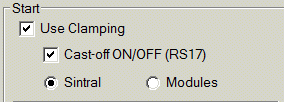
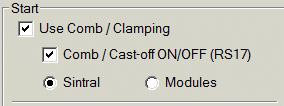
- Use Clamping
- Cast-off ON/OFF (RS17)
- Sintral
|
Machine with comb |
Machine with belt take-down | |
|---|---|---|
|
|
| |
|
|
The clamps are deactivated, i.e. the yarn carriers can not be brought into the clamp.
| |
|
|
Machine works with clamping and cutting.
| |
|
|
Each piece is cast-off as no control is performed via RS17. All yarn carriers must be in the clamp at the end of the fabric. | |
|
|
Cast-off can be controlled with the RS17. (Cast-off ON: RS17=0 /Cast-off OFF RS17=1) With the help of a Sintral instruction the piece counter is queried and with ST= 0 the RS17 is set to 0. This way all yarn carriers will be clamped and the fabric will be cast-off. | |
|
|
With a Sintral function, the start width of the new fabric piece is enabled through widening or casting-off. This selection is necessary with fully fashioned fabric. In case of fabric without shape this selection is also possible. | |
|
|
Only to be used with constant fabric width.
| |
 Use Clamping:
 Sintral:
 : The side selection of the comb thread and the draw thread can be freely selected in the yarn field.
- 7
- Select the start from Stoll with protection yarn / Standard / 1 System / without elastic thread / Transition loose row / Tubular.
- 8
- Confirm the settings with Generate Design Pattern.
- The Symbol view [Basic] will be opened.
Settings in Configuration:
- 1
- In the menu call up the Configuration dialog box.
- 2
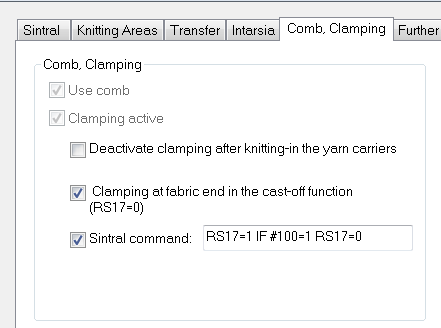
- Open the Comb, Clamping tab.
- 3
- Under the Comb, Clamping section, the following functions are automatically selected, if Cast-off ON/OFF (RS17) was selected with the start.
|
|
If RS17=0, all yarn carriers are clamped at the fabric end before casting-off the fabric. If RS17=1, the clamping of the yarn carriers is skipped. |
|
|
Via the Sintral command RS17=1 IF #100=1 RS17=0 casting-off is coupled to the piece counter. |
- 4
- In case of machines with belt take-down, knitting-in Float and Lock_B [8-8] is automatically adjusted for CMS530 HP B.
In the example, however, is used only clamping and cutting on the right side. Therefore, Float and Lock_B [0-8] was adjusted.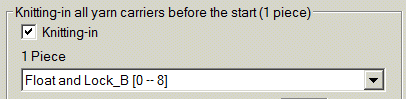
- 5
- Confirm the settings with the OK button.
Call up Sintral function table:
- 1
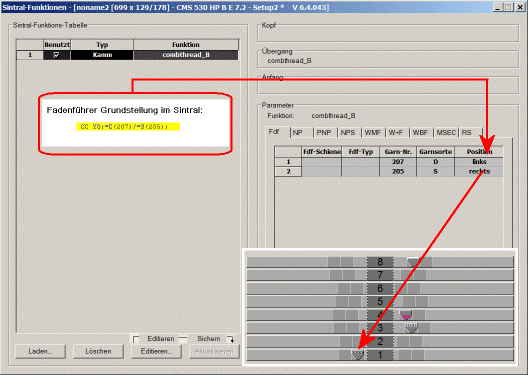
- The default Sintral function is automatically used for the CMS530HP_B: combthread_B.sin. With this Sintral function, the yarn carrier home position for the draw thread is on the left on track 1 and for picking-up after pressing-off on the right on track 8
Call up and allocation of Sintral functions:
- 2
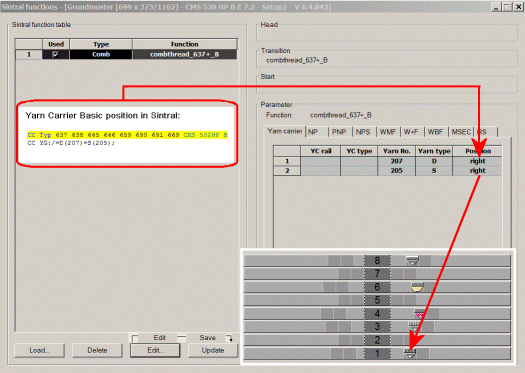
- For all the following example patterns, the Sintral of a CMS502HP_B was used, where the draw thread is also on the right.
Please, delete the Sintral function combtread_B.sin and load the Sintral function combthread_637_B.sin: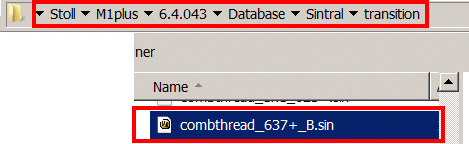
Modify the Stoll start:
- 1
- Modify the inserted Stoll start.
- 2
- Via the / menu open the the Start directory.
- 3
- Open the Tubular technical container module double clicking.
- 4
- Open the Tub_1sys_without_E and delete all the knitting rows after the net row.
- 5
- Open the Tub_1sys_LR element and delete the knitting rows with rear stitch.
- 6
- Save the elements and replace the start.
Drawing the pattern:
- 1
- Create the basic pattern with the predefined basic module and knitting sequence.
|
Basic module: |
|
The basic pattern is filled completely with this module. |
|
Knitting sequence pattern (CA) |
|
The knitting sequence is entered as CA over the entire pattern height |
|
|
|
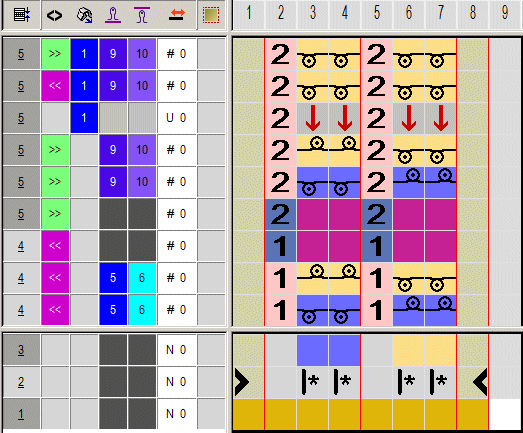
In the CA, the reference rows (blue) have no needle action. The module from the basic pattern is inserted. |
|
Knitting sequence pattern end (CA) |
|
The last two rows of the pattern are overwritten with this CA. It enables secure transferring for the protection rows. |
|
|
|
|
|
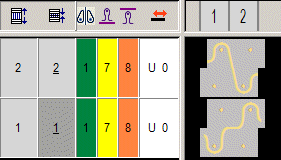
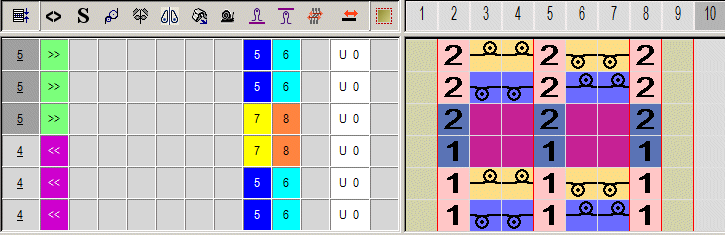
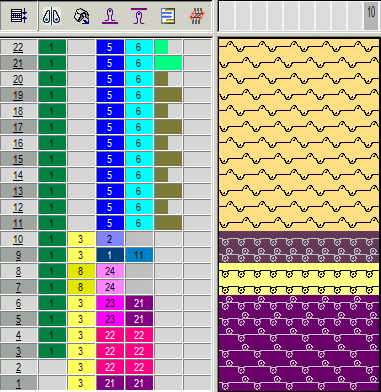
Example basic pattern |
|
Drawing with basic module |
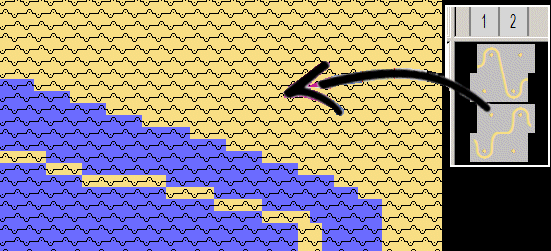
|
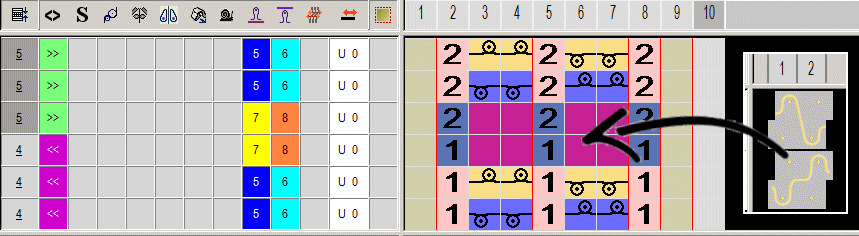
Processed Pattern |
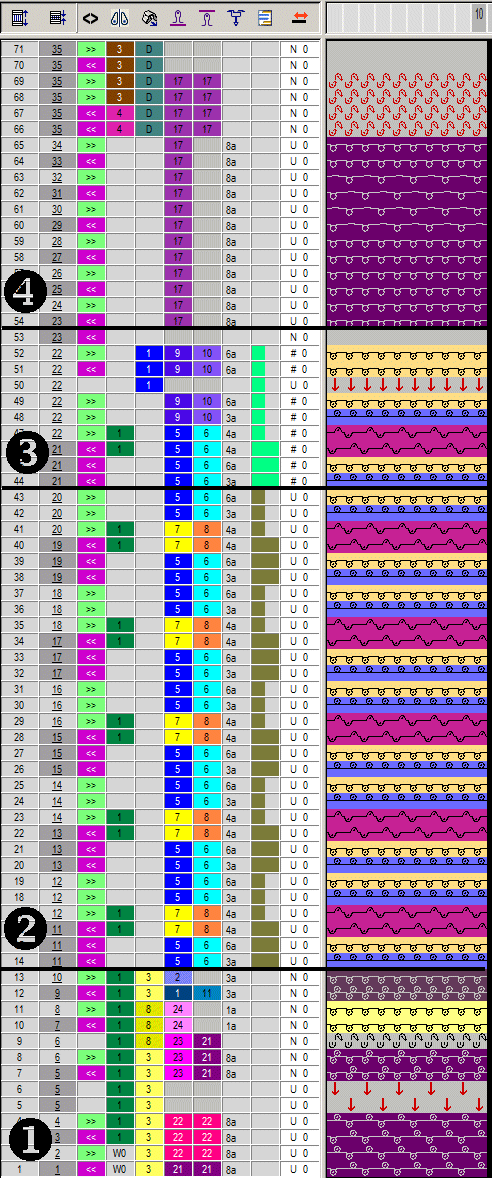
|
(1
(2)
(3)
(4)
|
- 2
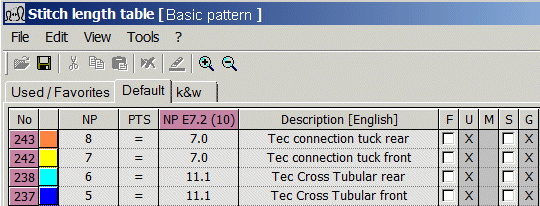
- Check settings for stitch length
There are private NP values for Tech Knits patterns:
- 3
- Check settings for fabric take-down.
For a machine with belt take-down with the E7.2 gauge, the take-down value WB=3-0 is sufficient. A higher take-down value can damage the belt permanently.
Complete the pattern:
- 1
- Switch to the tab and under activate
 Use yarn color.
 - 2
- In the edit box beside it enter the color number of the protection yarn # 205.
The protection rows at the end of the fabric piece are knitted with protection yarn (residual yarn). - 3
- [not necessary, only if changes are needed after cutting-out shape] In the Steps of Processing
 toolbar call up the .
 - 4
- [not necessary, only if changes are needed after expanding] Expand the pattern with the
 button of the Steps of Processing toolbar.
 - 5
- Start the technical processing with the
 icon.
icon.
- The query appears.
- 6
- Confirm the query with OK.
- 7
- Call-up Sintral Check via the menu.
- or -
Click in the Steps of Processing toolbar.