Create shape: Cardigan with inserted sleeve
I. Generate a front and back in the Shape Editor:
For the shape of a cardigan, the elements opening and gore have to be inserted in the Front shape element.
- 1
- Open the Shape editor via /.
- 2
- Select a k&w... entry under .

- 3
- Set to Stitches.
- 4
- Activate
 under .
 - 5
- Specify starting width.
- 6
- Open the table with Left Lines and enter the values for the front and the back.
II. Variants for working out the shoulder:
- Gored shoulder with binding-off
Front / Back
- 1
- Allocate the necessary settings to the shape edges.
- 2
- Allocate the gore cycle to the shoulder edge (No. 8) under in the tab.
- 3
- Specify the type of binding-off in the tab.
The shoulder will be done in gore technique and then knit-off and bound-off.
- 4
- Select the module of the desired type of binding-off in the directory
|
Standard binding-off |
Simultaneous shoulder binding-off |
Function |
|---|---|---|
|
Shoulder standard 01 |
Shoulder simultaneous 01 |
Narrow shoulder seam |
|
Shoulder standard 02 |
Shoulder simultaneous 02 |
Wide shoulder seam |
Create the shape for the back following the same procedure and make the same settings.
- Narrowed shoulder
Front / Back
- 5
- Allocate the necessary settings to the shape edges.
- 6
- Allocate narrowing for the shoulder edge (No. 8) under in the tab.
- 7
- Set the narrowing type Shoulder in the tab under .
- 8
- Also activate the checkbox in the tab.
Create the shape for the back following the same procedure and make the same settings.
However, the checkbox needs not be activated.
III. Generate the neck gore element in the Shape editor:
- 1
- Open the shape Inserted sleeve cardigan front.
- 2
- Generate a new element in the Shape Editor via
 .
. - 3
- Select the Gore entry in the section list.
- 4
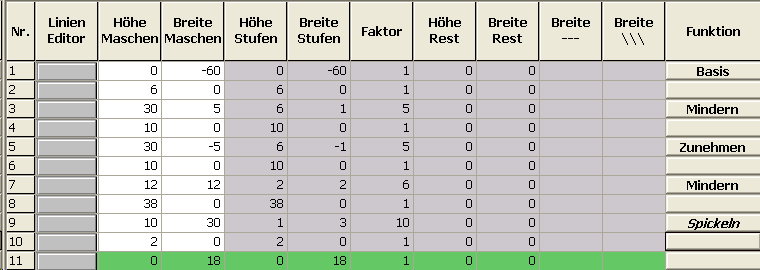
- Specify the values for the neck gore under Left Lines.
Gore in front element

- 5
- Specify the (2 at minimum) for the gore element.
IV. Insert Opening element in the front:
The cardigan shape is not knitted continuously in the front.
- 1
- Create a new element for the opening of the cardigan in the front with .
- 2
- Select the Opening entry in the section list.
- 3
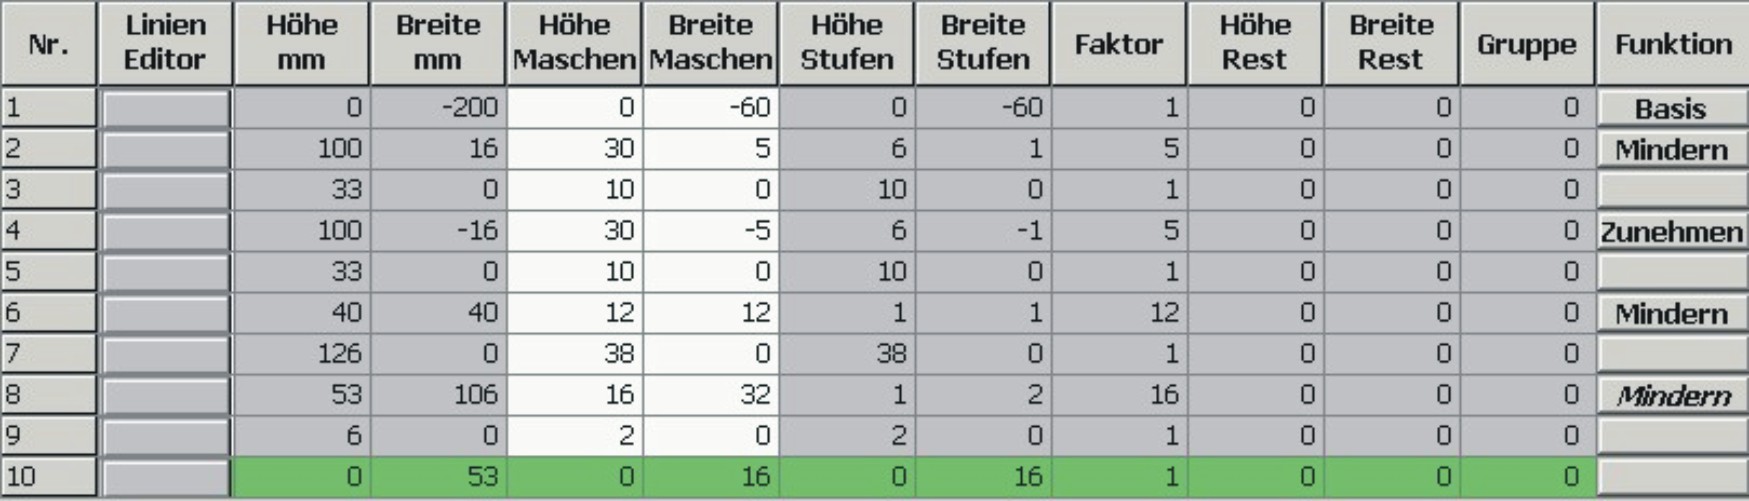
- Insert a new line and specify the height for the opening under Left Lines.
The height of the opening corresponds to the total height of the front piece.
Opening element

Further settings are not necessary for the opening element.
- 4
- Save shape.
V. Generate the shape element for the sleeve in the Shape Editor:
With the shape with inserted sleeve the remaining stitches will be connected to the body by Remaining Narrowing (Narrowing without knitting).
Sleeve element
- 1
- Assign Narrowing to the end line under in the tab.
- 2
- Select in the selection list under of the Narrowing tab .
The checkbox will be activated automatically.
- 3
- In the tab activate k&w Remaining Narrowing (SLEEVE-END).
- 4
- Specify the desired number of stitches in the input field of the tab.
- The specified number of stitches will be bind-off together with the shoulder.
- No specification:
All the stitches will be narrowed during the remaining narrowing. A small hole results at the transition. - Specification:
The specified number of stitches will not be narrowed during the remaining narrowing.
No hole results at the transition.
- 5
- Confirm entry with OK.
- The sleeve element is saved.
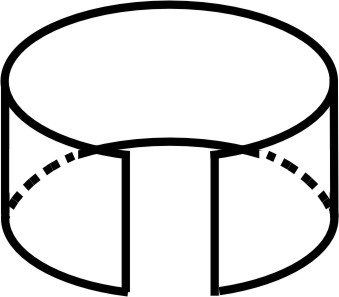
VI. Generate the element for the collar in the Shape Editor:
The cardigan shape requires a collar element with opening.
Collar with opening
- 1
- Open the shape editor via / .
- 2
- Select the k&w collar entry in the selection menu under .
- 3
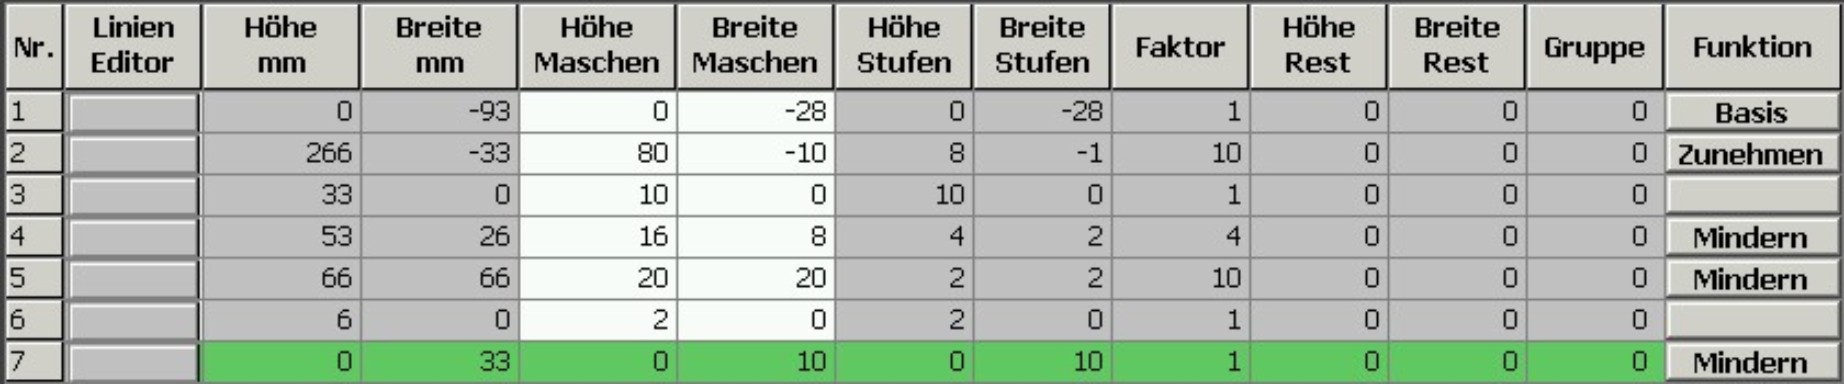
- Specify the information for the collar under Left Lines.
Collar front and back basic element

- 4
- Set bind-off for the end line under in the tab.
- 5
- Select under directory in the tab.
- 6
- Set Fast cut-out for the binding-off type Neckline open L0 under .
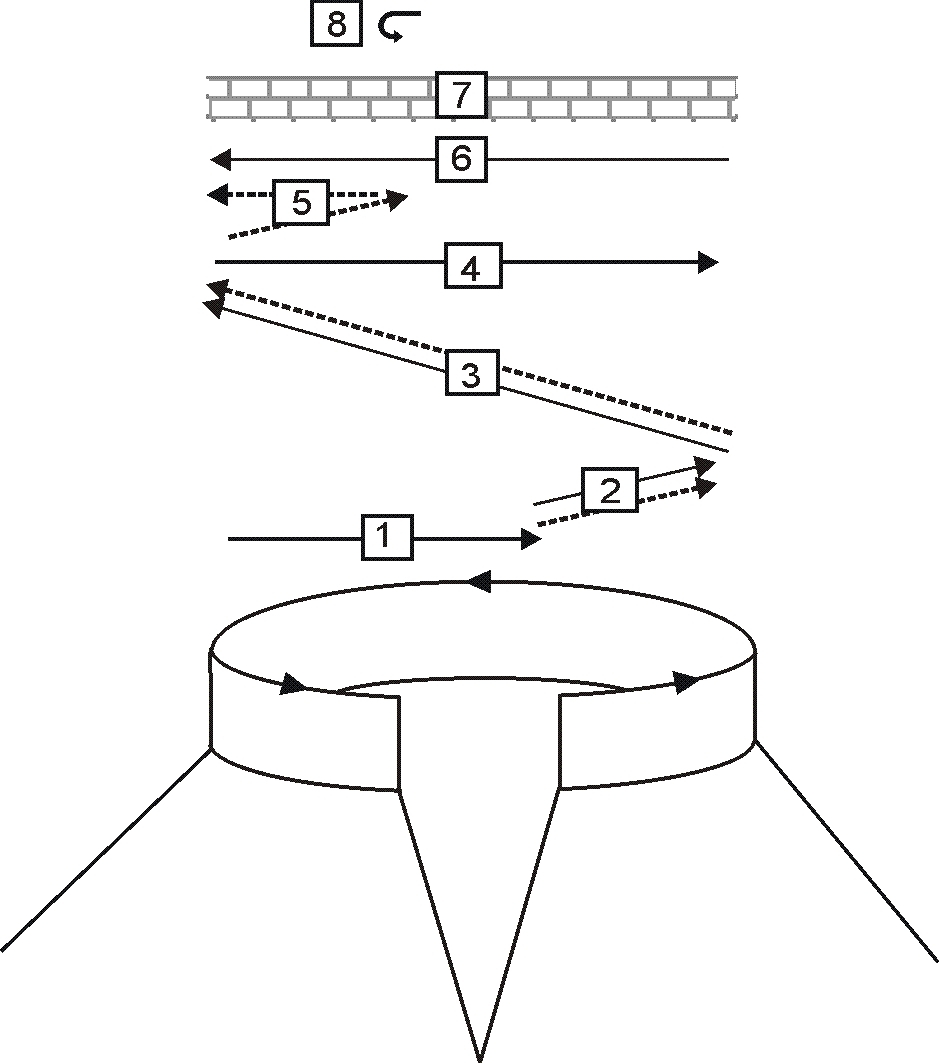
Binding-off cycle for the polo collar (Neckline open L0)
|
|
Description |
|---|---|
|
1 |
Knit in draw thread layer 0 (front). |
|
2 |
Bind off layer 0 the draw thread is carried along. |
|
3 |
Bind-off layer 1 (back) the draw thread is carried along. |
|
4 |
Knit draw thread to the right. |
|
5 |
Bind off layer 0. |
|
6 |
Knit draw thread to the left. |
|
7 |
Protection rows. |
|
8 |
Fix the bind-off stitch. |
Generate a shape for the back collar with the same specifications as for the front without the opening element.
VII. Insert Opening element in the front of the collar:
- 1
- Create a new element under Elements with the key.
- 2
- Set the Opening entry in the section list.
- 3
- Specify the height (= height of collar) for the opening under Left lines.
- 4
- Save shape.