Space the Suspending Rows Newly
Space the length compensation in the body manually:
- The Cut-out shape processing step
 has to be loaded.
- 1
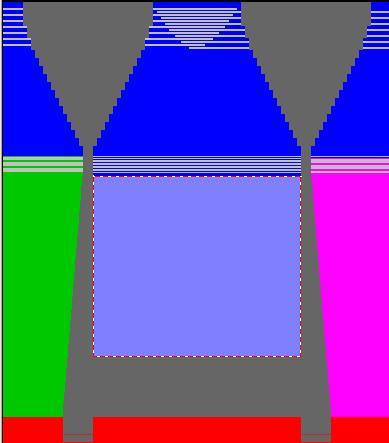
- Select the body in width and height from the first row after the start upto the last row with suspending in the Symbol View [Basic with shape].
The selection must not contain Outside Shape.
- 2
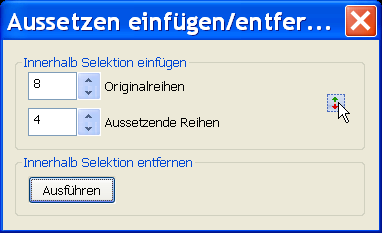
- Call up the Insert/Delete Suspension dialog box with
 .
. 
- 3
- Press the Run key.
- The Suspension inserted when calculating the CA will be removed.
- 4
- Enter new values under :
- Original Rows = Number of rows to be knitted
- Suspending rows = Number of rows without knitting
|
Example: | |
|---|---|
|
Original Rows: |
8 |
|
Suspending Rows: |
4 |
- 5
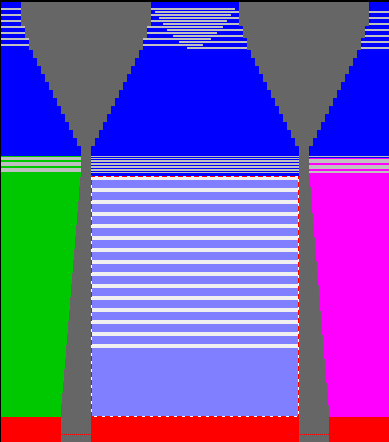
- Pick up the selection at the first row after the suspending area with the left mouse button and drag it open downward.

The meaning of the different cursor presentations:
|
Cursor |
Meaning |
|---|---|
|
|
Drag open in both directions is not possible |
|
|
Drag open upward |
|
|
Drag open downward |


Result:
- 6
- Close the Insert/Delete suspension dialog box with X.
- 7
- Re-allocate the CA to the new suspending area in the
 control column.
- The modifications are saved in the
 state of pattern.