Shapewizard: Determine docking points and k&w Arrangements
I. Open the dialog to define docking points:
- 1
- Open the Shape View and the Docking Points dialog box with
 in the toolbar of the Shapewizard.
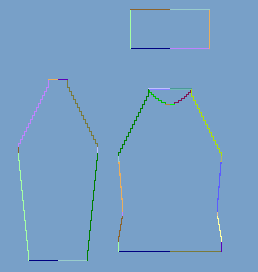
II. Define the docking point for sleeve-body:

Press the Ctrl key while specifying the docking points, in order to jump with the cursor automatically to the nearest edge start or edge end.
- 1
- Click in the pattern with the left mouse button and hold it.
- 2
- Move the cursor in the element to be connected and specify the end position of the connection, then release the left mouse button.
- 3
- Change the position by a manual entry in the Docking Points dialog box in order to correct a docking point.
- or -
Press to delete a connection.
III. Define the docking point for the collar:
- 1
- Define the Collar docking points in the Docking Points dialog box.
- Always set the connecting line on the left collar side.
- The same position is automatically applied for the right side.
- If the collar is to be positioned asymmetrically, then you can overwrite the positions.
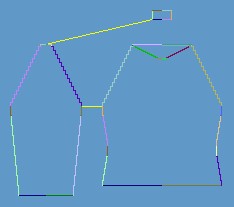
IV. Generate k&w shape:
- 1
- Press the Determine k&w Arrangements button.
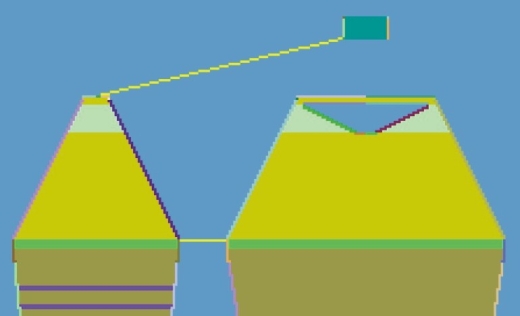
The determined k&w Arrangements are represented color coded in the grafical Shape Display.
- 2
- Save the shape as kaw file via the / menu.
The elements of the shape (front, back, and sleeve) and the kaw file must all be located in the same directory.
- 3
- Exit the Shapewizard.