Create the shape in the M1plus Shape Editor
I. Generate your own shape:
- 1
- Call up the / menu.
- The Shape Editor appears.
- 2
- Open and change an existing shape via the / menu.
- or -
Create a new shape by .
.
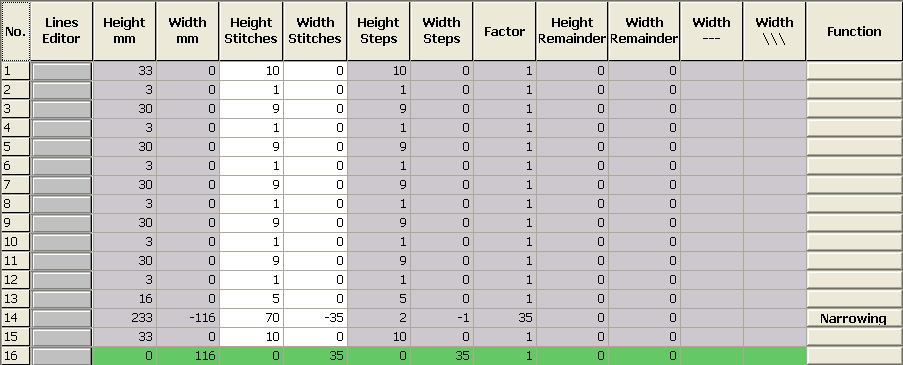
Front element:

Settings in the table for the front: | ||||
|---|---|---|---|---|
Line of the edge | General tab | Narrowing tab | Widening tab | Binding-off tab |
No. 2 | Narrowing | L-R separate transfer |
|
|
No. 5 | Widening |
| Closing stitch |
|
No. 4 | Widening |
| Closing stitch |
|
No. 2 | Binding-off |
|
| BO-SJ-01 |
- 3
- Generate the V-neck shape element mirrored.
Neck element:
- 4
- Deactivate the
 checkbox.
 - 5
- Display the tables of the left and right shape halves with
 and
and  .
.
The button loop attribute is allocated to the left shape edge. No fade-out is necessary at the right edge.
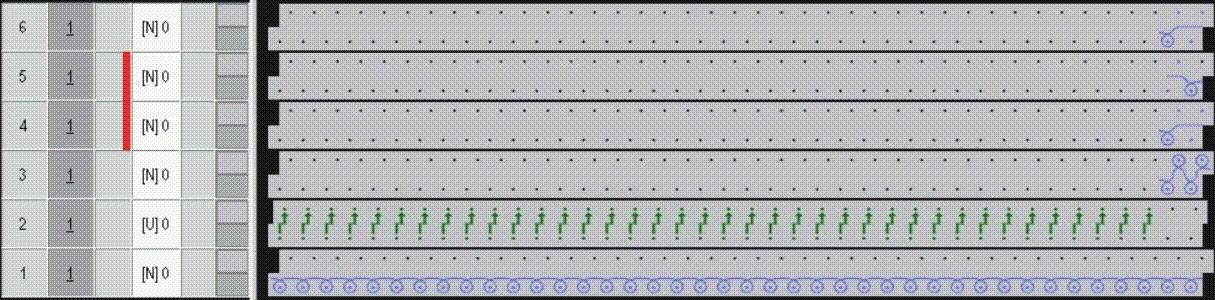
II. Generate a fade-out module for button loops:
- 1
- Generate a fade-out module for the loops.
- 2
- Allocate the fade-out module to the edge lines 2, 4, 6, 8, 10 and 12 of the left edge only.
Module for button loop at the left shape edge
- 3
- Enter a cycle for length control of the loops into the module.
- or -
Enter cycles for length control of the loops in the technical view after expanding.
- This way, different cycles can be allocated to the loops.
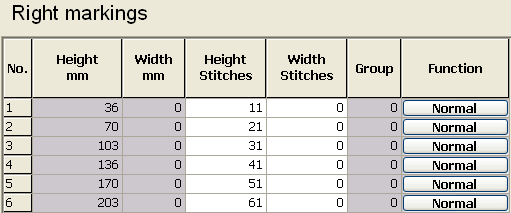
III. Generate a fade-out module for button markings:
- 1
- Create a table for the button marking at the right edge under
 .
.
Marks for the buttons at the right edge
- 2
- Generate a module for the button marking.

- 3
- Allocate the generated marking module to the edge lines in the table under Normal.
If the module for the markings shall be selectable in the shape editor, then it must exist in the Module Explorer of Database under Stoll / Technique / Shape markings.
- 4
- Determine the distance between the neck opening and the button marking.
- 5
- In the element neck opening under x-distance to... center axis specify the distance between the button marking and the edge.
- 6
- Save the shape with the settings for Fading-out and Markings.