Loading and Positioning the Shapes
I. Open shape parts and position them on the basic pattern:
- 1
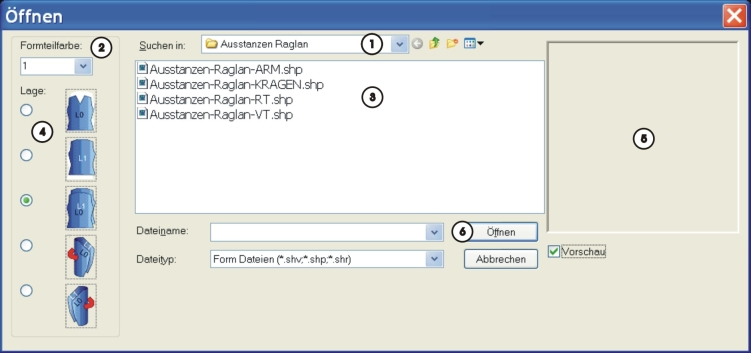
- Call up the dialog box via the / Open and Position Shape (Stamp out)... menu.
- The Open dialog box will be displayed.
|
No. |
Function | |
|---|---|---|
|
1 |
Select the path of the folder (directory) with the shape parts | |
|
2 |
Selection list with the shape part colors for defining the shape part when loading Use of the shape part color (Stoll default):
| |
|
3 |
List of the shape parts of the selected folder (directory) for selecting the element to be opened | |
|
4 |
The shape part selected in the list will be allocated to the activated layer
Result: | |
|
|
Position the shape part (one-layer element) on L0 Example: Front of the body | |
|
|
Position the shape part (one-layer element) on L1 Example: Back of the body | |
|
|
Position the shape part on L0 and L1.
| |
|
|
Position the shape part (two-layer element) on L0 + L1 Example: Left sleeve | |
|
|
Position the shape part (two-layer element) on L0 + L1 Example: Right sleeve | |
|
5 |
|
Preview of the selected shape part |
|
|
No preview | |
|
6 |
Open and position the selected shape part with the given specifications | |


 :
:


By default, the shape parts are positioned always from left to right on the basic pattern.
Therefore it is useful to load the elements in the sleeve-body-sleeve order.
When positioning the first shape part, the basic pattern becomes Outside Shape.
- 2
- Select the first shape part in the list.
Example: Left sleeve - 3
- Check the shape part color and change it if necessary.
- 4
- Check layer allocation and adapt if necessary.
- 5
- Click Open.
- The selected shape part is positioned in the allocated shape part color on the specified layer of the basic pattern.
Open all the other shape parts following the same procedure.
Result:
 not active
 active

II. Move the shape parts:
- The symbols
 and/or are active.
- 1
- Select the
 icon in the Drawing Tools toolbar.
 - 2
- Select the body shape part with LMB and position it in the height according to the sleeves (sleeve-body connection).
- 3
- Select the right sleeve shape part
- 4
- Enter 24 in the Tool Properties dialog box and select both layers.
- 5
- Move it to the right with the arrow button.
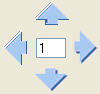
- The shape part is shifted to the right by 24 columns.
- 6
- Select the Body shape part.
- 7
- Enter 12 in the Tool Properties toolbar.
- 8
- Move it to the right with the arrow button.
- The shape part is shifted to the right by 12 columns.
The distance between the sleeve-body-sleeve shape parts is 12 columns each.
This corresponds to a racking by 24 needles.
The distance is gauge-dependent.
- 9
- Select the Collar shape part and position the element at the end of the Body element in the center using the LMB.
- The Collar shape part is positioned centered on the body.