Editing in the Symbol View [Basic] Step by Step
Modify the measures and shape of the shape parts within and outside the shape:
- 1
- Insert rows for goring in all shape parts after the sleeve-body connection
- 2
- Modify the stepping of the narrowing edges in the body shape part.
Height: 4
Width: 4 - 3
- Adjust the height of the sleeve to the narrowing edge of the body.
- 4
- Modify the widening edges of the sleeves.
- 5
- Enlarge the body element by drawing with shape part color 1.

- The element for gore and collar is inserted.

- 6
- Specify the narrowing edges of the enlarged body shape part:
Height: 2
Width: 2 - 7
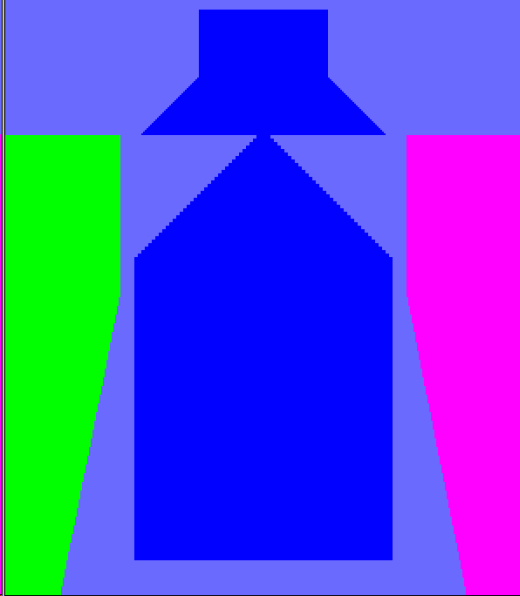
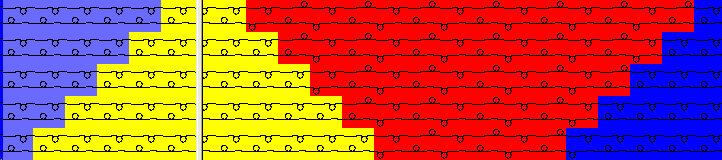
- Fill the three shape parts with the corresponding yarn carrier color:
Shape part 1: Yarn carrier color #79 – Yarn carrier 5 right
Shape part 2: Yarn carrier color #75 – Yarn carrier 6 right
Shape part 3: Yarn carrier color #82 – Yarn carrier 4 left
- Result:
Draw in goring and 1x1 rib:
- 1
- Draw in the gore on L0 of Body and Sleeves with yarn color #10 and the
 icon.
icon.
The gore starts after the connection of sleeve and body. 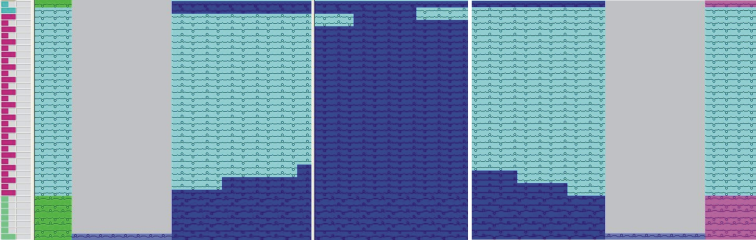
- 2
- Draw in the yarn carrier color #79 at the end of the gore over two rows (= one complete tour).
- Yarn carrier 5 stands at the end of the gore at the outer edge of the right sleeve.
- 3
- Draw in yarn color #10 into the body element from the end of the gore to the end of the sleeves.
- 4
- Draw in the 1x1 rib structure into the body and the gore on L0.
The 1x1 rib structure of the body have to match the 1x1 rib of the Stoll k&w Start.
- 5
- Draw in the aligning symbol up to the end of the sleeve with the
 drawing tool:
 between left sleeve and body
 between body and right sleeve
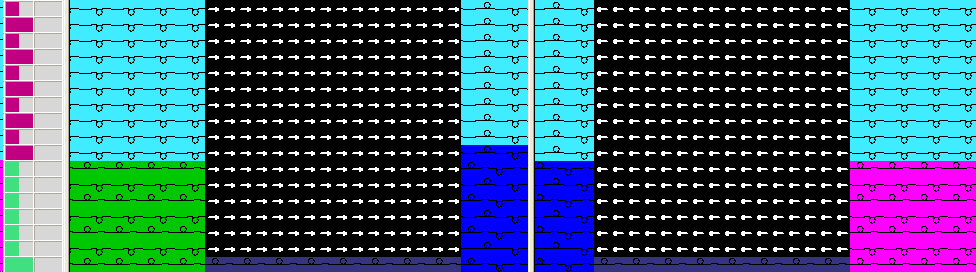
- 6
- Draw in the length compensation between sleeve and body with the
 drawing tool:
Specify the number of suspending rows
Specify the number of original rows
The height of both areas (suspending and original rows) must be devisable by the number of rows of the Color Arrangement.
- 7
- Draw into the Left sleeve and Right sleeve shape part the
 narrowing symbol over the total width of the sleeve.
- 8
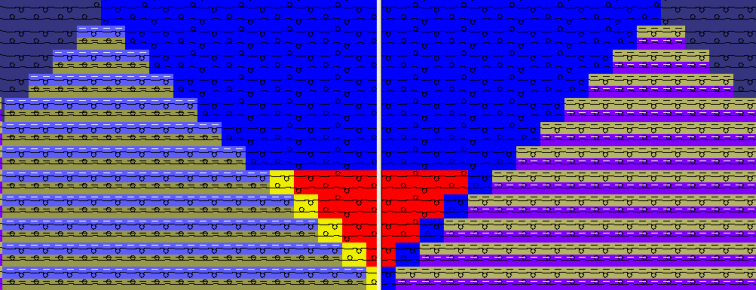
- Draw into the enlarged body element additional yarn colors:
One color (e.g. #11 yellow) for the left area beside the gore
One color (e.g. #7 red for the gore 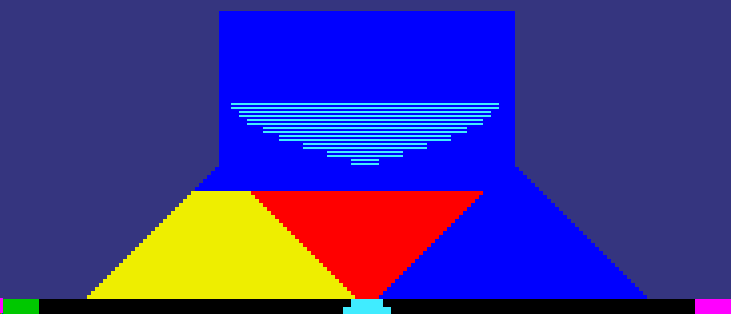
- 9
- Draw in the widening stepping in the gore (red) in correspondence to the stepping of the narrowing edges at the outer shape edges.
- 10
- Draw in the 1x1 rib structure into the gore (red).
The 1x1 rib structure of the body must be continued in the gore.
- 11
- Draw in the narrowing symbol into the areas with the yarn color #11 (yellow) and the yarn carrier color #79 (blue) starting at the outer shape edges ending two needles before the gore.

- 12
- Draw in the narrowing symbol starting at the end of gore up to the end of the narrowings at the outer edges.
- 13
- Draw in the 1x1 rib structure continuously in the total height of the collar starting at the gore.
- 14
- Draw in a neck gore in the area of the collar on L0 with yarn color #10 and .
- 15
- Draw in the separation symbol
 in the centerline of the gore.
- 16
- Draw in Binding off at the end of the collar.
Generate a shape edge via Shape Attributes.
Select the desired method of binding off.