Position and cut-out the shape and expand the pattern
I. Position shape and draw-in float jacquards:
- The shape with k&w Arrangements is located on the pattern after the ShapeSizer is closed.
- 1
- Position the shape elements Sleeve and / or Body with collar on the motif with the
 symbol selected and the left mouse button pressed.
- or -
Select the desired shape element with the selected symbol and position the selected shape element with the arrow keys of the keyboard or of the Tool Properties toolbar. 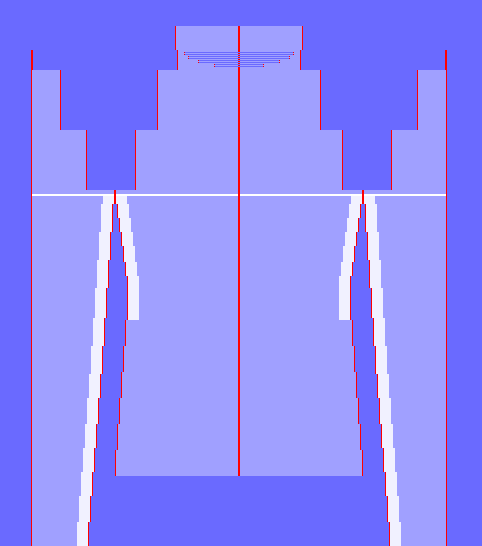
For drawing-in the motif, place the white help line (position of sleeve-body connection) of the different elements (sleeves and body) at the same height.
- 2
- Open via / menu.
- The dialog box appears.
- 3
- Select the tab
- 4
- Activate the
 option.
 - 5
- Confirm with OK.
- 6
- Draw in motif for float jacquard in basic pattern.
Presentation Cut folded in:
Possible settings for drawing:
 Front layer only
 /
/  Display only columns of knitting layer.
 /
/  Color Presentation
Ensure a continuous motif when drawing:
- from body to sleeves
Activate the option in the k&w Configuration dialog box under / section. - from front layer to back layer
- 7
- Select the desired Pattern Presentations k&w:
 +
+ 
- +

- + +
- 8
- Run the function in the .
- 9
- Make the desired settings in the dialog box.
- 10
- Press the Apply key.
- The pattern is applied to the back.
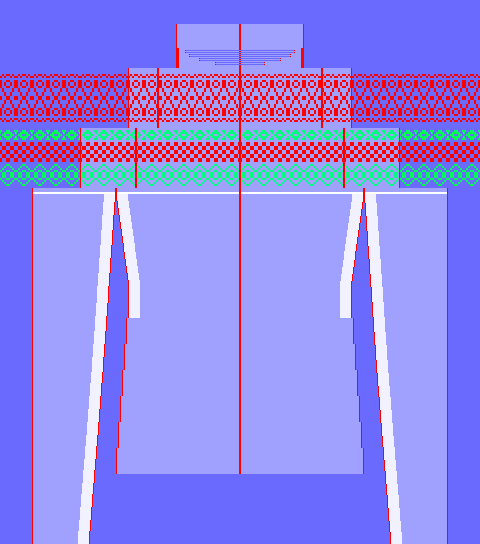
II. Insert Jacquard generator and cut-out shape:
You can make pattern related settings in the k&w configuration dialog box before cutting out.
- 1
- Select the jacquard area
- 2
- Call up the Jacquards jacquard dialog box in the / menu.
- 3
- Select the setting front in the dialog box under .
- The Jacquard generator will be inserted only for the front layer L0.
- 4
- Select Float L0 under Jacquard / k&w / Float.
- 5
- Press the Apply key.
- The Jacquard generator will be inserted in the front layer.
- 6
- Select the same jacquard area again.
- 7
- Select the setting back in the dialog box under .
- The Jacquard generator will be inserted only for the front layer L1.
- 8
- Select Float L1 under Jacquard / k&w / Float.
- 9
- Press the Apply key.
- The Jacquard generator will be inserted in the back layer.
Carry out this cycle in all the other jacquard areas.
- 10
- Cut out the shape with
 in the Steps of Processing toolbar.
- The k&w Options for Cut out dialog box appears.
- 11
- Confirm the settings in the dialog box with OK.
- The Insert/Replace k&w Start dialog box appears.
- 12
- Select the desired start.
- 13
- Confirm with OK.
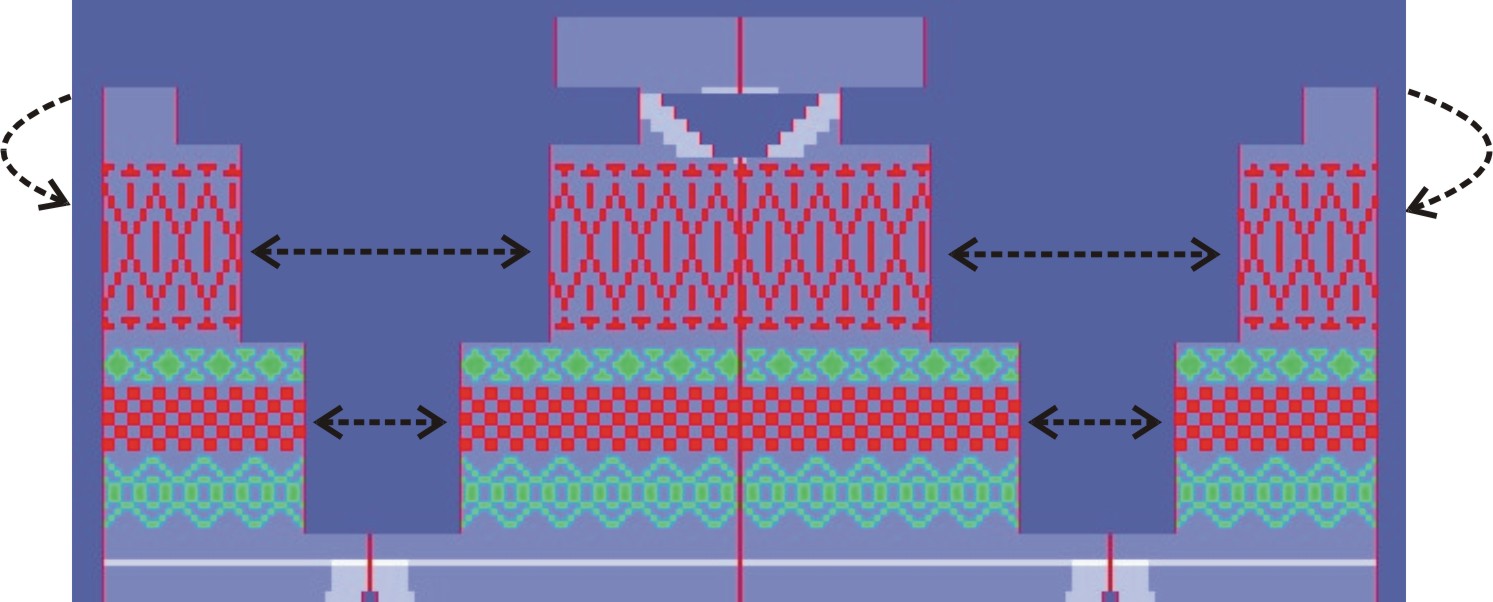
III. Expand the pattern:
- 1
- Expand the pattern with
 of the Steps of Processing toolbar.
- The Correction of Widening dialog box appears.
- 2
- Confirm with Yes.
- The shape edges with the Widening attribute are corrected.
The bind-off module for the collar is inserted.