Edit markings
I. Disply Fair Isle markings:
In the Basic pattern state of pattern you can edit the Fair Isle markings (multi-step narrowing) in the Shape View.
- 1
- Load the basic pattern state of pattern with
 .
. - 2
- Call up the shape view with the
 button.
- The shape with the determined knitting cycles and the Fair Isle markings is displayed.
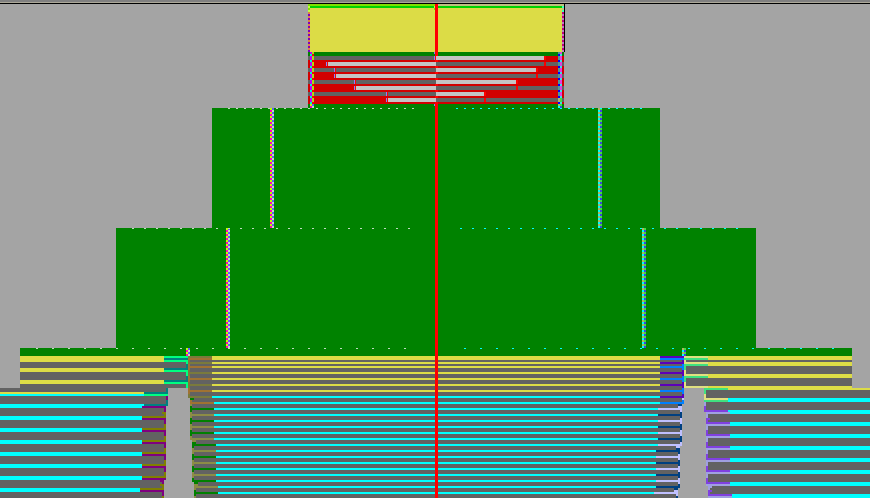
Multi-step narrowing in the Shape View:
|
No. |
Meaning |
|---|---|
|
1 |
Left shape edge with markings for multi-step narrowing. |
|
2 |
Right shape edge with markings for multi-step narrowing. |
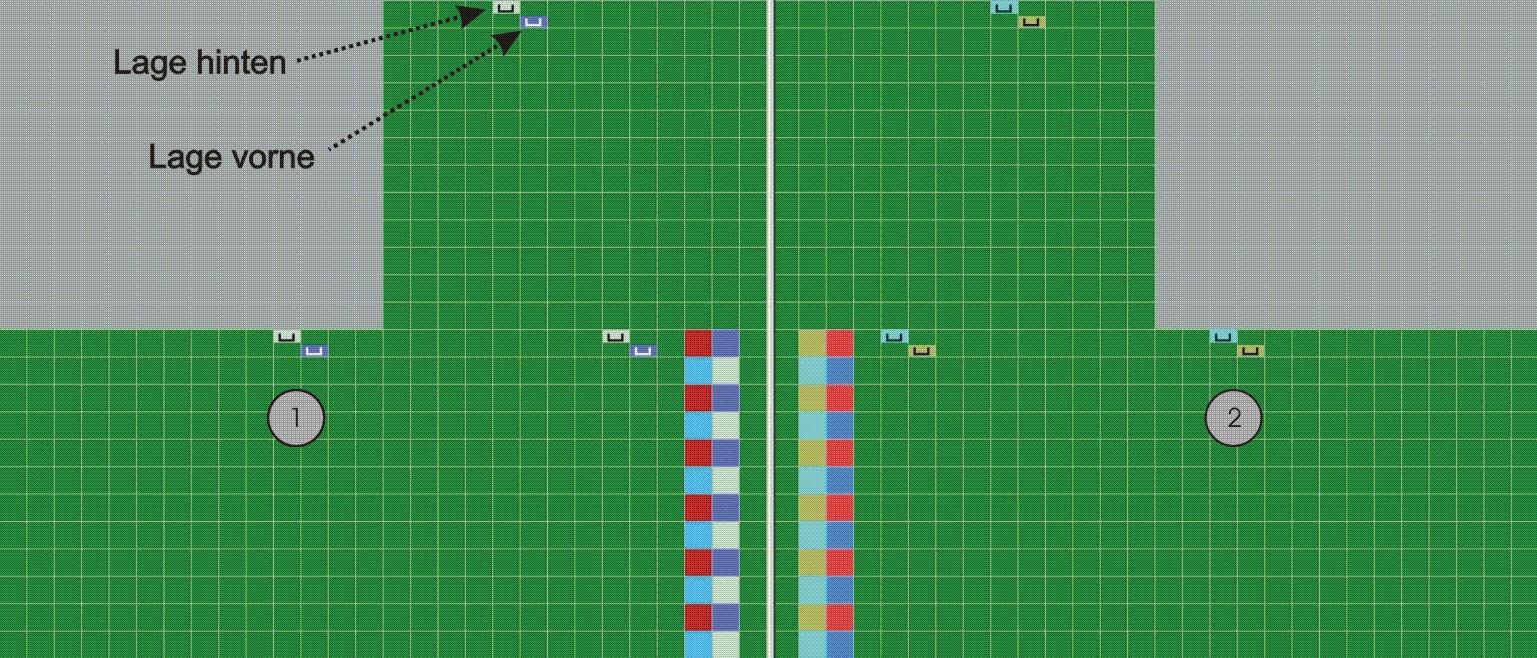
II. Move markings:
- 1
- Call up in the context menu of the Shape View.
- 2
- Place the cursor on the marking and move the marking with the left mouse button pressed.
The markings can only be moved in the same row.
III. Delete markings:
|
Types of markings | |
|---|---|
|
|
Multi-step narrowing underneath |
|
|
Multi-step narrowing above |
- 1
- Select the type of marking
 or
or  in the Shape Attributes toolbar.
- The selection
 turns active.
- 2
- Select the key additionally.
- 3
- Click on the marking with the left mouse button.
- The marking is deleted.
- 4
- Select the desired layer in order to delete the markings.
|
|
Function |
|---|---|
|
|
You can delete in L0 and L1 |
|
|
You can delete in L0 |
|
|
You can delete in L1 |


IV. Insert and change markings:
- 1
- Select the type of marking or in the Shape Attributes toolbar.
- 2
- Enter the desired cover width under
 .
. - 3
- Left click the existing marking and overwrite it.
- or -
Insert the marking at the new position with the left mouse button.
|
Symbol |
Function | |
|---|---|---|
|
|
Narrowing marking with stitch underneath (default) | |
|
|
Narrowing marking with stitch above | |
|
|
Selecting the cover width 1-3 | |
|
|
|
Cover width 1 = racking by 1 needle |
|
|
Cover width 2 = racking by 2 needle | |
|
|
Cover width 3 = racking by 3 needle | |
|
|
Selection of layers for inserting the markings | |


When changing the cover width, the markings must be recalculated manually.