Draw-in the k&w Arrangements manually: Raglan with V-neck
I. Insert manually k&w Arrangements in the Shape View:
- 1
- Open the Shape view with the
 button.
 - 2
- Select the
 key.
key. - 3
- Position the shape elements relative to one another with the left mouse button.
- The k&w Arrangement sleeve body connection can be inserted.
- 4
- Open the Module Explorer via the / menu.
- 5
- Select and insert the desired k&w Arrangement.
- 6
- Sleeve-body connection:
- k&w Arrangements / Favorites / Basic Shapes / Raglan / B1 Type 1 (no connection L0-L1).
- 7
- Insert the k&w Arrangement once in the Shape view at the position of the sleeve body connection.
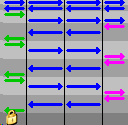
Watch out the cursor function when inserting the k&w Arrangements:
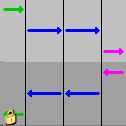
|
Meaning of arrows in insert mode | |
|---|---|
|
Red arrow |
The k&w Arrangement can be inserted in downward arrow direction |
|
Green arrow |
The k&w Arrangement can be inserted in upward arrow direction |
|
Red arrow |
Shift key + k&w Arrangement |
Picture 1:
- 8
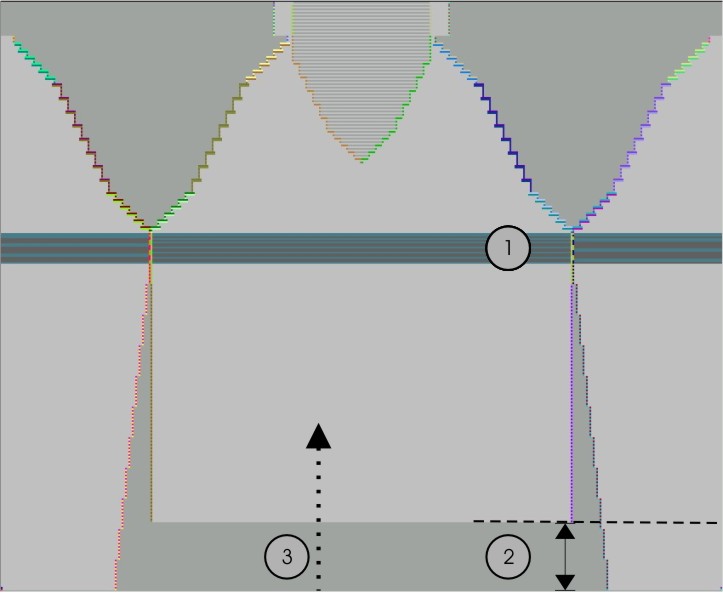
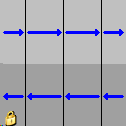
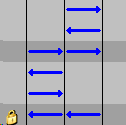
- Move the length compensation:
Move the length compensation (2) between body and sleeve with the following k&w Arrangement from the lower fabric edge (sleeve) to the center of the fabric (see figure 1):
- k&w Arrangements / Stoll / X Standard
|
Knitting cycle modules |
Name |
Function | |
|---|---|---|---|
|
|
X Default |
All three tubes/areas are processed evenly. | |
|
Use: |
1 |
To move the length adjustment, only select the module. | |
|
2 |
For overwriting the previously inserted k&w Arrangements | ||
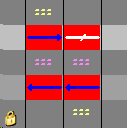
Picture 2:
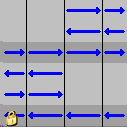
|
No. |
Function |
|---|---|
|
1 |
Inserted k&w Arrangement: |
|
2 |
Length difference between body and sleeve is moved upward below the body-sleeve crossover. |
|
4 |
Area of the inserted k&w Arrangements: |
The length compensation should not take place immediately at the start of the fabric piece, otherwise this makes it difficult to work with the comb.
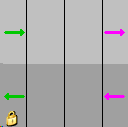
Display when inserting the k&w Arrangements in the Shape view:
- A green line indicates that the k&w Arrangement is complete in the height and will be inserted.
- A red line indicates that the k&w Arrangement is not complete in the height and will not be inserted.
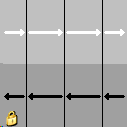
|
Button allocations for the insertion of knitting cycles modules | ||
|---|---|---|
|
Key |
Selection |
Function |
|
Ctrl |
k&w Arrangement |
Overwrite k&w Arrangement |
|
Shift |
k&w Arrangement can also be inserted partially. (Insert, even with red line) | |
|
Alt+Ctrl |
Inserting between existing k&w Arrangements; additional rows will be inserted. | |
|
Alt |
Inserting with empty rows | |
|
Alt+Ctrl + Shift |
Inserting between existing k&w Arrangements; additional rows will be inserted. | |
- 9
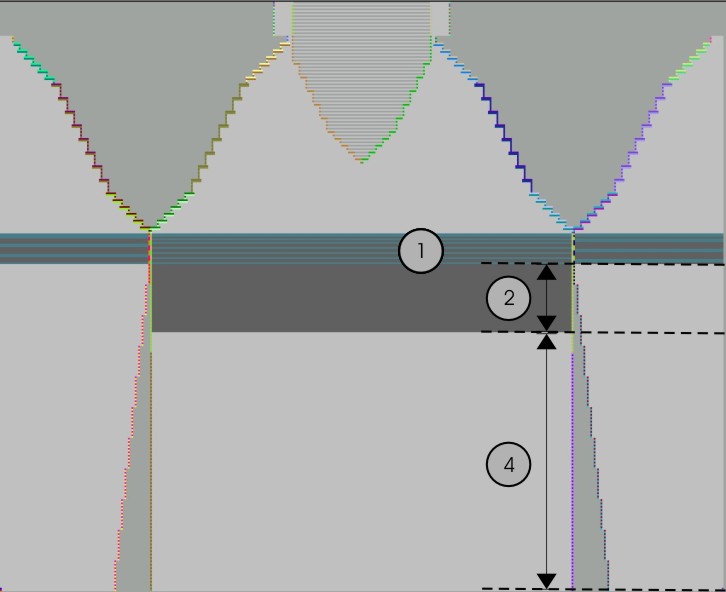
- Use the following k&w Arrangements for the length compensation:
- k&w Arrangements / Favorites / Basic Shapes / Raglan / A1-3 tubulars.
- k&w Arrangements / Favorites / Basic Shapes / Raglan / A5-2 Tubular.
|
Knitting cycle modules |
Name |
Function |
|---|---|---|
|
|
A13 tubulars |
Knitting of the body and sleeve elements |
|
|
A52 tubulars |
Knitting of the sleeve elements (= 2 tubulars) below the sleeve-body crossover. |
- 10
- Fill up uniformly the length difference between body and sleeve with the following k&w Arrangements.
- The area with k&w Arrangement X Standard will now be overwritten with the above described k&w Arrangements.
The inserted k&w Arrangements can be selected and copied and pasted with Ctrl + C and Ctrl + V.
- 11
- From the sleeve-body connection up to the start of the V-neck:
Insert the k&w Arrangement from above the sleeve-body connection to the start of the V-neck:
- k&w Arrangements / Favorites/Basic Shape Types / Raglan / C37-3 Area 1:1:1
|
Knitting cycle modules |
Name |
Function |
|---|---|---|
|
|
C37-3 areas -1:1:1 |
Knitting of the body and sleeve elements |
- 12
- Insert the k&w Arrangement From the start of the V-neck up to the end of the V-neck:
- k&w Arrangements / Favorites/Basic Shape Types / Raglan / C112-3 Area 1:1:1 with opening (L0)
|
Knitting cycle modules |
Name |
Function |
|---|---|---|
|
|
C112-3 Areas with opening (L0)-1:1:1 |
Knitting of the body with opening and sleeve (= 3 areas) elements after the sleeve-body crossover. |
- 13
- Collar:
- k&w Arrangements / Stoll / Collar / with opening / without gore / D12 collar with opening (L0)
|
Knitting cycle modules |
Name |
Function |
|---|---|---|
|
|
D12 collar with opening (L0) |
Knitting of the collar element with opening. |
- 14
- Binding-off collar:
Select the following k&w Arrangement for binding-off the collar and insert it on the last knitting row of the collar:
- k&w Arrangements / Stoll / 1 Area / bind off collar / with opening / D10 Binding-off with opening (L0)
|
Knitting cycle modules |
Name |
Function |
|---|---|---|
|
|
D10-neckline front open bind off |
Binding-off the collar element with opening in the front layer. |
Binding-off cycle for collar with opening in layer L0:
|
No. |
Description |
|---|---|
|
1 |
Knit in draw thread layer 0 (front). |
|
2 |
Bind off layer 0 the draw thread is carried along. |
|
3 |
Bind-off layer 1 (back) the draw thread is carried along. |
|
4 |
Knit draw thread to the right. |
|
5 |
Bind off layer 0. |
|
6 |
Knit draw thread to the left. |
|
7 |
Protection rows. |
|
8 |
Fix the bind-off stitch. |
- 15
- Save the shape as shk file with the inserted k&w Arrangements under a new name via the / menu.
If you do not save the shape view with the k&w Arrangements, it is not possible to remove the shape from the pattern.
Then the k&w Arrangements have to be inserted again.
- 16
- Close the shape view with
 .
.