Generate a Module Arrangement
Structure modules, which are drawn-in next to each other generally, contain different transfer processes. When expanding the modules, these transfer processes will be automatically split into a sequence of technical rows. This sequence may cause an undesirable stitch distortion because of large racking courses.
The stitch distortion can be avoided arranging the transfer processes strategically.
I. Generate a Module Arrangement from a selection:
- New pattern is generated as .
- 1
- Select the rows in which you want the modules to be arranged.

Only modules of the same knitting row can be arranged to each other.
- 2
- Click the
 icon in the Default toolbar.
- or -
Call up the / / menu.
- The Properties of: MA #1 dialog box appears.
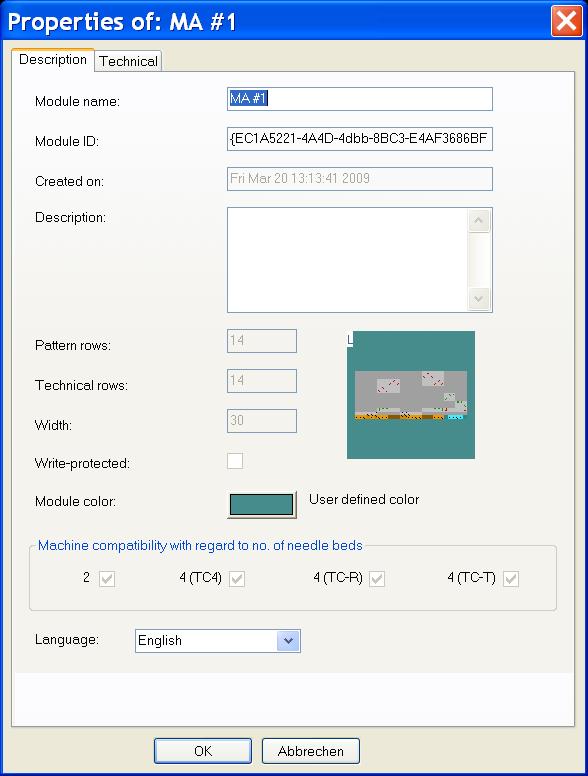
- 3
- If necessary, change the module name and the module color.
- 4
- Close the dialog box with OK.
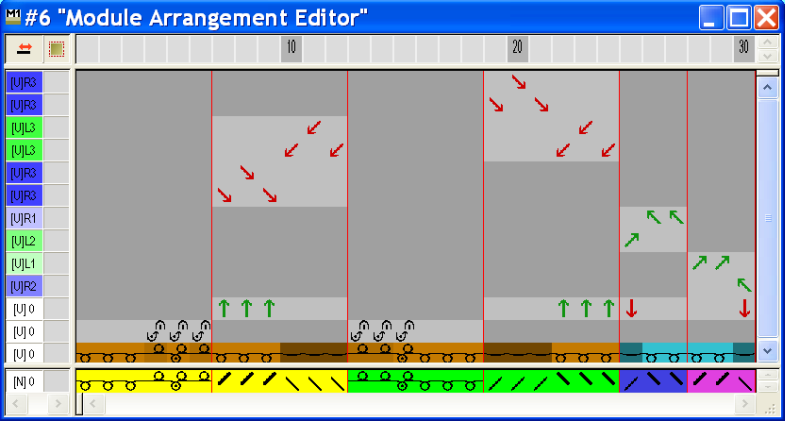
- All modules existing in the selection are displayed in the Module Arrangement Editor.
The settings in the / menu, initially determine the racking priority in the Module Arrangement.
These settings will be ignored if a Module Arrangement is used.
II. Modify the transfer cycle in the Module Arrangement Editor:
- 1
- Click the
 Aligning icon in the Drawing tools toolbar.
 - 2
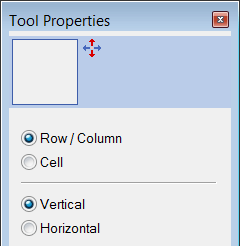
- Select the desired options in the Tool Properties dialog box.
|
Setting |
Function |
Meaning |
|---|---|---|
|
Row / Column |
Move the transfer cycles of a technical row of a segment. |
The transfer in the selected row can be moved to another technical row. However, only if an eventual racking matches or is feasible. |
|
Cell |
Move the transfer cycle of one individual needle (cell) |
The transfer in a selection can be moved to another technical row. However, only if an eventual racking matches or is feasible. |
|
Vertically |
Move a row / column or a cell vertically |
|
|
Horizontally |
Move a row / column or a cell horizontally |
|
- 3
- Click on the desired element and move the selection in the selected direction with the left mouse button pressed.
- or -
Activate the desired option in the Tool Properties dialog box and move the selection with the left mouse button pressed.
|
Cursor when moving |
Meaning |
|---|---|
|
Red dashed frame |
Selection
|
|
Yellow bar |
The selection is moved between two rows onto a newly inserted row. |
|
Yellow frame |
Move the selection to an existing row. |
|
Yellow frame with red X |
The selection can not be moved to the existing row. |
 . Only with matching racking positions.
- 4
- Repeat the procedure for all desired transfer processes.
|
|
Function |
|---|---|
|
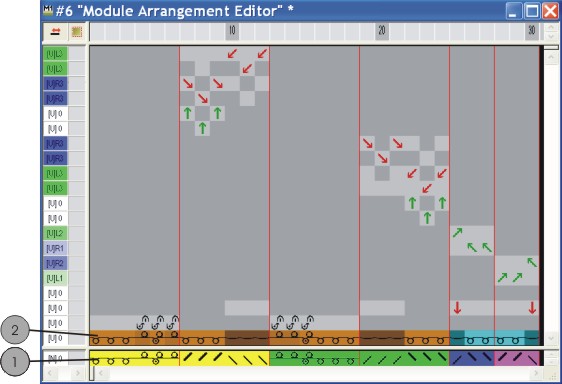
1 |
Module color = search color from of the
|
|
2 |
Original yarn color of the module |

- 5
- Select the empty rows resulted by the modifications and delete them with the DEL key.
- 6
- Close MA editor with
 .
. - 7
- Confirm the query with Yes.
- The color marking of the Module Arrangement will automatically be entered in the control column of the selected pattern area.
The Module Arrangement will be saved with the pattern and can be selected in the tab of the Module toolbar.
III. Expand the Selected Area:
- Rows are selected.
- 1
- Expand the area with the Module Arrangement via
 of the Steps of Processing toolbar.
- The selected area is displayed in the Symbol View (Preview).
- 2
- Close the preview with .
IV. Select in the Module Arrangement Editor:
|
Selection |
Function |
|---|---|
|
Row selection via the row bar |
Move the content of a selected row to another technical row. |
|
Selected with |
Move the content of a selection to one or several other technical rows. |

V. Behavior of Structure Modules:
Before the processing step Expanding:
If you modify the structure modules in use after generating a Module Arrangements, these modification will be applied to the basic pattern but not to the existing Module Arrangement.
A new Module ID will be created with the modification.
- 1
- Modify the existing Module Arrangement manually.
- or -
Generate a new Module Arrangement.
After the processing step Expanding:
If you modify a structure module in use after the expanding, a copy of the module will be generated.
The changes will not be applied to the pattern.
- 1
- Activate the state of pattern.
- 2
- Replace the original module by the changed module.
- 3
- Modify the existing Module Arrangement manually.
- or -
Generate a new Module Arrangement.