What was new in CREATE PLUS V2.5

Release V2.5. - 07/2023
Versione file: 13 (V2.5)
Compatible with:
- EKC 2.6
- CKC 2.0
- OKC 6.6
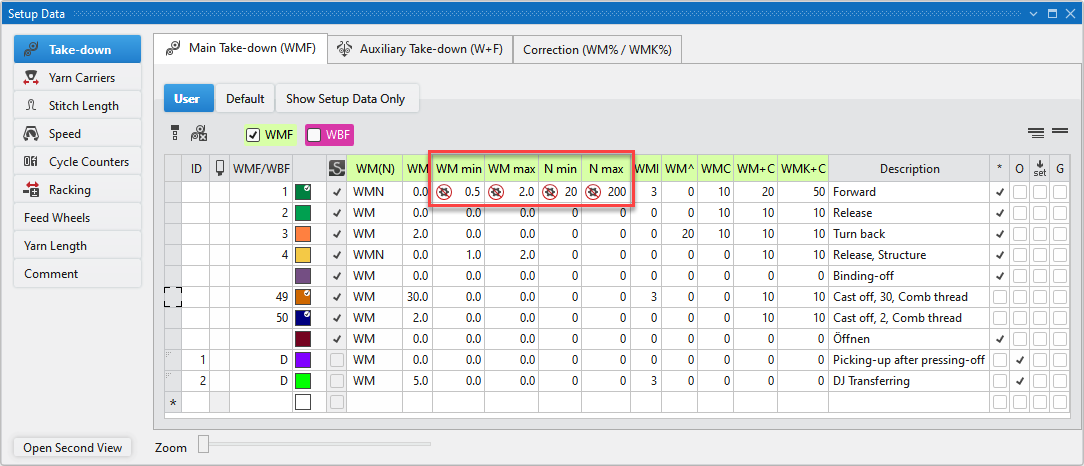
New markings for setup values that are not modified by the technical processing.
 Dati Setup -> Section
  Tirapezza -> Tab Tirapezza principale (WMF)
If the data of the WM min , WM max , N min or N max columns is changed manually, the marking  appears beside the entry. It appears exclusively in these columns.
The marking means that the entry cannot be modified by the technical processing.
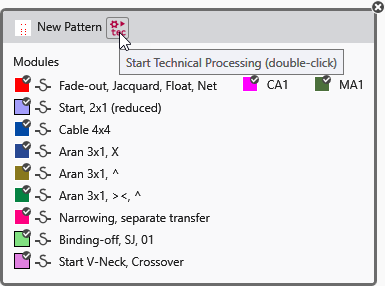
Filtered view in the tool windows Module, CA and MA
A filtered view can be selected using the context menu on the knitting elements in the Moduli, CA and MA tool windows.
The knitting elements can be filtered by pattern or group.
The groups correspond to the generated groups in the Disegno tool window.
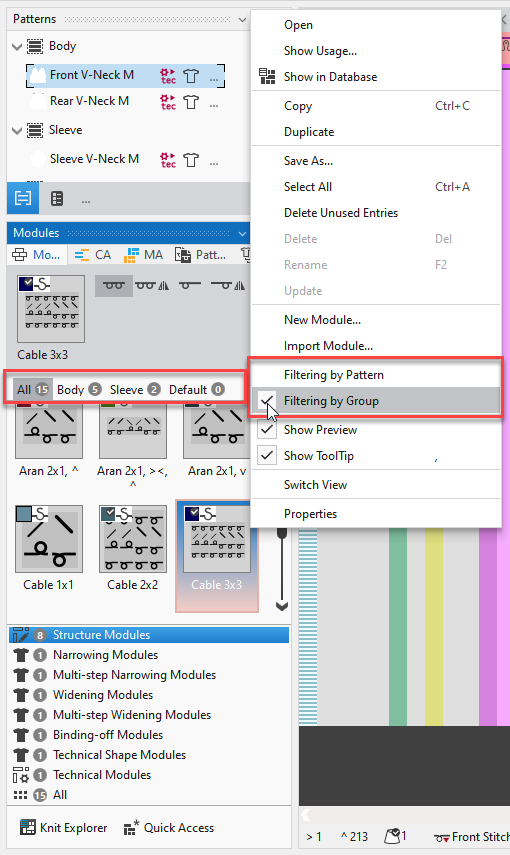
The options (pattern or groups) appear with the activation of a filter above the content view in the tool window.
By clicking on a pattern or a group only the knitting elements that are applied in the pattern or group will be displayed in the content view.
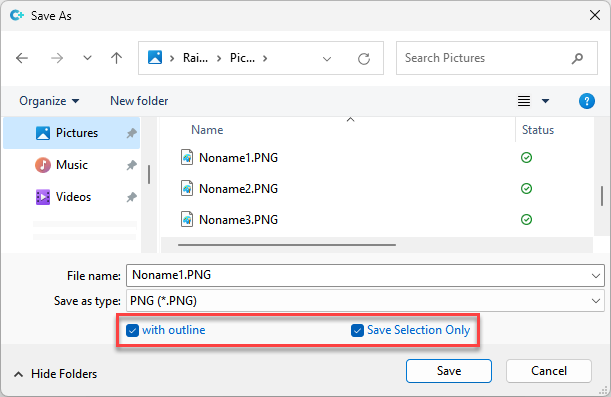
Options when exporting the design view
Esporta come file di immagine... context menu on the design view of a pattern
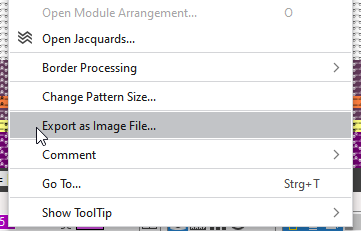
There are 3 options for the export of the design view as an image file:
- With or without grid
- With or without contour
- Selection or entire pattern
Grid settings
The grid settings when exporting the image file are applied from the settings of the status bar.
In the dialog box Options of the status bar you define the following settings for the grid in the pattern:
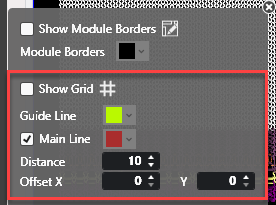
- Display or hide grid
- Select the grid colors of the main and help lines
- Define the distance and offset of the lines
The image file is exported with these grid settings.
- Export image without grid.
A stitch in the pattern corresponds to one pixel in the image: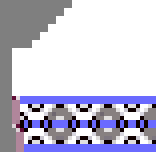
- Export image with grid.
A stitch in the pattern corresponds to four pixels in the image:
(One pixel applies to the frame)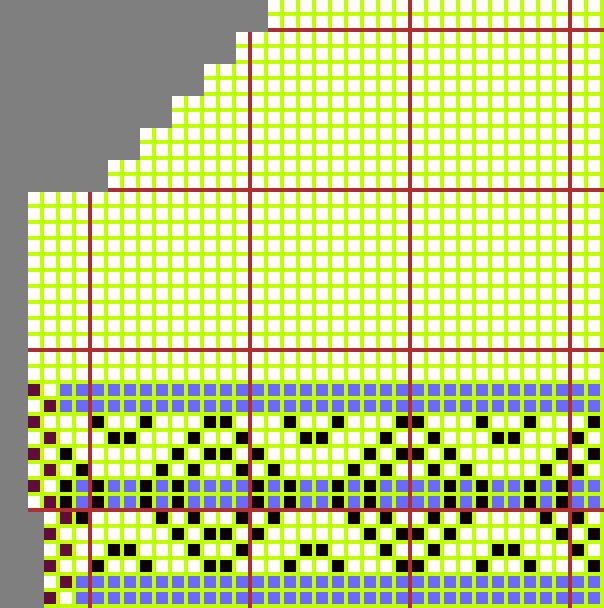
- Options (tool window)
With or without contour / Selection or entire pattern
In the dialog box Save As appear the following options for the export of the file:
-
 Con contorno
If a shape is positioned on the pattern then the selection of exporting the pattern with or without shape contour appears. -
Salva solo selezione
If there is an area selected in the pattern then the selection of saving the entire pattern or only the selection appears.
Symbols for Knitting Elements are no longer in Group tool window
The symbols for knitting elements are specific and dependent on the knitting element to be edited. That is why they are only offered in the document window of the corresponding knitting element as a tab.
The symbols for knitting elements can no longer be opened as a tool window in the Avvio ribbon -> Finestre degli strumenti group.
Enter your own path
A private path can be selected in the Sostituzione / Scambio area with Dati dell'ago ->  Moduli struttura.
In the drop-down menu scroll all the way down and click on the Seleziona elemento di lavoro in un altro percorso... option.
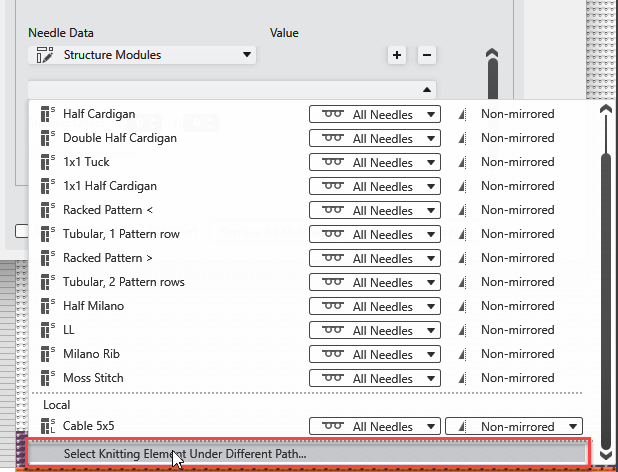
The following dialog box appears:
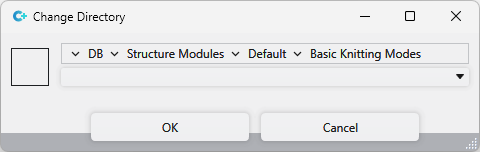
In it select the path and the desired module.
Area Elaborazione dell'elenco
You can toggle the area forElaborazione dell'elenco of the Trova e sostituisci dialog box.
For this click on the right border on the  symbol.
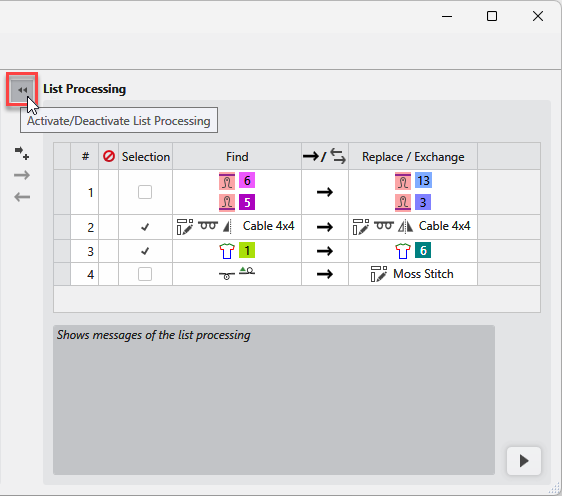
- You can apply operations of the Trova e sostituisci dialog box to the Elaborazione dell'elenco area.
- The operations of the list will be done by this sequence.
- You can switch the sequence of the first column by changing the numbering.
- You can disable items of the list by the second column. They will be ignored by the list processing then.
- You can save the lists and load them independently from the pattern.
STOLL Trova e sostituisci (*.srxf) - List Processing
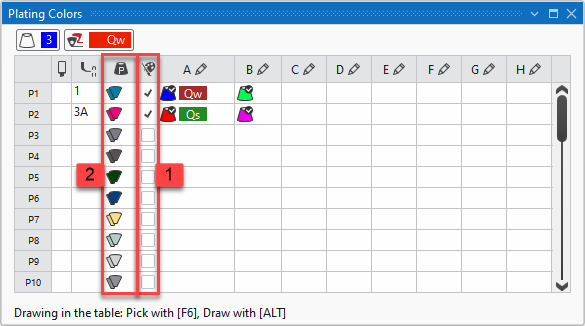
Mescolanza di colori Function in the Colori vanisé Tool Window
The  Mescolanza di colori column (1) is available in the Colori vanisé tool window.
-
The plating color (2) is automatically mixed from the selected colors. -

Entering the color value manually disables the check box.
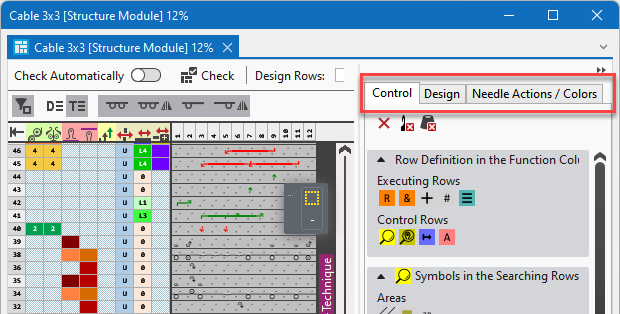
New Features of CA
In a reference row in the CA there are two options to define empty needle actions:
-

 Elimina azione dell'ago/simbolo per elemento di lavoro
 -

 Trasparente
In a column with defined overwriting excess width, the Elimina azione dell'ago/simbolo per elemento di lavoro selection results in the corresponding area in the adjacent segment being deleted because of this empty needle action. (See 1 in the image)
If the Trasparente selection is drawn in, then the area in the adjacent segment is not deleted. (See 2 in the image)
Duplicate and Mirror Shape Element
In the context menu of a shape element there is the Duplica riflesso function.
 This function is available within the lined shape project as well as within the lined shape layer of a pattern project.
With this function shape elements in a lined shape are able to rapidly be duplicated mirrored.
- Mirrored basic shape
- The shape element is mirrored and is inserted in the mirrored position in the basic shape.
- The anchor point of the shape element is also mirrored at the same time.
-
- Non-mirrored basic shape
- The mirrored shape element is inserted beside the original shape element.
- Position and anchor point of the shape element cannot be mirrored.
Shape element Tassello / Asimmetrico
An asymmetrical shape element gore widening to the left is inserted on the left side of the basic shape and widening to the right on the right side.
Both are symmetrical in their shape
New function Go to Selection
In the Selezione ribbon there is a new feature.
 Vai alla selezione
If there is an area selected in the pattern then it is displayed centered in the document window.
This function can also be carried out with the help of the shortcut CTRL-B.
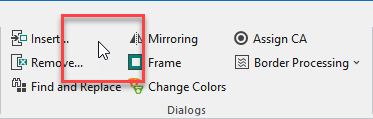
Selezione in the context menu on the pattern
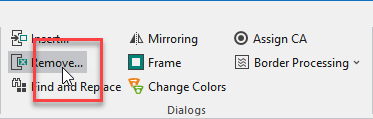
You can call up all functions of the Selezione ribbon in the context menu of the Design View except Inserisci... and Rimuovi... .
New Function in the Disegno Tool Window
Beside the pattern entries in the Disegno tool window are the different symbols as display and button.
A new symbol was added at the end.

A dialog box is opened using this symbol that displays all knitting elements of the pattern.
In the header ribbon of the dialog box there are additionally the same functions as in the pattern entry.
The knitting elements are opened with double clicking.
To close the window again, click on the cross in the top right.
The knitting elements applied in the pattern are displayed in the Proprietà del disegno dialog box .
The knitting elements are opened with double clicking.
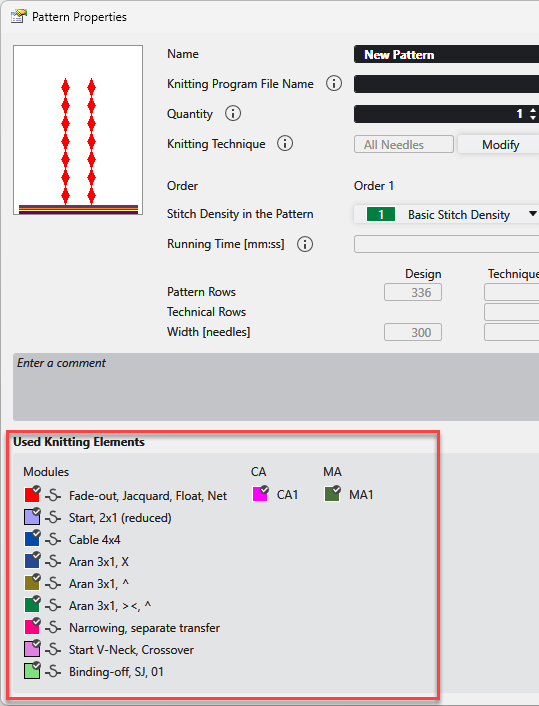
The presentation of the knitting elements in the tool windows was modified.
- Around the thumbnail of the knitting element there is a frame.

- In the upper part of the thumbnail you can find different markings that identify the following properties of the knitting element.
- Identifying Color

-
 Knitting element is applied in the pattern
 -
 Knitting technique MG
 -
 Knitting element with repetitions
 -

The mark appears at the lower right if the module was created by STOLL.
A module of your own will not have this mark. - In the Tool Window module the background color beside the thumbnail has the following meaning.
- If the knitting element is at the cursor, then the background is light blue
- If the knitting element is selected, then the background is blue
- If the knitting element is selected and is at the cursor, then the background is half blue and the other half is light blue.
Panning the View by Mouse and SPACE Key
The behavior to the move of the view was improved in the document window.
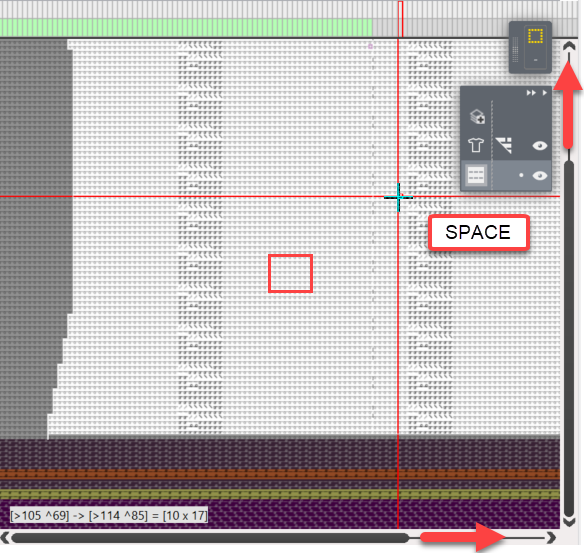
- If you move the view with the mouse and spacebar, then the direction and speed of the movement is modified depending on the position of the mouse.
- If the mouse is in the centre of the document window, then the view remains the same.
- If the mouse is outside of the centre, then the view moves in the corresponding direction as long as you press the spacebar.
- The further you move the mouse with pressed spacebar outwards, the faster the view moves in this direction.
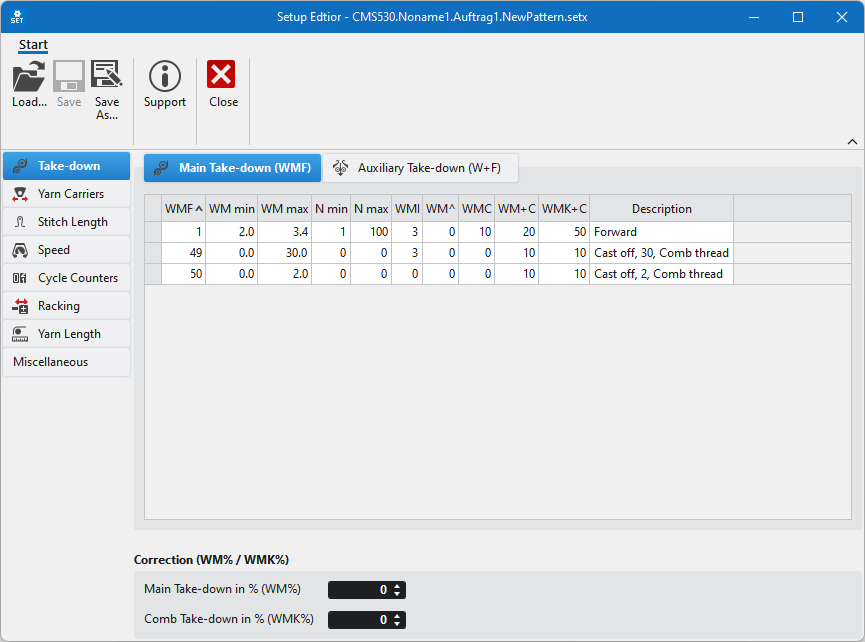
MC-Setup Editor is renewed
The MC-Setup Editor was newly developed.
Call it up by:
-
Avvio tab -> Sintral group ->
 Mostra MC-Setup
- As standalone app

The layout of the tabs corresponds to the layout of the setup data in the pattern.
The help for the dialog boxes and menu bars can be called up using the F1 button.
Menu bars:
- 174
- With an active window, in the menu bars place the cursor on a group and press the F1 button.
The cursor has to be in the menu bar on an empty area without button.
- The help to the corresponding group appears.
Correct positioning of the cursor:
Incorrect positioning of the cursor:
Dialog boxes and tool windows
- 175
- Open the dialog box or the tool window.
- 176
- Position the cursor on the dialog box or the tool window and press the F1 button.
- The help to the corresponding dialog box or tool window appears.
Background Image Adopted to Stitch Density of Dimensioned Shape
You can load a background image with Carica immagine di sfondo per telo… of the context menu.
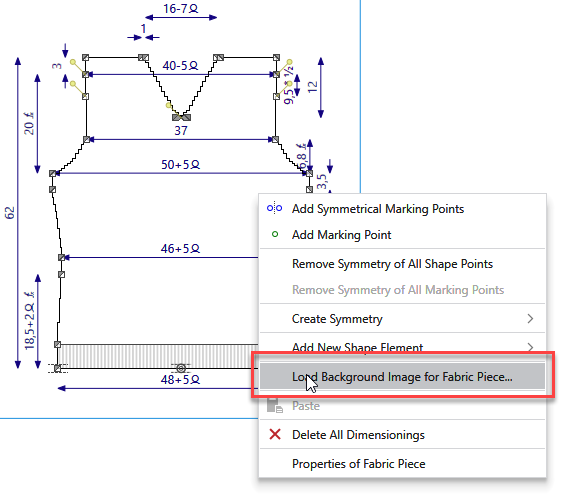
The image can be loaded specifically for a fabric piece or independently from the existing shapes.
- If the image is loaded for a fabric piece, then it will be inserted corresponding to the stitch density defined in the shape.
- If the image is loaded independently from an existing shape, then the Importazione immagine
dialog box appears.
You can load the image with or without stitch density. - With stitch density:
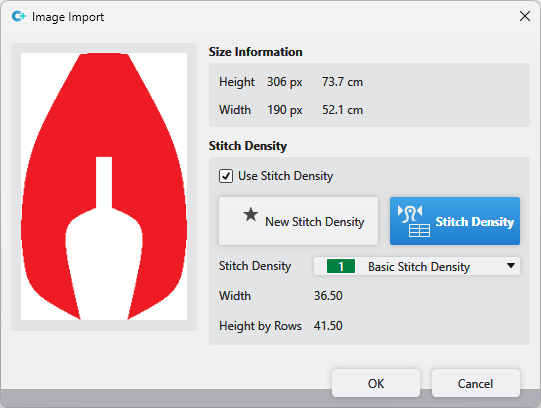
The selected entry from the Stitch Density tool window appears in the tooltip in the top right of the image.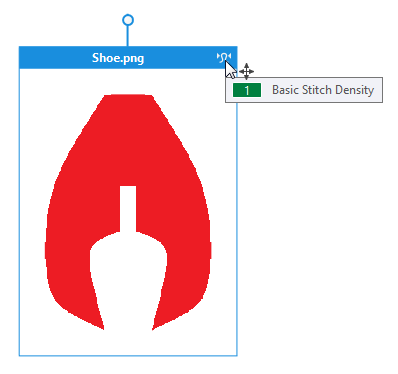
- Without stitch density:
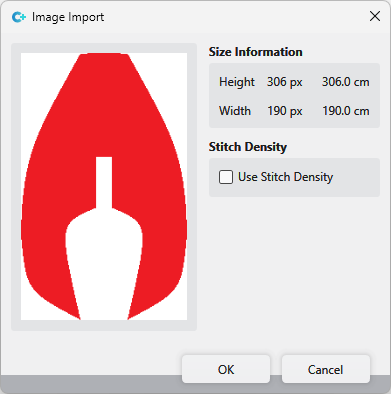
The image can then be pulled into the desired size using the graspers.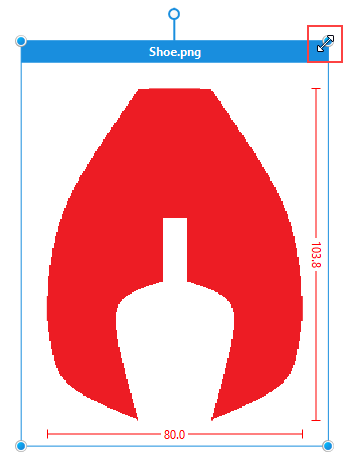
You can find the news of the previous releases in the Guida CREATE (F1) help.