What's new in CREATE PLUS?

https://software.stoll.com/createplus/software_updates/index.html
Release V2.7 03/2024
Dosya sürümü: 15 (V2.7)
Compatible with:
- EKC 3.1
- CKC 2.1
- OKC 6.6
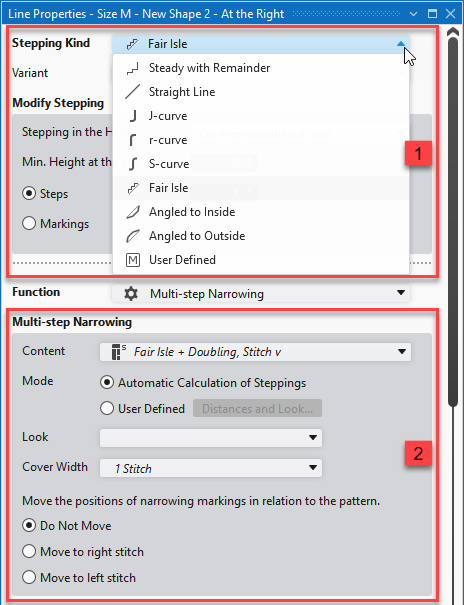
Enhanced settings of the line properties.
|
1 |
|
|
2 |
|
Stepping Kind Kullanıcı tanımlı
User defined lines are exclusively defined by the sub-rows of the Çizgi tablosu.
With selecting the Kullanıcı tanımlı stepping kind, no Basamaklar and no Fonksiyon will be offered in the Çizgi özellikleri.

- User defined lines are marked with M in the view of the lined shape.
- In the view of the lined shape, you cannot change a user defined line, as it is exclusively defined by the sub-rows of the Çizgi tablosu.
If a start or end point of a user defined line is moved, the whole line will get moved the same way. - Line Properties
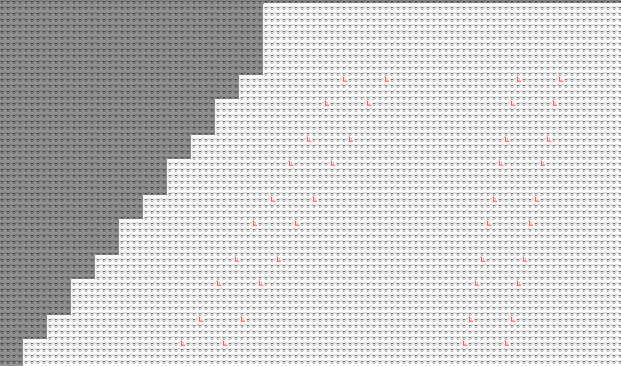
New variants of Fair Isle within the lined shape.
Four variants of the Basamaklama akışı Fair Isle are available within the lined shape.

The variants are offered in the Çizgi özellikleri for selection.
- Varsayılan
- Knitting technique as before with the Fair Isle selection.
- Trapez
- In the Lined Shape:
- Folded-out in the Raster-Shape:
- Testere dişi
- In the Lined Shape:
- Folded-out in the Raster-Shape:
- Pli
- In the Lined Shape:
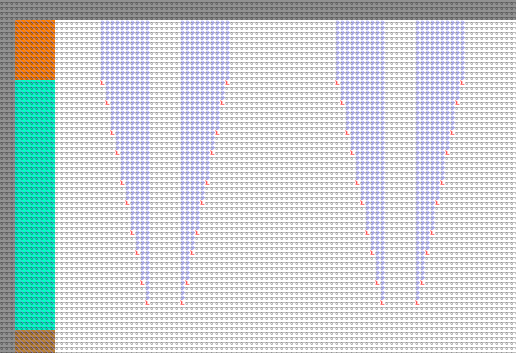
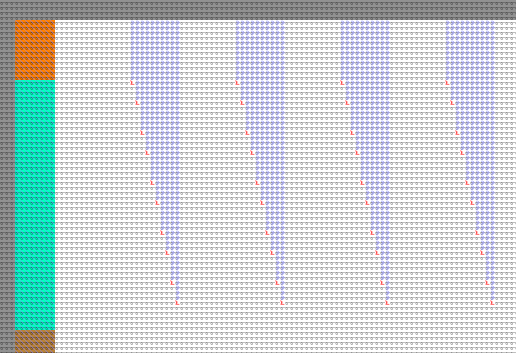
Each variant has specific options.
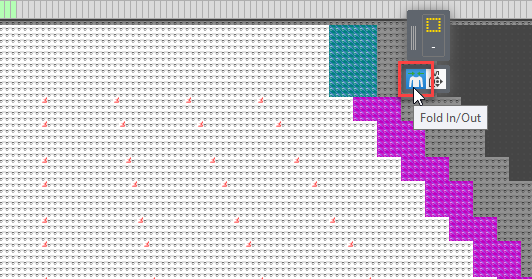
The Trapez and Testere dişi variants can be displayed by the Raster-Shape folded out or folded in.
Fold In/Out button below of the cursor attributes
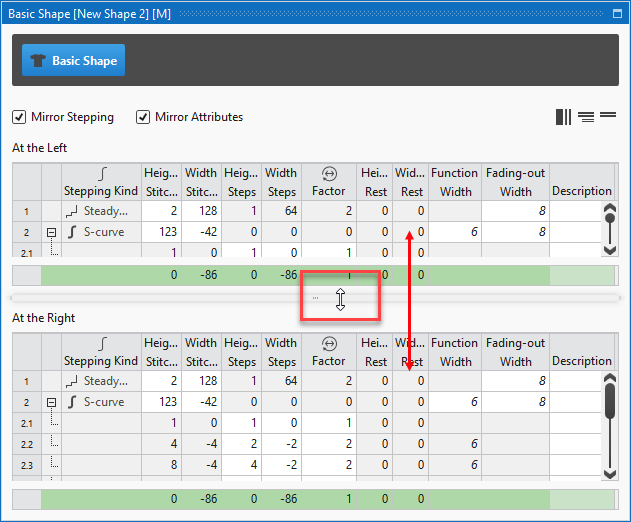
Each lined shape has its own line table.
Each lined shape has its own Çizgi tablosu docked to the document window.
- The Çizgi tablosu is pinned to the right edge by default.
You can drag it to any desired edge of the document window. - You can expand the Çizgi tablosu and unpin it from the edge.
- The table always remains related to the same shape.
- You can dock the Çizgi tablosu again to the corresponding lined shape by the Yerleştir function in the context menu of the title bar.
- You can hide a docked Çizgi tablosu via the pin in the title bar.
- You can open and edit several line tables of different shapes at the time.
- You can copy areas of a Çizgi tablosu and paste them into another Çizgi tablosu.
- Calling up the Çizgi tablosu is no longer possible in the Başlat ribbon or the context menu of the lined shape layer.
- Line Table
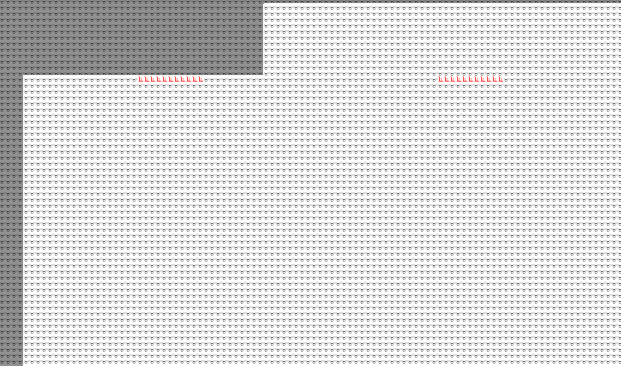
Adjustable view on the lines of the right and the left shape halves
You can move the areas of the shape lines of the left or right shape half in the Çizgi tablosu.
Therefore, drag the separator between the areas as desired to the top or bottom.
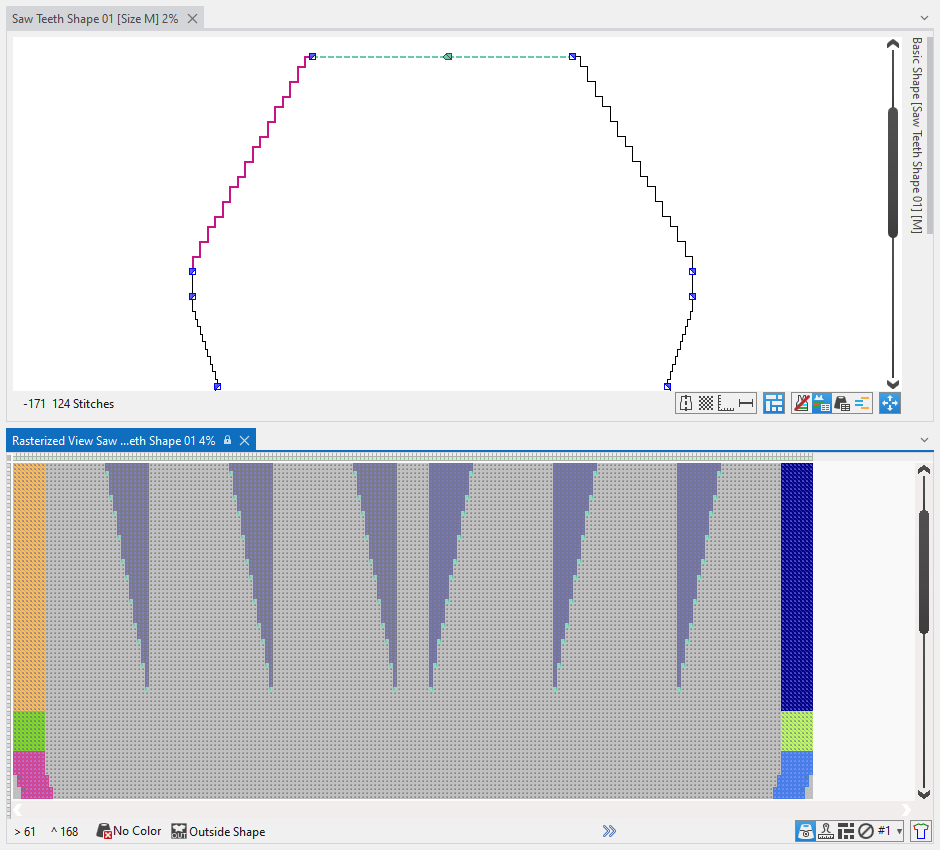
Raster-Shape Preview of a Lined Shape
You can get the rasterized view for each lined shape of the Kesimler tool window via the context menu.
- Rasterized view appears folded-out.
- Especially helpful for the Trapez and Testere dişi variants of Fair Isle.
- The rasterized view cannot be edited.
- Context menu on the shape
Modified behavior of starts with positioned shapes (≤ V2.6 vs. V2.7)
- Behavior when positioning a shape without start on a pattern with start:
- The start of the pattern gets allocated to the shape.
- If the shape is moved on the pattern, the start will be moved accordingly.
- With the positioned shape, the start can only be modified by the start module and not within the pattern.
- If the shape is withdrawn from the pattern, the start returns to its original position within the pattern.
- Behavior when loading or importing a pattern of a former version (≤ V2.6):
- The pattern of the former version has a positioned shape.
- The start of this pattern has been modified within the pattern having the positioned shape.
Therefore, the start within the pattern is different from the start module. - When loading or importing this pattern in version V2.7, the pattern will be converted to a raster-shape.
With it, the modified start will be kept in the pattern.
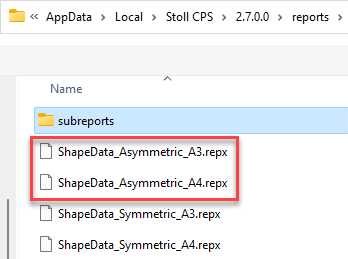
Fully Fashion – Shape Data Print
Improved Print Function for Lined Shapes and Dimensioned Shapes
- Dosya ribbon / Şekil verileri raporu .
- Shape Data Report (view)
The individual topic:
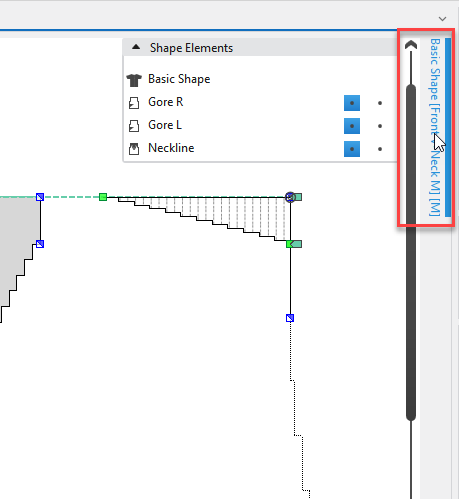
- All shape elements will appear in the preview
- The shape lines of asymmetric shapes appear next to another for the left and right shape halves.
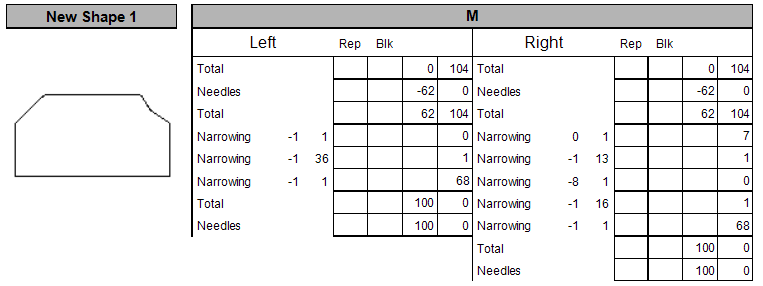
- Layouts for asymmetric shapes:
Configuration Template in Özel Dialog Box
- New functions for the Configuration Template in the context menu on the entries under Özel:
|
Display Configuration Template in File Explorer |
Shows the storage location of the allocated Configuration Template. |
|
Select Configuration Template |
Opens the file explorer in order to select a Configuration Template. |
|
Edit Configuration Template |
Opens the allocated Configuration Template in the Template Editor. |
|
Remove Configuration Template |
Deletes the allocated Configuration Template. |

- You can freely define the storage location of the Configuration Template.
- A Configuration Template is basically machine specific.
- However, you can allocate a Configuration Template to a different type of machine.
- With it, only the relevant data will be applied.
- Configuration Template
- Select Machine
Loading templates in the New Pattern Project dialog box
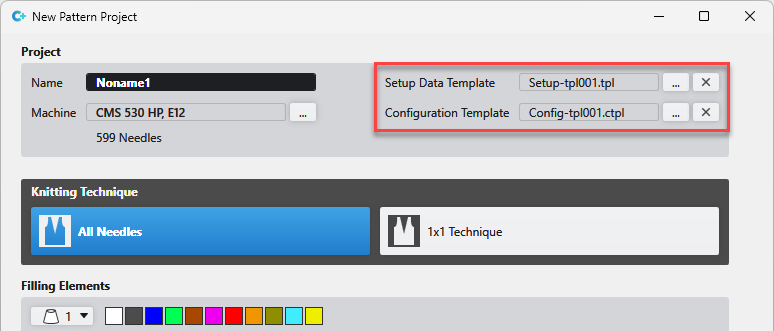
- Open the file explorer via the … button and select the template.
- The last selected template is offered in the Yeni desen proje dialog box.
- If you have selected your own machine (My Machines) with an already allocated Configuration Template, this will be applied directly.
- The Setup Data Template is only loaded via the Yeni desen proje dialog box.
- The Setup Data Template setting has been removed from the Seçenekler dialog box.
- New Pattern Project (dialog box)
Create a new function in the Setup Data Template and assign it.
- 138
- Create your a function of your own for Düşürme örme paneli in the Setup verileri.
- 139
- Assign your function via the Setup verileri to the entire project.
- 140
- You can see your own function in Yapılandırma / Sintral / Sintral fonksiyonu, but you cannot edit it there.
- 141
- Export the Setup verileri as template.
- 142
- Apply the Setup Data Template to a new pattern project.
- The selection of functions appears in Yapılandırma and Setup verileri the way it was saved.
- If you open the Configuration Template with a Sintral function of your own in theTemplate Editor, the following hint appears under Yapılandırma / Sintral / Sintral fonksiyonu: My Function.
Multiple Selection of yarn carriers in the Mekikler tool window
You can select several yarn carriers at the same time in the tool window Mekikler.
With it, the available options are reduced as follows:
- Mekik tipi
- Kenar sabitleme
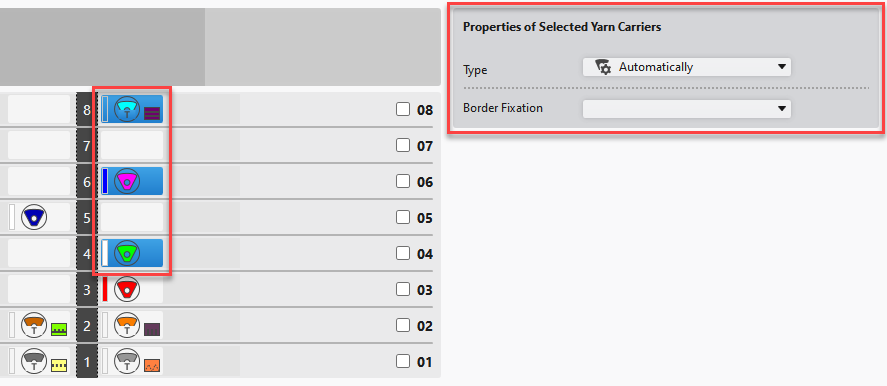
The same behavior arises in the following situations:
- If you selected a color area within the Renk parametreleri table or the Mekik görünümü to which several yarn carriers are allocated.
E.g. with plating or multi-system knitting. - If you have selected several color areas having different yarn carriers.
- Available Yarns and Yarn Carriers Tab
 Exclude from Clamping (YG:n!;)
- With the check box enabled, the yarn carrier will not be clamped but moved to its position at the SEN edge.
 Only with ADF machines.
 - Settings for Yarn Carriers
Color Parameter Table
Extra position for the column of row quantity
The column for quantity of rows no longer only refers to knitting-out.
The entry define the distance of color fields from which on you want to knit-out, to move to SEN edge or to clamp.
Therefore, the column is no longer part of the knitting-out group but placed at the left in the general area.
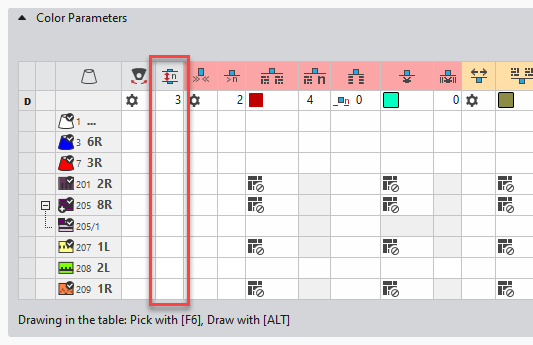
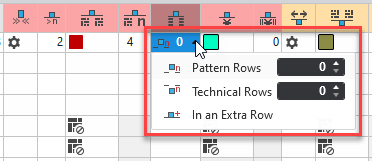
Row-offset for Knitting-in by Technical Rows
You can enter the Row-offset for Knitting-in in pattern rows as well as in technical rows.
The Örgü alanları (SEN) and Tandem (YLR) sectors have been reworked.
Sector Örgü alanları (SEN) of the Mekikler tool window
- Yapılandırmadaki veriler are removed from the upper area.
- The SEN areas are shown in the middle and more clearly.
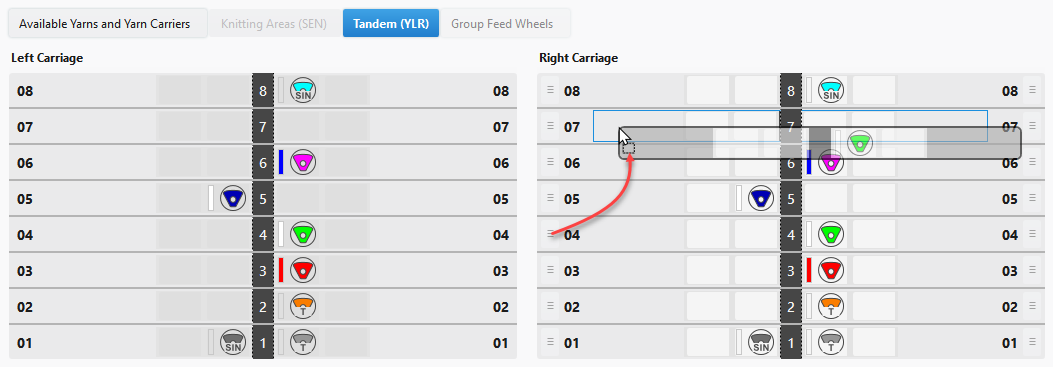
Sector Tandem (YLR) of the Mekikler tool window
- The yarn carrier allocation of both carriages is shown.
- In this view, you can shift the yarn carrier tracks of the right carriage only.
Detecting opened knitting elements, shapes and patterns
Opened knitting elements, shapes and patterns are marked by OPEN label in the tool window.
- Opened
Label with gray background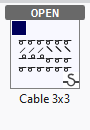
- Opened and active
Label with blue background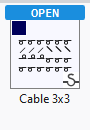
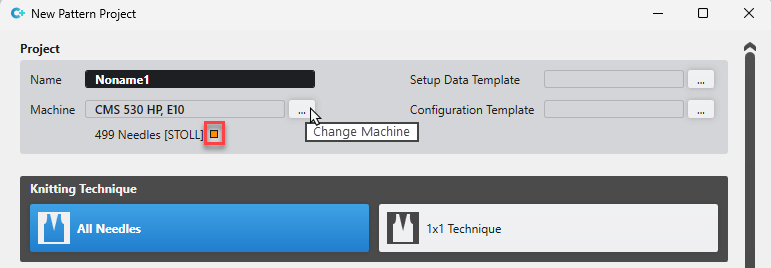
Marking of modified STOLL machines
If you select a STOLL machine in the Yeni desen projedialog box, then you can make settings for this machine at the same time.
- Then, the settings of this machine no longer correspond with the STOLL default.
- An orange button appears next to the machine label representing the deviation from the STOLL default.
- You recall the modifications by click on the orange button.
Then, the settings of this machine correspond with the STOLL default again.
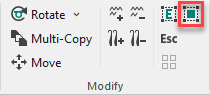
New function Draw with Selection
- In the Başlat ribbon / Değiştir ribbon group
- In the Seçim ribbon
With Draw with Selection, the drawing area is at once selected when drawing.
- The selection is added when drawing additively.
With CTRL - The selection is canceled when drawing subtractively.
With CTRL + ALT - Modify (Ribbon Group)
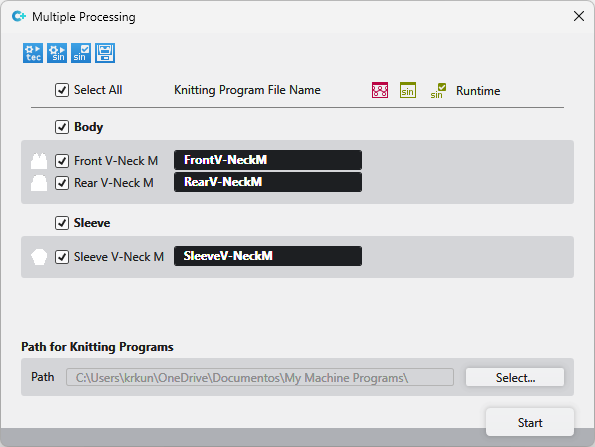
Groups and orders in the Multiple Processing dialog box
The setting of the Desen tool window is taken into account by the Multiple Processing dialog box.
The working with groups and orders is applied the same way.
Standalone editor for Sintral functions in the Setup Data
You will find these sections in the Sintral tab of the Setup verileri.
- Fonksiyon çağrısı (F:)
- Sintral komutu / PRINT
- Sintral fonksiyonu
You can edit functions and Sintral commands in the standalone Sintral Editor much easier, faster and clearer.
- 143
- Select a function.
- 144
- Click on Düzenle in the lower area.
- The editor of functions appears.
- 145
- Edit the function as desired.

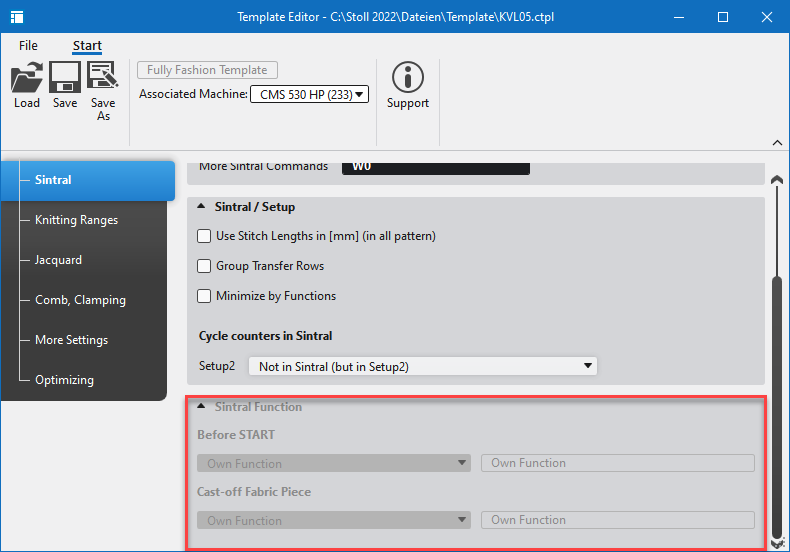
Assigning Sintral Functions by the Setup Data
Now, you can assign the Sintral functions for START öncesinde and Düşürme örme paneli also within the Setup Data.
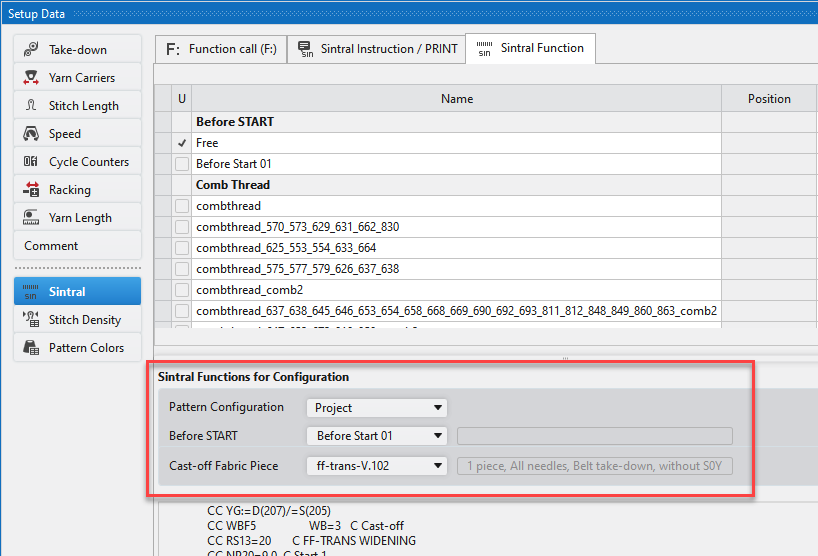
- 146
- Select a pattern or the entire project.
- 147
- Select the function for START öncesinde.
- 148
- Select the function for Düşürme örme paneli.
 This selection is no more available via Configuration / Sintral.
There you will find the link to the Sintral functions of the Setup Data.
The selection for the project will be saved with the Setup Data Template.
The Açıklama column is added to several tool windows.
The Açıklama column is available in the Vanize renkleri, Çok sistem renkleri, İplik düzenleme and Çizgi tablosu table.
Ruler in the Örgü görünümü
At the left and upper edge of the Örgü görünümü
Define the unit of measure by cm or inch in the Project Settings tab of the Seçenekler dialog box for new projects.
Revision of the Options dialog box.
The tabs of the Seçenekler dialog box has partly been renamed and updated
The functions within the tabs have been simplified, made more consistent and better organized.
12th + 13th Gen Intel® Core™ Desktop Processors do not support the Simultaneous Fabric Preview faultlessly.
- Activate the Correct display errors with the latest Intel processors check box in case of error.
Dosya ribbon group -> Seçenekler dialog box -> Genel tab -> Graphics Preference section
 - Disable this function again if the presentation gets faulty.
You can find the news of the previous releases in the CREATE Yardım (F1) help.