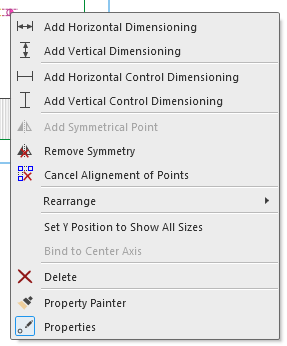
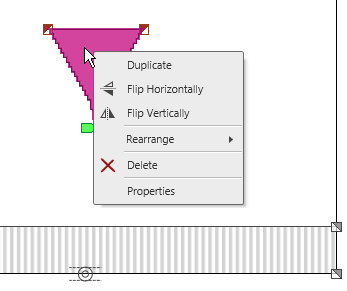
Context Menu
-

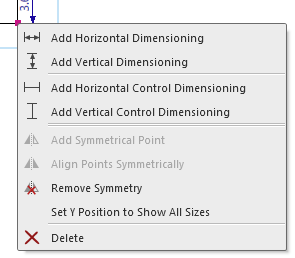
Draws a dimensioning with horizontal positioning between two points. -

Draws a dimensioning with vertical positioning between two points.  How to Assign New Dimensionings
 -
 Draws a control dimensioning with horizontal positioning between two points.
 -
 Draws a control dimensioning with vertical positioning between two points.
 - How to Create Control Dimensionings
 Adds the mirrored shape point in correspondence to the selected point.
 not with symmetrical shape points
 Aligns two points symmetrically by click on them successively
Cancels the binding to the opposite shape point. only with symmetrical shape points-
only together with
- How to Set the Reference Line for the View of All Sizes
 Removes the selected shape point.
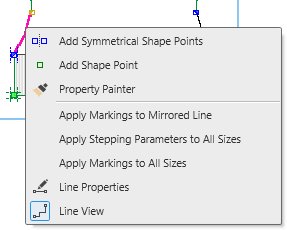

Adds a shape point and its mirrored point.
Adds a shape point.- How to Insert New Shape Points

Copies the properties of a line:- Stepping Kind
- Attributes of the Line
- Markings of Line
- How to Transfer Line Properties
Applies the markings and their properties to the line on the opposite.
Markings will possibly be removed to keep the opposite line symmetrical. only with lines with markings defined by symmetrical shape points.
Applies the attributes to this line within each of the size. only for shapes having different sizes.
Applies the markings and their properties to this line within each of the sizes.
Markings will possibly be removed to keep the other sizes corresponding. only for shapes having different sizes.
Opens the dialog box Line Properties. How to Determine Individual Steppings
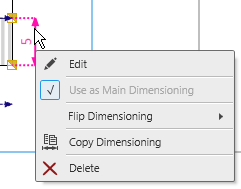

Opens the direct input of the dimensioning.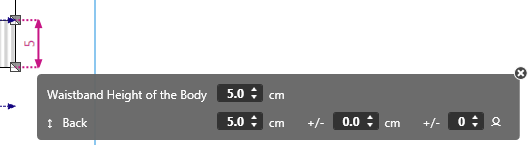

The active dimensioning gets the main dimensioning.
You can hide all reuses of this dimensioning. together with
  The check mark shows the usage as main dimensioning.
- Keeps the position of the upper shape point and shifts the lower point upward.
- Keeps the position of the lower shape point and shifts the upper point downward.
- How to Flip a Vertical Dimensioning
Keeps the position of the right shape point and shifts the left point to the right.
Keeps the position of the left shape point and shifts the right point to the left.- Exchanges the vertical or horizontal position of the shape points.
- How to Invert a Dimensioning
 Copies the active dimensioning for reuse.
- Click on a new startpoint, move the cursor to a new target point and click on the target point.

-
Removes the active dimensioning.
The corresponding measure is kept in the table.
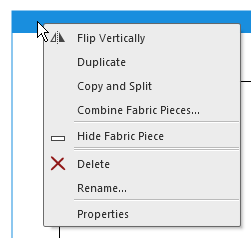
 Mirrors the fabric piece at the vertical center axis.
A multiple selection is possible Symmetrical fabrics do not differ in the result
Makes a copy of the fabric piece and inserts it.
A multiple selection is possible
Example: Back (copy)
Copies the fabric piece and separates the left and right polyline to individual fabric pieces.
Combines the left and right polyline of individual fabric pieces to one new fabric piece. Combine Fabric Pieces (dialog box)
Shows the fabric piece minimized only.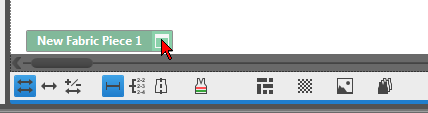
You can show it again by clicking on the window icon. Controls of the View-
Deletes the fabric piece after prompt.
A multiple selection is possible
The query appears in case of multiple selection for each fabric piece individually.
Opens the Name edit box of the fabric piece.- Overwrite name and quit the edit box.
Opens the Properties of Fabric Piece dialog box
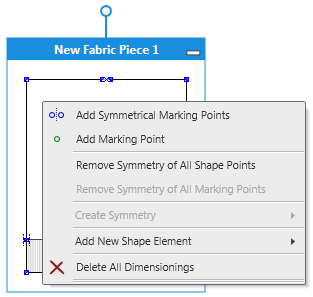

Adds a marking point and its mirrored point. Adds a marking point.
- How to Insert Markings for Buttons
Cancels symmetry of all shape points and with it of all lines.
Cancels the symmetry of all marking points.
Aligns all the shape points, and with it all lines, of the right side symmetrically to the left side.
Missing shape points will be added.
Surplus of shape points will be deleted.
Aligns all the shape points, and with it all lines, of the left side symmetrically to the right side.
Missing shape points will be added.
Surplus of shape points will be deleted.
Aligns all the marking points of the right side symmetrically to the left side.
Missing marking points will be added.
Surplus of marking points will be deleted.
Aligns all the marking points of the left side symmetrically to the right side.
Missing marking points will be added.
Surplus of marking points will be deleted.-
Opens the Open dialog box in order to select a graphic file. - Supported formats: *.bmp; *.jpg; *.png.
-
Adds a new shape element to the fabric piece.
You determine the type and the symmetry of the shape element in the submenu. 


- Example

Area for the start is ignored by the M1plus.
Set dimensions from the shape elements to shape points of the pattern area.
Removes all dimensionings from the fabric piece without changing its geometry.

Adds a new, not dimensioned fabric piece.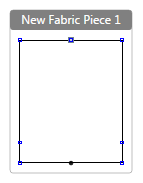
 For example: Add the Fabric Pieces for Collar and Armhole Cuff
Opens the Add New Sizes dialog box. Add New Sizes
Arranges the fabric pieces clearly within the dimensioning view.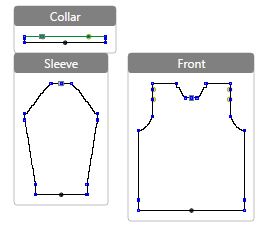
-
-
Shows the frame around the edit box not only with mouse over. -
Shows the title bar of the edit box not only with mouse over. - Key combination: J
-
Opens the Open dialog box in order to select a graphic file. - Supported formats: *.bmp; *.jpg; *.png.
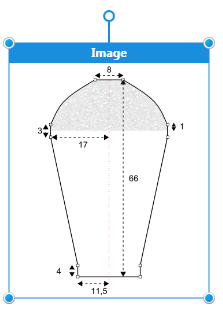
- The image in the dimensioning view with title and handles
- Continue:
Context menu -
Shows information about the object on which the cursor is positioned.
Key combination: , (Comma)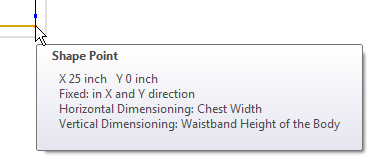

Draws a dimensioning with horizontal positioning between two points.
Draws a dimensioning with vertical positioning between two points.
Draws a control dimensioning with horizontal positioning between two points
Draws a control dimensioning with vertical positioning between two points.
Adds the mirrored marking point in correspondence to the selected point. not with symmetrical marking points
Cancels the binding to the opposite marking point. only with symmetrical marking points
Cancels the alignment in vertical or horizontal direction.
Click the desired points.-
Moving the position of the marking point.
Commands in the group:

Brings the selected object to the foreground.
Brings the selected object one layer to the front.
Sends the selected object to the background.
Sends the selected object one layer to the back.
The commands affect objects of the same kind only.
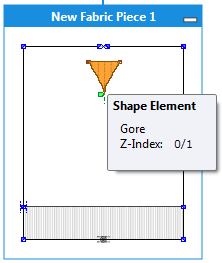
- Overlapping knitting ranges
- Knitting ranges are placed directly upon the basic element
- Fading-out of the basic element always covers the knitting range
- The fix order of shape elements from bottom to top:
 Within Shape
 Gore
Gore Dart
Dart Hole
Hole- You can arrange the shape elements of the same type.
- only together with How to Set the Reference Line for the View of All Sizes
- Removes the selected marking point.

Copies the properties of the selected marking point by click on it and transfers it to the marking point you click on next.- How to Define and Transfer Properties of Marking Points
 Opens the Marking Point Propertiestool window .
 = tool window is open.
- Removes all settings concerning the start
- Knitting elements and other options
- Stitch Density
- Knitting Elements for Doubling
- Shape points and dimensions will be kept
-
Makes a copy of the shape element and inserts it. -

Mirrors the shape element at the vertical center axis. -

Mirrors the shape element at the horizontal center axis.
Commands in the group:
-
Brings the selected object to the foreground. -
Brings the selected object one layer to the front. -
Sends the selected object to the background. -
Sends the selected object one layer to the back.
The commands affect objects of the same kind only.
- Overlapping knitting ranges
- Knitting ranges are placed directly upon the basic element
- Fading-out of the basic element always covers the knitting range
- The fix order of shape elements from bottom to top:
- Within Shape
- Gore
- Dart
- Hole
- You can arrange the shape elements of the same type.
-

Deletes the shape element without prompt. -
Opens the Shape Element Properties dialog box for the active shape element. Shape Element Properties
Additional Information