What was new in CREATE PLUS V2.4

Release V2.4. – 04/2023
Versione file: 12. (V2.4)
Compatible with:
- EKC 2.6
- CKC 2.0
- OKC 6.6
General
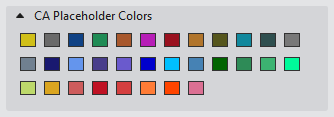
More Placeholder Colors for Color Arrangements
Placeholder Colors for Color Arrangements in the Simboli per elementi di lavoro tool window extended to 32.
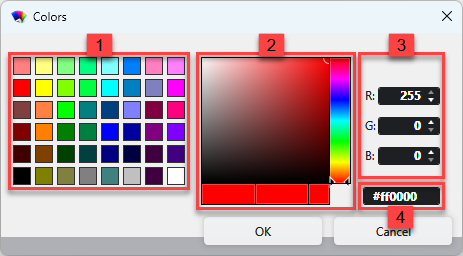
Standard Colors of M1plus in the Colori Dialog Box
48 standard colors of the M1plus are available for direct selection
|
1 |
48 standard colors of the M1plus
|
|
2 |
|
|
3 |
|
|
4 |
|
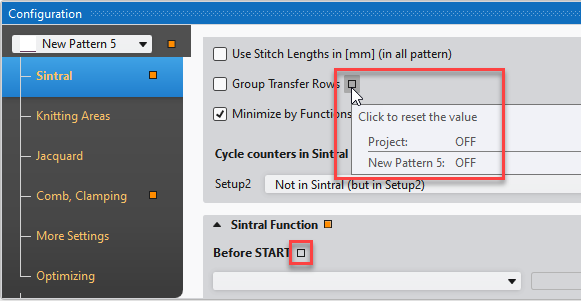
Configurazione
If the value differs between project and pattern, than this state will get marked by the little button next to the entry.
- The button will appear empty if the value between project and pattern is the same but not inherited from the project due to manual editing.
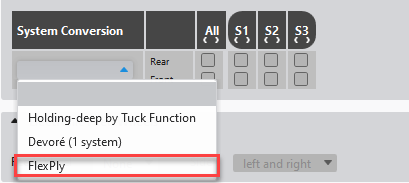
FlexPly Knitting Technique Available
FlexPly is similar to Devoré, simultaneously practicable on both needle beds by one system.
- FlexPly Knitting Technique
- Only ADF machines, EKC type, E 7.2
- System Conversion of both opposing knitting systems is required.
- Specify the desired system in the Configurazione dialog box -> Attributi della macchina tab -> Funzioni di sistema section.
System Functions - The following function appears with FlexPly selected:
 Consentire la formazione di maglie nel sistema 'FlexPly' per tutti i colori vanisé con YPI.
Systems with FlexPly conversion are not recommended for stitch forming and disabled by default.
Activate this function if you want to use the converted system for ordinary stitch forming.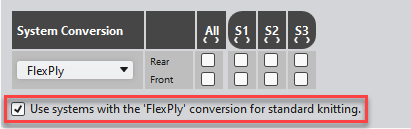
- Converted systems do not support other needle actions as transfer, tuck or split.
- The
 FlexPly davanti e dietro setting is required in the Funzione del sistema control column.
System Function
 Systems converted for FlexPly cannot drive yarn carriers into clamping position.
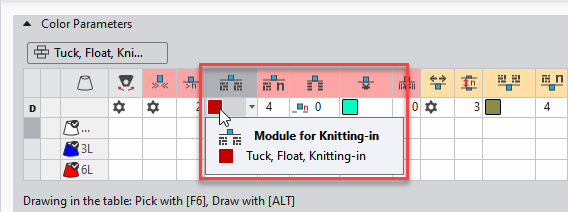
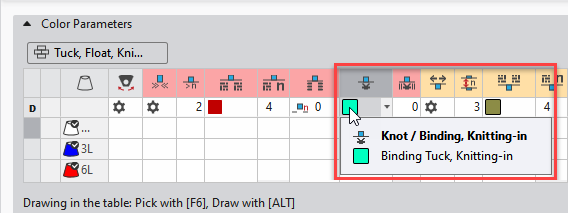
Separated Modules for Knitting-in, Knitting-out and the Corresponding Bindings
You can assign the modules for Knitting-in / Knots and Knitting-out / Knots independently from each other in columns of the Parametro colore table.
You can combine the different variants as you wish.
- Intarsia / Knitting-in group of Parametro colore
-
Modulo per immagliatura
-
Nodo/legatura, immagliatura
-
Intarsia / Knitting-out group

- Modulo per fine lavorazione
- Nodo/legatura, fine lavorazione
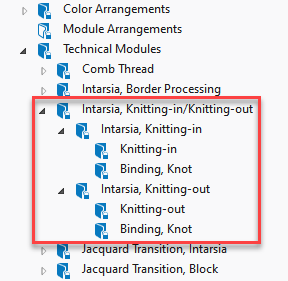
- Separated directories of the Knit Explorer for Knitting-in, Knitting-out and Knots
 Due to it, pattern project of version 2.4 cannot be saved for a former version.
Check box for Optimized System Sequence
New function the tool window Colori a più cadute:
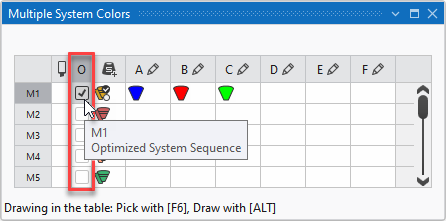
O (Sequenza sistema ottimizzata) column to specify the system sequence in the pattern.
-

Sequenza sistema ottimizzata - System Sequence for Minimized Time of Production
- The sequence of the used yarn carriers may change.
-
Sequenza sistema regolare - System sequence with a common order of the yarn carriers
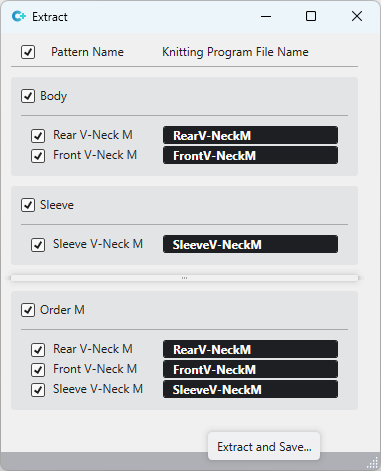
Extract knitting programs with Multiple Processing
You can extract already created knitting programs by the  Estrarre... function of the Modifica multipla ribbon group.
The Estrarre... dialog box appears.
- Select in it the desired knitting programs.
- A green
 checkmark appears next to each successfully extracted knitting program.
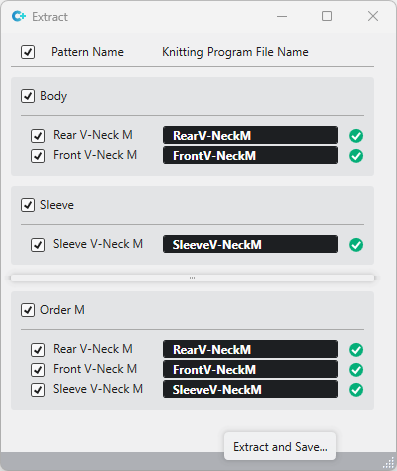
Alternative Call-ups of Controllo Sintral
You can open the Controllo Sintral as follows:
- For knitting programs of the current pattern project
- Avvio ribbon -> Sintral (Ribbon Group) ribbon group -> Controllo Sintral
- The icon is greyed out and disabled if the no knitting program is available for the pattern.
- For knitting programs regardless of the current pattern project Recommended for external knitting programs!
- Call up the Sintral Check directly on the Start Page.
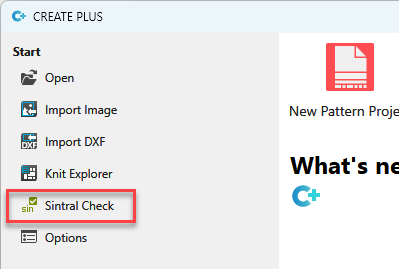
- - or -
Call up the Sintral Check by View ribbon.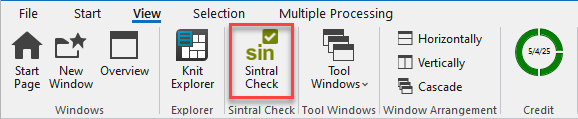
- Load and check any desired knitting program without loading the pattern.
- You can load and check a knitting program of the pattern only if it is already extracted.
Manage settings of the Status Bar of the Lined Shape
You can manage the view settings of lined shapes via the context menu of the status bar.
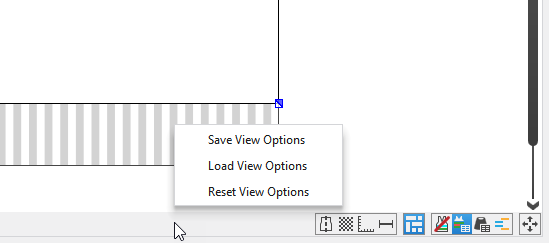
Following options are available:
|
Salva la visualizzazione |
Saves the current settings of the status bar as default.
|
|
Carica rappresentazione |
Loads the default settings of the status bar. |
|
Reimposta la visualizzazione |
Resets the settings of the status bar and the default setting to the STOLL default. |
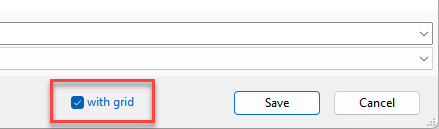
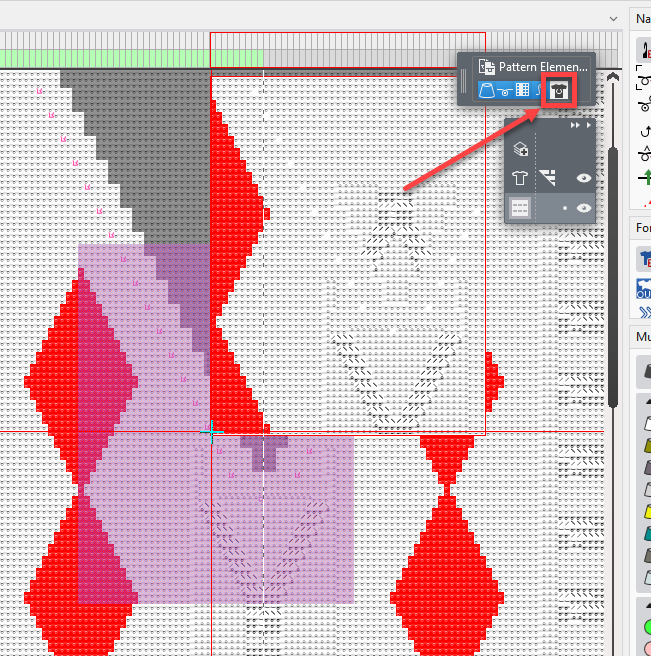
Image Export with Grid
Export of the design view as image file with framed needle positions.
- Click Esporta come file di immagine... in the context menu of the design view.
- Activate Con griglia in the Save As dialog box.
- The color value of each needle position is displayed by 3x3 pixels and framed in black (1 px).
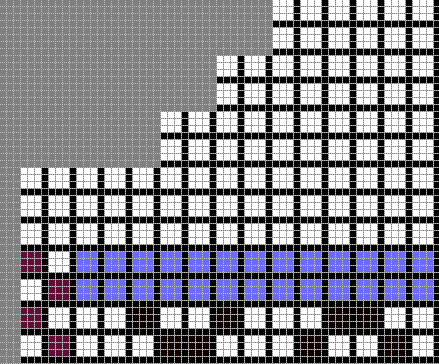
- The frame makes it easy to count the stitches in the picture and to compare it with the knitted fabric piece.
- The image file cannot be used as a basis for pattern designs.
Editing
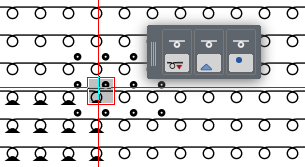
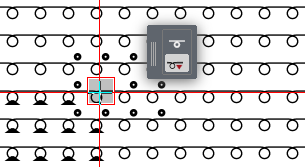
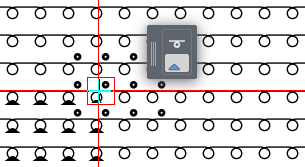
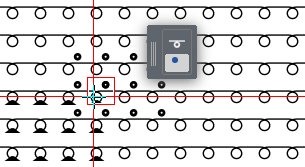
Rolling Picking by the F5 Key
You can pick-up needle actions or modules from the pattern to the cursor in the needle area with the F5 key.
Set the cursor on the desired position and press the F5 key.
Several needle actions can be inserted at one cursor position as stitch, devoré and do not sink e.g.
Therefore, rolling picking is now also possible with the F5 key.
All needle actions together are picked up by the first picking.
By newly, repeated picking, the needle actions will appear one after the other.
-
F5
-
F5
-
F5
-
F5
- Pick Attributes
Draw in pattern elements with shape symbols from pending shape.
- Problem:
A pattern element with shape symbols (from pattern with pending shape) cannot be inserted in a pattern. - Remedy:
You can insert the pattern element any way into the pattern by disabling the shape symbols in the cursor attributes.
- Create pattern element from selection.
- Click the shape symbol in the cursor attributes and switch it off thereby.
- Insert a pattern element into the pattern.
You can assign the following module types to a shape marking of the lined shape.
- Structure Modules
- Pattern Elements
- Shape Marking Modules
fully fashion / Marcatura di forma
Shape markings appear as follows in the raster-shape created from the lined shape:
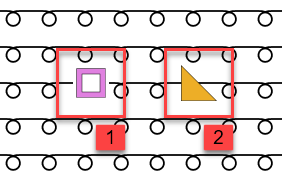
Variant 1:
- The shape marking consists of a shape marking module.
- The shape marking does not appear in the Marcature della forma tool window.
- Therefore, the module of the shape marking cannot be replaced.
Variant 2:
- The shape marking consists of a structure module or of a pattern element.
- The shape marking appears in the Marcature della forma tool window.
- Therefore, the module of the shape marking can be changed.
Drag-and-drop Knitting Elements and Yarns
You can copy back and forth knitting elements and yarns of different positions of use and storage by drag-and-drop.
- The following folders enable drag-and-drop:
-
Knit Explorer
Knit Explorer -
Accesso rapido
Quick Access - Tool window of the individual knitting elements
Module tool window
CA tool window
MA tool window
Pattern elements tool window
Yarns Tool Window - Windows File Explorer
- You can drag-and-drop even between different projects.
- You can drag and drop a knitting element or yarn to any desired tool window for knitting elements.
The knitting element or yarn will be copied to the corresponding tool window or to the corresponding path of the Moduli tool window. - In each dialog box with selection of a knitting element, you can drag and drop it from any desired folder to the selection field.
- To all table cells with selection of a knitting element or yarn, you can drag and drop it from any desired folder.
In the Zone di lavoro tool window or Parametro colore table e.g
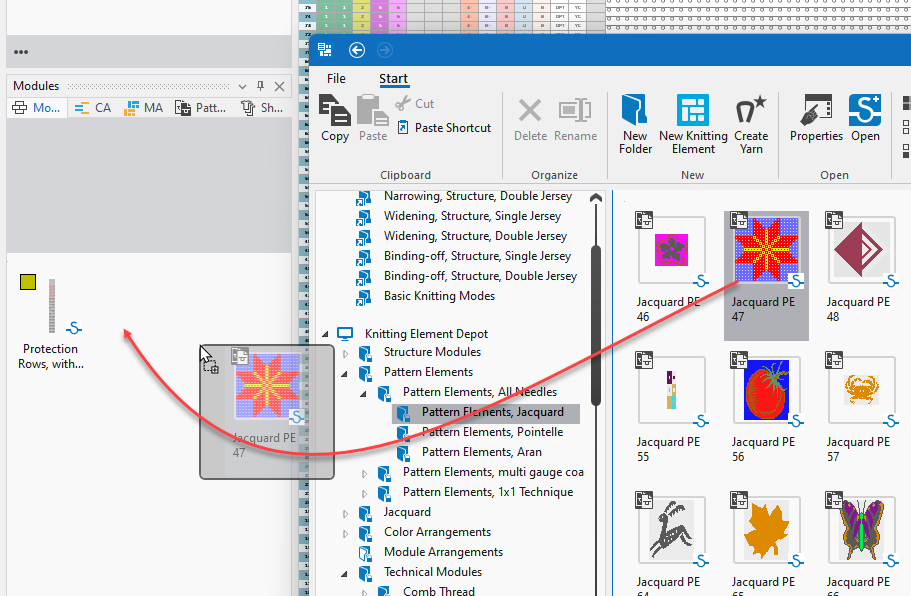
Example 1:
- Drag and drop a pattern element from Knit Explorer to the Moduli tool window.
- The pattern element appears in the Parti di disegno tool window.
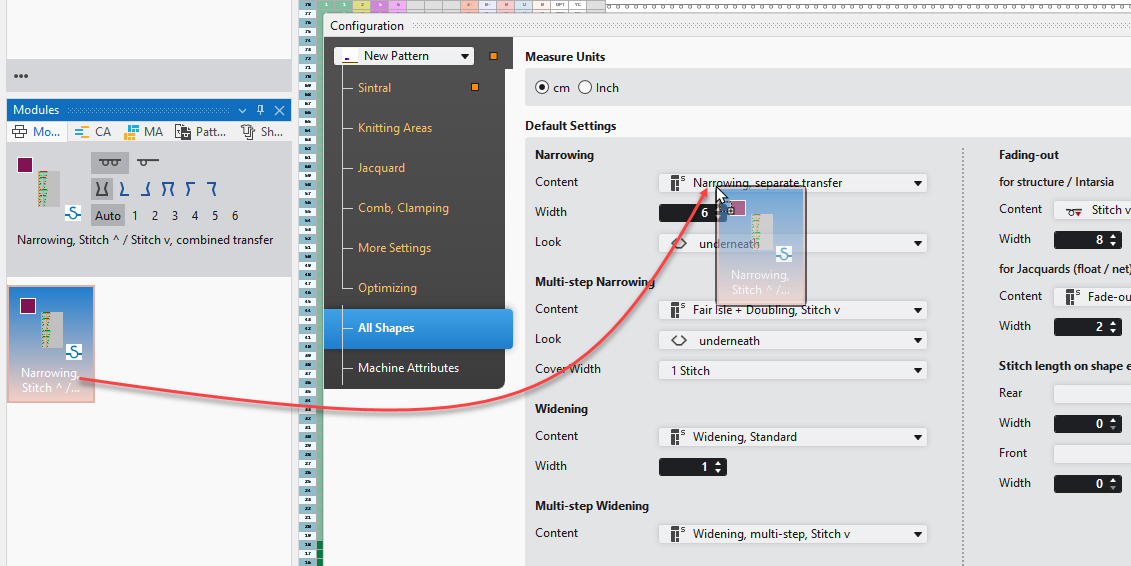
Example 2:
- Drag and drop a narrowing module from the Moduli tool window to the Configurazione dialog box -> Tutti i tagli tab -> Impostazioni standard section:
Sort Pattern-related Rows
You can add pattern related rows into tables of the Parametri del disegno
.
The pattern-related rows may become very confusing if the project contains many patterns.
Therefore, you can sort the pattern-related rows now in different way.
- Sort alphabetically (as known):
- Click the column header to the Disegno column.
The entries are sorted alphabetically according to the pattern names: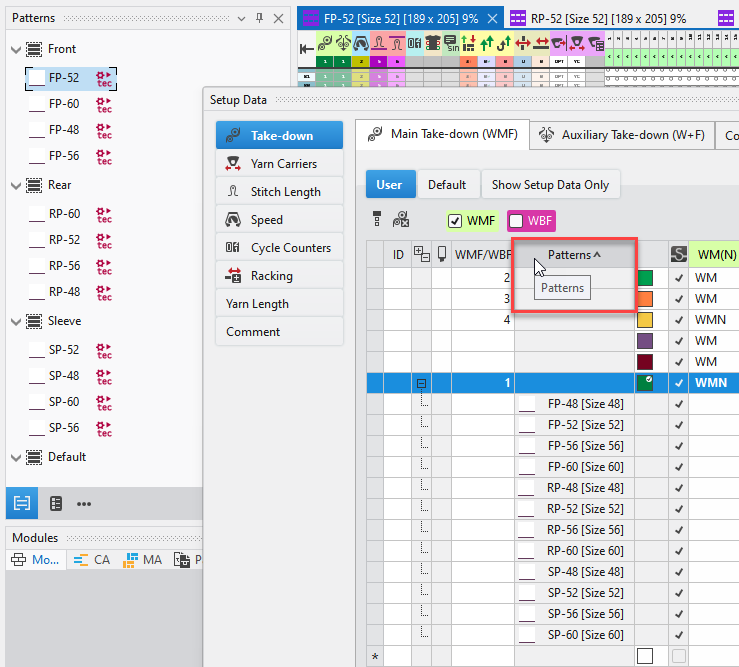
- Sort by orders:
- If the rows are alphabetically sorted, click Reimposta classificazione in the context menu of the table header.
- Activate
 Operare con ordini in the Disegno tool window.
 - The entries will be sorted according to the Disegno tool window.
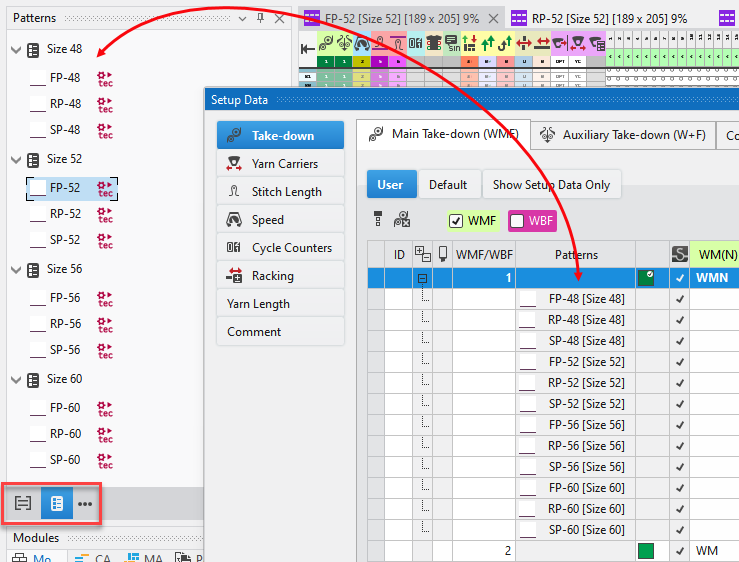
- Re-sorting the patterns in the Disegno tool window will immediately update the sorting within the table.
- Sort by groups:
- If the rows are alphabetically sorted, click Reimposta classificazione in the context menu of the table header.
- Activate Operare con gruppi in the Disegno tool window and deactivate
 Operare con ordini.
 - The entries will be sorted according to the Disegno tool window.
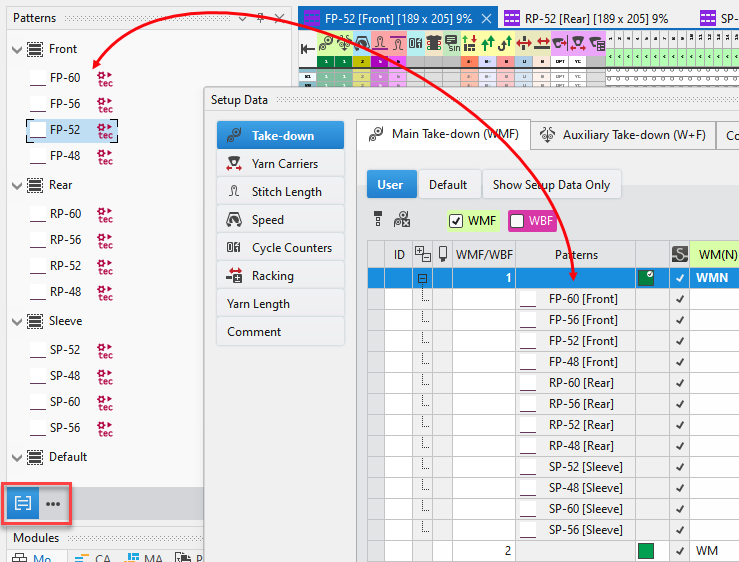
- Re-sorting the patterns in the Disegno tool window will immediately update the sorting within the table.
- Sorting of rows with pattern-related values
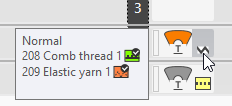
Combining Technical Yarns in the Guidafili Tool Window
Example:
Drag and drop yarn carrier 2R Filo elastico 1 to yarn carrier 2L Filo pettine 1.

Important for machines with a reduced quantity of yarn carriers (e.g. CMS 502)
- Combined technical yarns get a new symbol:
Separate Combined Technical Yarns:
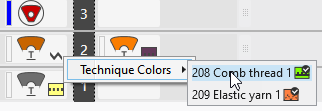
- Right click on symbol of the yarn carrier.
- Click on Colori tecnici.
The combined yarn carriers appear: - Drag the desired yarn carrier from the context menu to any desired position.
Scan a Yarn for the Fabric View
For a realistic representation of the fabric, you can scan a yarn, create a stitch appearance from it and place it on the fabric view.
- Scanned Yarn:

- Open the scanned image via Knit Explorer ,
 Crea filato da immagine...
.
Crea filato da immagine...
. - Enter background information about the yarn in its Properties tool window:
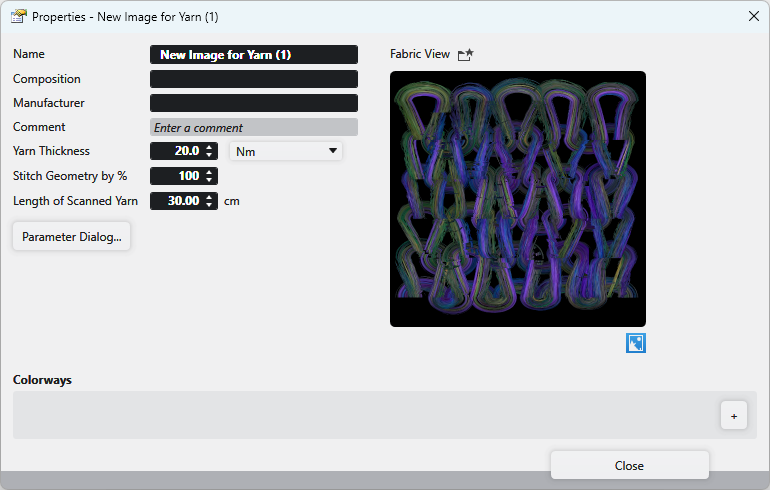
Yarn properties (yarn from the image) - Make the following settings for the scanned yarn in the Parameter dialog box:
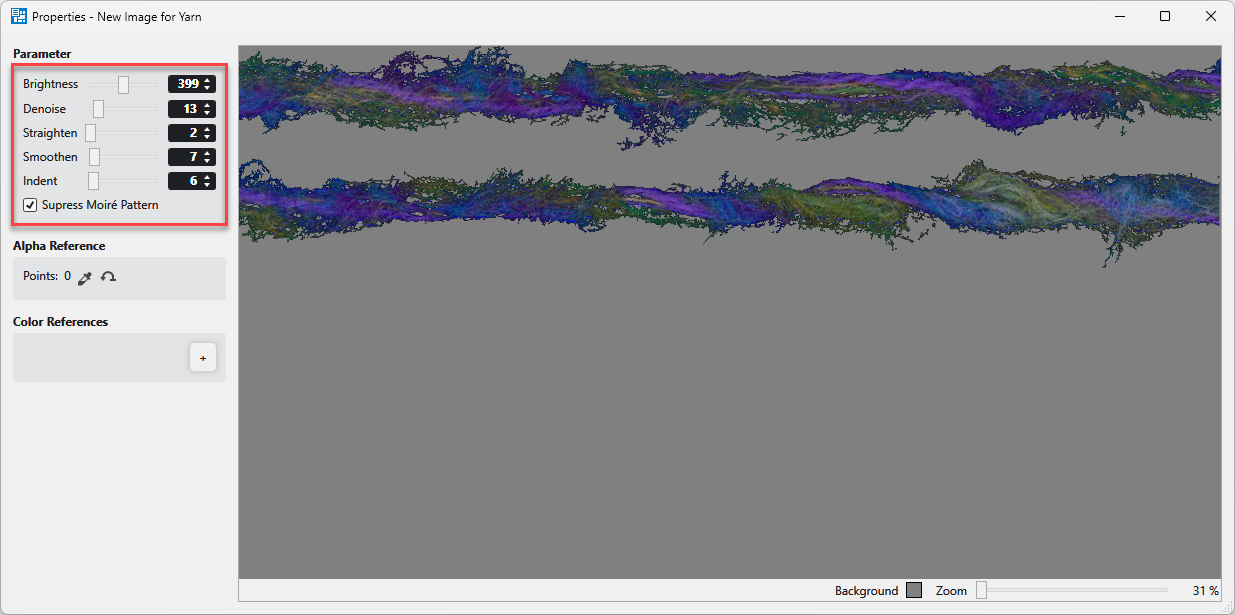
Parameter Dialog Box
 Modify the parameters until you get the desired view.
Drag this yarn by drag-and-drop to the fabric view.
The pattern size is shown with the scanned yarn.
If you continue to modify the yarn properties, the fabric view will be updated in real time.
|
Variant |
|
| |
|
|
CREATE PLUS licence includes the new M1plus licence. | ||
|
Download |
http://software.stoll.com/createdesign/software_updates/index.html |
https://software.stoll.com/createplus/software_updates/index.html |
https://software.stoll.com/m1plus/software_updates/index.html |
|
Tasks + Program Sections |
|
|
- |
|
- |
|
Cut and Sew, Fully Fashion and k&w | |
|
- |
|
Modules and Arrangements | |
|
|
|
Lined Shapes for Fully Fashion and k&w | |
|
|
|
Import of GKS Dimensioned Shapes | |
|
User |
|
|
|
|
Knitting Programs + Machines |
- |
For all STOLL flat knitting machine of the generations OKC, EKC and CKC |
For all STOLL flat knitting machine of the generations OKC, EKC, CKC and before |
|
Hardware |
System Requirements |
The requirements of M1plus are valid to use it exclusively. | |
|
License |
|
| |
|
| ||


You can find the news of the previous releases in the Guida CREATE (F1) help.